There’s something primal about preparing chili over an open flame that connects us to centuries of outdoor cooking tradition. The smoky char that infuses each spoonful, the gentle bubble of ingredients melding together, and the communal anticipation as aromas waft through the backyard—these are experiences no kitchen stovetop can replicate. Yet, many home cooks sabotage their grill-top chili ambitions by reaching for flimsy stock pots or ceramic dishes that crack under intense heat, turning their culinary masterpiece into a frustrating disappointment.
Enter the grill-safe Dutch oven: your indestructible partner for creating championship-caliber chili while harnessing the raw power of your grill. Unlike standard cookware, these heavy-duty vessels are engineered to thrive in high-temperature, high-stress environments where ordinary pots fail. This comprehensive guide dives deep into what separates a true grill-ready Dutch oven from pretenders, exploring the metallurgy, design features, and techniques that transform simple ingredients into smoky, complex chili that’ll have your neighbors begging for your secrets.
Top 10 Grill-Safe Dutch Ovens for Chili
Detailed Product Reviews
1. Lodge 7-Quart Cast Iron Dutch Oven – Made in USA, Pre-Seasoned, PFAS-Free & Non-Toxic, Heat-Treated, Induction Compatible, Self-Basting Lid, Durable Multi-Use Cooking Pot for Oven to Table

Overview: The Lodge 7-Quart Cast Iron Dutch Oven represents American craftsmanship at its finest. This pre-seasoned powerhouse from a family-owned company since 1896 delivers chemical-free cooking with its naturally non-toxic surface. The generous capacity handles everything from braised short ribs to artisan bread, while the self-basting lid ensures moist, flavorful results. Built for induction compatibility and oven-to-table service, it’s a versatile workhorse for serious home cooks.
What Makes It Stand Out: This Dutch oven’s PFAS-free construction sets it apart in an era of health-conscious cooking. The innovative self-basting lid features condensation rings that continuously recirculate moisture, eliminating the need for manual basting. Its heat-treated, pre-seasoned surface arrives ready to use and improves with age, developing a natural patina that synthetic coatings can’t match. The dual loop handles provide secure grip even with bulky oven mitts, and the “rust isn’t broken” philosophy reflects Lodge’s honest, user-friendly approach to cast iron maintenance.
Value for Money: At $79.90 ($1.92/ounce), this USA-made classic delivers exceptional value. Comparable imported models cost $60-90 without the same quality control or heritage. The 7-quart capacity suits large families and batch cooking, effectively replacing multiple pots. Considering its multi-generational durability and lifetime warranty reputation, the per-use cost becomes negligible. It’s an investment that appreciates over time, unlike disposable cookware.
Strengths and Weaknesses: Strengths: Superior heat retention and distribution; genuinely non-toxic, chemical-free surface; self-basting lid prevents dry dishes; made in USA with ethical manufacturing; improves with use; compatible with all heat sources.
Weaknesses: Extremely heavy at this size; requires regular seasoning maintenance; rough texture may scratch glass cooktops; initial learning curve for cast iron care; can rust if neglected.
Bottom Line: This Lodge Dutch oven is essential for cooks who value tradition, performance, and chemical-free cooking. While it demands more care than enameled alternatives, its superior searing capability, durability, and honest American craftsmanship make it worth every penny. Perfect for dedicated home chefs ready to embrace cast iron’s rewarding maintenance routine.
2. EDGING CASTING 2-in-1 Pre-Seasoned Cast Iron Dutch Oven Pot with Skillet Lid Cooking Pan, Cast Iron Skillet Cookware Pan Set with Dual Handles, Indoor Outdoor for Bread/Frying/Baking/Camping/BBQ, 5 Qt

Overview: The EDGING CASTING 5-Quart Dutch Oven offers clever dual-functionality at a budget-friendly price point. This pre-seasoned set functions as both a deep cooking pot and a shallow skillet, making it ideal for space-conscious kitchens and outdoor adventures. With integrated helper handles and vegetable oil seasoning, it promises versatile cooking from stovetop to campfire. The 5-quart capacity hits the sweet spot for small to medium families.
What Makes It Stand Out: The skillet-lid design maximizes utility without consuming extra storage space—flip the lid and you’ve got a separate cooking surface for searing or serving. This 2-in-1 approach particularly shines for camping, where packing efficiency matters. The integrated handles eliminate rivets that can loosen over time, creating a seamless, durable construction. Pre-seasoned with natural oils rather than synthetic coatings, it offers immediate usability for everything from frying chicken to baking no-knead bread.
Value for Money: At $39.79, this represents one of the most affordable entry points into quality cast iron. Competing 5-quart Dutch ovens typically start at $60+, making this a remarkable value for budget-minded buyers. While the brand lacks Lodge’s heritage, the functionality-per-dollar ratio is outstanding. For occasional cooks or those testing cast iron waters, the investment risk is minimal. The dual-purpose design effectively provides two pieces of cookware for less than the price of one premium brand.
Strengths and Weaknesses: Strengths: Exceptionally affordable; versatile 2-in-1 design saves space; pre-seasoned and ready to use; perfect for camping and outdoor cooking; integrated handles provide secure grip; ideal size for couples/small families.
Weaknesses: Unknown brand with limited track record; likely thinner casting than premium brands; quality control may be inconsistent; seasoning may require reinforcement; less heat retention than heavier models; no warranty information provided.
Bottom Line: This EDGING CASTING Dutch oven is perfect for beginners, campers, or anyone wanting cast iron versatility on a tight budget. While it won’t match heirloom-quality pieces, its smart design and unbeatable price make it a practical choice for occasional use or as a secondary piece. Manage expectations regarding long-term durability and you’ll be satisfied.
3. Lodge 6 Quart Enameled Cast Iron Dutch Oven with Lid – Dual Handles – Oven Safe up to 500° F or on Stovetop - Use to Marinate, Cook, Bake, Refrigerate and Serve – Island Spice Red
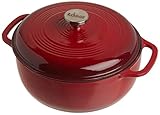
Overview: Lodge’s 6-Quart Enameled Dutch Oven combines classic cast iron performance with modern convenience. The vibrant Island Spice Red porcelain enamel finish eliminates seasoning maintenance while delivering the same superior heat retention. Oven-safe to 500°F and refrigerator-friendly, it transitions seamlessly from marinating to cooking to serving. The smooth interior promotes caramelization and easy cleaning, making it approachable for cast iron novices who want premium results without traditional upkeep.
What Makes It Stand Out: The frit-based porcelain enamel bonding process creates a glass-like surface that’s impervious to water, acids, and odors—allowing you to marinate directly in the pot. Unlike raw cast iron, it won’t react with tomato-based sauces or wine reductions. The tight-fitting lid seals moisture for tender braises, while the elegant design moves beautifully from kitchen to dining table. Lodge’s reputation for quality ensures the enamel is applied thickly enough to resist chipping better than many competitors.
Value for Money: Priced at $89.90, this sits competitively in the mid-range enamel market. Similar-sized enameled Dutch ovens from premium European brands cost $150-300, making Lodge an accessible alternative. The 6-quart capacity serves most families perfectly, and the refrigerator-safe feature adds unique versatility. While $10 more than Lodge’s raw cast iron version, the time saved on maintenance justifies the premium for busy cooks. It’s an investment in convenience without sacrificing performance.
Strengths and Weaknesses: Strengths: Zero seasoning required; non-reactive surface for acidic foods; beautiful oven-to-table presentation; dishwasher safe (though hand-washing recommended); superior heat distribution; trusted Lodge quality; refrigerator and freezer safe.
Weaknesses: Enamel can chip if dropped or overheated empty; heavier than raw cast iron of same size; lid knob is phenolic (lower temp tolerance than stainless); not suitable for campfire cooking; price premium over traditional cast iron.
Bottom Line: This enameled Dutch oven is ideal for cooks who want cast iron’s heat retention without maintenance hassles. Perfect for busy families, apartment dwellers, or anyone intimidated by seasoning routines. While it demands more care than raw iron to prevent chipping, its versatility and stunning presentation make it a kitchen centerpiece worth the investment.
4. Mueller 6qt Enameled Cast Iron Dutch Oven, Heavy-Duty Casserole and Braiser Pan with Lid and Knob, Oven-Safe up to 500° F & Across All Cooktops, Red

Overview: Mueller’s DuraCast 6-Quart Dutch Oven enters the premium enamel market with aggressive pricing and modern features. This heavy-duty casserole promises heirloom durability with a high-gloss enamel finish that enhances over time. Compatible with all cooktops including induction, it functions as a true kitchen multitasker for searing, braising, baking, and roasting. The stainless steel knob and wide handles demonstrate thoughtful design for safe, comfortable handling.
What Makes It Stand Out: The raised nodes on the lid interior create a continuous self-basting effect, a feature usually found in higher-priced competitors. Mueller’s commitment to customer support includes 24/7 live telephone assistance—unprecedented in cookware. The stainless steel knob withstands higher temperatures than standard phenolic alternatives, allowing true 500°F oven use. Wide, sturdy handles provide confidence when moving a full pot, and the vibrant red finish adds personality while resisting rust and staining.
Value for Money: At $59.99, this dramatically undercuts Lodge’s enameled offering while matching its specs. Comparable quality enameled Dutch ovens typically retail for $90-150, making Mueller’s value proposition compelling. The lifetime durability claim, combined with robust customer support, reduces purchase risk. For budget-conscious buyers wanting enameled convenience without brand premiums, this is market-leading value. The performance-per-dollar ratio challenges established players.
Strengths and Weaknesses: Strengths: Outstanding price for enameled cast iron; stainless steel knob allows full oven temperature; excellent heat retention and distribution; self-basting lid design; 24/7 customer support; induction compatible; stylish appearance.
Weaknesses: Brand has shorter cast iron heritage than competitors; enamel durability unproven long-term; made in China (quality control concerns); heavier than some premium brands; limited color options; newer product with fewer user reviews.
Bottom Line: Mueller’s Dutch oven is a smart buy for value-seekers wanting enameled versatility. While it lacks Lodge’s century-long track record, the features, price, and customer support make it a compelling alternative. Perfect for first-time enameled cast iron buyers or anyone prioritizing budget without sacrificing core performance. Monitor enamel wear closely during the first year.
5. OLLAKOK 2-in-1 Pre-Seasoned Cast Iron Dutch Oven Pot with Lid as Skillet, Grill Pan, with Lid Lever, Dual Loop Handles, Oval Heavy Dutch Oven for Bread Baking, Frying, Camping, BBQ, 3.8 QT Black

Overview: The OLLAKOK 3.8-Quart Dutch Oven targets compact living and bread-baking enthusiasts with its unique oval shape and 2-in-1 design. Pre-seasoned and ready for immediate use, this smaller capacity pot includes a specialized lid lever for safer transport—a thoughtful touch rarely seen at this price. Designed for 1-3 people, it excels at sourdough bread baking while remaining versatile enough for frying, stews, and camping meals. The oval profile accommodates longer loaves and fish.
What Makes It Stand Out: The integrated lid lever is a standout safety innovation that prevents burned fingers when removing the hot lid/skillet. The oval shape distinguishes it from round competitors, specifically benefiting bread bakers seeking elongated artisan loaves. Despite its compact 3.8-quart size, it maintains thick walls for heat retention and includes dual loop handles for secure lifting. The multi-functional lid serves as a skillet or grill pan, maximizing utility in minimal storage space.
Value for Money: At $27.85, this is the most affordable option reviewed, making cast iron accessible to nearly any budget. The specialized bread-baking features and 2-in-1 design deliver functionality typically found in $50+ products. For singles, couples, or those wanting a dedicated bread-baking vessel, the size and price are perfectly matched. While quality uncertainties exist with unknown brands, the risk is minimal at this price point, making it an excellent entry-level or secondary piece.
Strengths and Weaknesses: Strengths: Unbeatable price; innovative lid lever enhances safety; oval shape perfect for bread baking; compact size ideal for small households; pre-seasoned surface; versatile 2-in-1 design; suitable for all heat sources.
Weaknesses: Very small capacity limits family use; unknown brand reliability; likely inferior casting quality; seasoning may need frequent reapplication; not dishwasher safe; no warranty information; thinner construction reduces heat retention.
Bottom Line: The OLLAKOK Dutch oven is perfect for beginner bread bakers, campers, or anyone needing a compact, affordable cast iron piece. Don’t expect heirloom quality, but for the price, it delivers surprising functionality. Ideal as a gateway to cast iron cooking or a specialized bread-baking tool for experienced cooks. Manage expectations and focus on its bread-baking strengths.
6. Enameled Cast Iron Dutch Oven - Umite Chef 5QT Pot with Lid & Cotton Potholders - Heavy-Duty Cookware for Bread Baking, Braising, Stews, Roasting(Cream White)

Overview: The Umite Chef 5QT Enameled Cast Iron Dutch Oven delivers professional-grade performance for home cooks seeking versatility without the premium brand price tag. This cream white pot handles everything from artisan bread baking to slow braising, with even heat distribution across its thickened walls. The 5-quart capacity suits families perfectly, accommodating stews, roasts, and casseroles with ease. Compatible with all cooktops including induction and oven-safe to 500°F, it transitions seamlessly from stovetop to oven to table.
What Makes It Stand Out: Unlike competitors, Umite Chef includes thoughtful safety features: detailed thermal shock warnings and cotton potholders. The precision-engineered lid features interior condensation nodes that redistribute moisture evenly, preventing mushiness while locking in flavor. Extra-wide stainless steel handles provide secure, slip-free gripping even with oven mitts. The manufacturer explicitly addresses proper preheating (5-7 minutes) and cooling (45+ minutes), demonstrating unusual attention to user education and product longevity.
Value for Money: At $55.99, this Dutch oven costs a fraction of premium brands like Le Creuset while offering comparable enameled cast iron performance. The included accessories and comprehensive usage guidance add significant value. For cooks wanting low-maintenance enameled cookware without paying for brand prestige, this represents an excellent mid-range investment.
Strengths and Weaknesses: Strengths include even heat distribution, superior moisture retention, versatile compatibility, and included safety accessories. The enamel coating resists sticking and cleans easily with a soft sponge. However, the enamel requires careful handling to prevent chipping, and thermal shock sensitivity demands strict adherence to cooling protocols. The brand lacks Lodge’s long-standing reputation, and the cream color may show staining over time.
Bottom Line: The Umite Chef Dutch oven offers exceptional functionality and safety features at a competitive price. It’s ideal for attentive home cooks who will follow care instructions carefully. While it demands more careful handling than raw cast iron, the low-maintenance enamel and thoughtful design make it a smart value purchase for everyday cooking and special occasion dishes alike.
7. Bruntmor 2-in-1 Pre-Seasoned Cast Iron Dutch Oven with Grill Lid, 3.3 Quart - Cocotte Dutch Oven Pot and Braiser Pan with Lid and Dual Handles - Oven-Safe, Gumbo Pot for BBQ, Frying, Camping, Black

Overview: The Bruntmor 3.3QT Dutch Oven offers rugged versatility for outdoor enthusiasts and minimalist cooks. This pre-seasoned cast iron pot features a unique grill lid that doubles as a standalone griddle, effectively providing two pieces of cookware in one compact package. Designed for campfire, stovetop, or oven use up to 500°F, it excels at searing, simmering, and baking. The dual-handle design ensures safe transport from heat source to table, making it practical for both camping trips and small kitchen spaces.
What Makes It Stand Out: The reversible grill lid transforms into a 10-inch griddle for pancakes, eggs, or searing—eliminating the need for a separate pan. Pre-seasoned with natural oils, it’s ready for immediate use without initial seasoning. Its compact 3.3-quart size is perfect for couples or small families, while remaining lightweight enough for portable cooking. The design works across all heat sources, including direct campfire coals, offering true versatility that enameled alternatives cannot match.
Value for Money: At $49.99, this 2-in-1 system provides excellent utility for the price. While smaller than standard Dutch ovens, the dual-function lid effectively doubles its value. Compared to purchasing separate cast iron pot and griddle, the savings are substantial. However, traditional cast iron requires ongoing maintenance that enameled versions avoid.
Strengths and Weaknesses: Strengths include the innovative lid design, true multi-surface compatibility, pre-seasoned readiness, and camping-friendly portability. Cast iron’s natural durability ensures decades of use with proper care. Weaknesses include the smaller 3.3-quart capacity limiting meal size, the weight despite being “lightweight” for cast iron, and the mandatory maintenance required to prevent rust and maintain seasoning. The pre-seasoned surface isn’t truly non-stick initially and improves only with repeated use and proper care.
Bottom Line: The Bruntmor excels as a versatile, portable cooking system for campers, small households, or cast iron purists. If you value the high-heat searing ability of raw cast iron and don’t mind seasoning maintenance, this 2-in-1 design offers exceptional functionality. However, those preferring low-maintenance cookware should consider enameled alternatives despite the higher cost.
8. Amazon Basics Round Pre-Seasoned Cast Iron Dutch Oven Pot with Lid and Dual Handles, Heavy-Duty & Large, 7-Quart, Black

Overview: The Amazon Basics 7QT Pre-Seasoned Dutch Oven delivers massive capacity at a budget price point. This no-frills cast iron pot provides the essential benefits of cast iron cooking—superior heat retention and even distribution—without premium features or branding. The simple design includes dual handles and a matching lid, offering straightforward functionality for large-batch cooking, from stews to roasts. Oven-safe to 500°F and compatible with all cooktops, it serves as a workhorse for cost-conscious cooks needing serious volume.
What Makes It Stand Out: The standout feature is sheer value: 7 quarts for $33.03 makes this one of the most affordable large-capacity Dutch ovens available. It democratizes cast iron cooking for budget-minded consumers or those wanting to experiment before investing in premium brands. The pre-seasoned surface allows immediate use, and the simple, utilitarian design focuses resources on core functionality rather than aesthetics or accessories.
Value for Money: Exceptional. Comparable sized cast iron Dutch ovens typically cost $60-100+. The trade-off is minimal product support, basic construction quality, and lack of enamel coating. For large families, batch cooks, or those prioritizing capacity over convenience, the price-to-volume ratio is unbeatable. However, factor in the time cost of mandatory hand washing and ongoing seasoning maintenance.
Strengths and Weaknesses: Strengths include the enormous capacity, rock-bottom price, even heating, and multi-surface compatibility. The pre-seasoned finish provides a starting point for developing a natural non-stick patina. Significant weaknesses include the lack of enamel requiring diligent maintenance, hand-wash-only care, no true non-stick function out of the box, and potentially inconsistent quality control typical of generic brands. The basic lid fit may not seal moisture as effectively as higher-end models, and the rougher cast iron surface demands more oil to prevent sticking.
Bottom Line: This Dutch oven is ideal for budget buyers needing maximum capacity above all else. It performs the core functions well but demands cast iron literacy and maintenance commitment. If you’re willing to invest elbow grease rather than cash, it’s a practical entry point. For those wanting convenience or premium build quality, save for an enameled Lodge or Le Creuset instead.
9. 2-in-1 Enameled Cast Iron Braiser Pan with Grill Lid - 3.3-Quart Small Dutch Oven, Serves as Both Casserole & Stovetop Grill Pan, Cast Iron Cookware
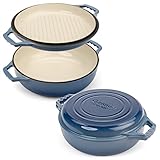
Overview: This 3.3QT enameled braiser combines low-maintenance enamel coating with innovative 2-in-1 functionality. The grill lid flips to become a griddle, offering versatile cooking options in a compact footprint. Perfect for small households, it handles braising, searing, roasting, and baking while eliminating cast iron seasoning chores. The enameled surface provides a non-reactive, easy-clean cooking experience across all heat sources, including oven use up to 500°F. Its smaller size makes it ideal for side dishes, couples’ meals, or as a complement to larger cookware.
What Makes It Stand Out: The rare combination of enameled cast iron with a reversible grill lid sets this apart. Unlike pre-seasoned alternatives, it requires zero maintenance while delivering cast iron performance. The lifetime warranty demonstrates manufacturer confidence, and dishwasher-safe convenience modernizes traditional cast iron care. The enamel coating resists sticking while allowing proper searing—a balance difficult to achieve in non-enameled pans.
Value for Money: At $59.99 for 3.3 quarts, this sits at the higher end of the price-per-quart spectrum. However, the dual-function lid effectively provides two enameled pieces for the price of one. Compared to buying separate braiser and griddle pans, it offers savings. The lifetime warranty and maintenance-free enamel justify the premium over basic pre-seasoned options, though Lodge’s 6QT enamel oven costs only $40 more.
Strengths and Weaknesses: Strengths include the maintenance-free enamel, versatile 2-in-1 design, lifetime warranty, dishwasher safety, and compact storage footprint. The grill lid adds genuine utility without sacrificing the main pot’s braising performance. Weaknesses center on the limited 3.3-quart capacity, which restricts meal size for families. The higher price per quart may deter budget buyers, and enamel—while durable—can chip if impacted. The smaller cooking surface on the griddle lid may feel cramped compared to full-size griddles.
Bottom Line: This braiser excels for small households wanting enameled convenience with added versatility. The 2-in-1 design maximizes utility in minimal space, and the lifetime warranty provides peace of mind. However, its small capacity and premium price make it a niche choice. Consider your household size carefully—if you regularly cook for three or more, invest in a larger enameled Dutch oven instead.
10. Lodge 6 Quart Enameled Cast Iron Dutch Oven with Lid – Dual Handles – Oven Safe up to 500° F or on Stovetop - Use to Marinate, Cook, Bake, Refrigerate and Serve – Lagoon

Overview: Lodge’s 6QT Enameled Dutch Oven represents over a century of cast iron expertise applied to modern enameled cookware. The vibrant Lagoon finish conceals a porcelain enamel coating bonded to heavy cast iron at 1400°F, creating a non-reactive, low-maintenance cooking surface. This versatile pot moves from marinating to cooking to serving and refrigerating, eliminating multiple dish transfers. Compatible with all cooktops and oven-safe to 500°F, it handles braising, baking, roasting, and stews with superior heat retention that reduces energy consumption.
What Makes It Stand Out: Lodge’s 125-year family-owned heritage ensures consistent quality control and time-tested design. The porcelain enamel interior promotes caramelization while resisting staining better than competitors. PFOA and PTFE-free construction guarantees chemical-free cooking. The tight-fitting lid seals moisture exceptionally well, and dual handles provide secure lifting. Unlike generic brands, Lodge’s reputation means reliable warranty support and proven durability across generations of use.
Value for Money: At $99.90, this sits in the sweet spot between budget enamel ovens and premium French brands costing $300+. You’re paying for proven quality, brand reliability, and superior enamel application. The 6-quart capacity serves families perfectly, and the heirloom durability amortizes the cost over decades. For serious home cooks, this is a justifiable investment that outperforms cheaper alternatives.
Strengths and Weaknesses: Strengths include exceptional heat retention, trusted brand quality, chemical-free enamel, versatile size, and tight moisture-sealing lid. The enamel coating eliminates seasoning maintenance while providing near-non-stick performance. Weaknesses include the premium price point, considerable weight (expected for cast iron), and enamel’s vulnerability to chipping if dropped or thermally shocked. While dishwasher-safe, hand washing is recommended to preserve the finish, requiring some care commitment.
Bottom Line: This Lodge Dutch oven is the best all-around choice for most home cooks seeking reliable, low-maintenance cast iron performance. The brand’s century-long reputation for quality justifies the moderate premium over budget options. If you want heirloom-quality cookware that handles any recipe while looking beautiful on your table, this is your purchase. The 6-quart size hits the sweet spot for versatility without being unwieldy.
Why Dutch Ovens Are the Ultimate Chili Vessels
Superior Heat Retention for Low-and-Slow Cooking
Chili demands consistent, even heat to break down tough cuts of meat and allow spices to bloom properly. A quality Dutch oven’s thermal mass—typically 8-12 pounds of cast iron—acts as a heat battery, storing thermal energy and releasing it gradually. This eliminates the temperature fluctuations that cause scorching and uneven cooking. When you nestle your Dutch oven over charcoal, the material absorbs radiant heat and distributes it uniformly across the entire cooking surface, including the sidewalls. This 360-degree heating environment creates the gentle simmer essential for collagen breakdown in chuck roast or pork shoulder, transforming tough fibers into melt-in-your-mouth tenderness.
Moisture Locking for Perfect Chili Consistency
The tight-fitting lid of a Dutch oven creates a self-basting ecosystem that’s impossible to replicate with standard pots. As chili simmers, steam rises, condenses on the lid’s interior, and rains back down onto the surface, preventing the dreaded crust formation that traps heat and creates bitter, burnt layers. This moisture recirculation is crucial for chili, which needs 2-4 hours of unattended cooking to develop depth. On a grill, where ambient heat can be unpredictable, this sealed environment maintains proper hydration levels without constant stirring or liquid additions.
What “Grill-Safe” Really Means for Dutch Ovens
Temperature Thresholds You Need to Know
Grill-safe isn’t a regulated term, but it implies survival at temperatures exceeding 500°F—something many kitchen-grade Dutch ovens can’t handle. Standard enameled cast iron cookware often has manufacturer limits of 400-450°F, beyond which the porcelain coating can craze, chip, or discolor. True grill-ready vessels, whether bare or specially enameled, withstand sustained temperatures of 600°F or higher. This matters because a charcoal grill with a closed lid can easily exceed 550°F, and direct flame contact creates localized hotspots approaching 800°F. Understanding these thresholds prevents catastrophic failure and voided warranties.
Structural Integrity Under Direct Flame
Grill cooking subjects Dutch ovens to thermal stresses unknown in kitchen environments. Direct flame contact creates temperature differentials of 300°F or more between the bottom surface and sidewalls within minutes. This rapid, uneven expansion tests the molecular bonds of the material. Grill-safe Dutch ovens feature reinforced casting techniques that minimize air pockets and structural weaknesses. The iron itself is typically 15-20% thicker than standard models, providing the mass needed to absorb and distribute intense heat without warping or cracking.
Material Matters: Cast Iron vs. Enameled Cast Iron
Traditional Bare Cast Iron Benefits
Bare cast iron remains the gold standard for grill chili purists. Its natural seasoning polymerizes into a durable, non-stick surface that improves with each use. More importantly, it lacks the temperature limitations of enamel—properly seasoned cast iron laughs at 700°F flames. The material’s superior heat responsiveness means it heats faster and recovers temperature quickly after adding cold ingredients. For chili, this translates to better searing of meat before the braise, creating fond that dissolves into rich, complex flavors. The trade-off? Reactive surfaces can interact with acidic tomatoes over long cooks, potentially creating metallic off-notes if the seasoning isn’t robust.
Enameled Cast Iron Advantages and Limitations
Enameled Dutch ovens offer convenience—no seasoning required and easy cleanup. However, not all enamel is grill-equal. Standard light-colored enamel can discolor and craze under high heat, while dark, matte-finish interiors are engineered for higher temperatures. The critical limitation is the lid knob: phenolic resin knobs melt at 375-400°F, requiring replacement with stainless steel alternatives for grill use. Enameled surfaces also don’t develop the same fond as bare iron, meaning you’ll sacrifice some browning depth. For chili, this translates to a cleaner but potentially less complex flavor profile.
Hybrid Approaches for Grill Enthusiasts
Some manufacturers now produce Dutch ovens with enameled exteriors and bare cast iron interiors, offering the best of both worlds. The exterior enamel prevents rust on the outside while the raw interior develops seasoning and superior browning. Another approach uses textured, dark enamel interiors that mimic cast iron’s performance while providing some protection. For grill chili, these hybrids excel because the exterior withstands weather and soot while the interior delivers authentic flavor development.
Size and Capacity: Matching Your Chili Ambitions
Quart Capacity Explained
Dutch oven sizing follows a quart system that directly correlates to serving capacity. A 5-quart model handles 6-8 servings, perfect for family dinners. The versatile 7-quart size accommodates 10-12 servings, ideal for small gatherings. For competition chili or large parties, 9-quart vessels manage 16-20 portions. Remember that chili shouldn’t fill the pot beyond two-thirds capacity to prevent boil-over during simmering. Grill cooks should also consider that larger pots require more fuel to maintain temperature and become exponentially heavier when loaded.
Serving Size Calculations
Professional chili cooks calculate 1.5-2 cups of finished chili per person when it’s the main course. Factor in that meat and vegetables reduce in volume by 30-40% during long cooks. A pound of boneless chuck yields approximately 2.5 cups of cubed meat, which cooks down to 1.75 cups. This shrinkage means a 7-quart Dutch oven starting with 5 quarts of raw ingredients produces roughly 3.5 quarts of finished chili—about 7 hearty servings. Always size up if you enjoy leftovers, as chili’s flavors deepen overnight.
Storage and Handling Considerations
Grill-ready Dutch ovens weigh significantly more than kitchen equivalents. A 7-quart cast iron pot tips scales at 15-18 pounds empty; filled with chili, you’re managing 25-30 pounds of hot, sloshing weight. Ensure your grill grates can support this load—thin wire grates on gas grills may sag or warp. Consider loop handles that accommodate both hands and allow tool-assisted lifting with hooks. Storage requires a cool, dry location away from humidity that causes rust. Many grill enthusiasts keep a dedicated “outdoor” Dutch oven to avoid tracking soot into the kitchen.
Lid Design: The Self-Basting Advantage
Tight-Fitting Lids vs. Loose-Fitting Alternatives
Precision-ground lids with no more than 1/16-inch gap create the pressure differential needed for effective self-basting. Some grill-specific models feature a slightly concave lid interior that directs condensation toward the center, creating a “rain effect” that evenly distributes moisture. Avoid lids with steam vents for chili—these release precious humidity and concentrate flavors at the bottom, increasing burn risk. Test lid fit by placing it on the pot and running a finger around the rim; you should feel consistent contact without wobbling.
Basting Spike Technology
High-end Dutch ovens incorporate concentric rings or spikes on the lid interior that capture and redistribute condensation. These features become even more valuable on grills, where heat comes from below and can create a dry zone at the chili’s surface. The spikes break up large water droplets, preventing them from splashing and creating a more uniform misting effect. For chili, this means the top layer receives continuous moisture, preventing skin formation and ensuring even cooking without stirring.
Lid Knob Materials and Heat Resistance
The knob is often the weakest link. Phenolic knobs require replacement with stainless steel or cast iron alternatives for grill use. Some manufacturers offer knobs rated to 500°F, but these still risk failure during high-heat searing or accidental direct flame contact. The best grill-safe Dutch ovens feature integrated cast iron handles or welded stainless steel knobs that become hot but never fail. Always use welding gloves or lid lifters when handling—metal knobs retain heat longer than the pot itself.
Handle Configuration: Safety First
Loop Handles vs. Side Handles
Traditional Dutch ovens feature loop handles on each side, designed for lifting with hooks or tools. These excel for grill use because they stay cooler than integrated side handles and allow two-handed control. The ideal loop handle has a 1.5-inch opening to accommodate thick grill gloves and lifting tools. Side handles, common on French-style ovens, position your hands closer to the hot pot and can trap heat against the sidewalls, making them dangerously hot. For chili, which requires occasional stirring, loop handles provide better stability when tilting the pot.
Handle Material Considerations
While cast iron handles are traditional, they conduct heat efficiently—which means they get hot. Some grill-specific models feature stainless steel handles riveted to the body, providing strength with less heat conductivity. These remain cooler but require periodic tightening as thermal cycling loosens rivets. Silicone handle covers marketed as “heat-resistant” typically fail above 450°F and can melt onto your pot. For authentic grill chili cooking, embrace the reality: all handles get hot, and proper tools are non-negotiable.
Tool Compatibility and Maneuverability
The distance between handle and pot body determines which tools you can use. A minimum 3/4-inch gap allows standard lid lifters and pot hooks to engage securely. Some competition cooks prefer Dutch ovens with three small legs (camp-style) that stand above coals, but these are unstable on grill grates. Flat-bottomed ovens with robust handles provide the versatility to work on both grills and campfires. Consider how you’ll rotate the pot for even cooking—some handles are designed for 90-degree rotations using grill tongs.
Heat Tolerance and Thermal Shock Resistance
Maximum Safe Temperatures
Bare cast iron theoretically has no maximum temperature short of its melting point (2,200°F), but practical limits exist. Seasoning breaks down above 800°F, and structural weakness can appear around 1,000°F. Enameled Dutch ovens vary wildly: standard models cap at 400-450°F, while “grill-grade” enamel withstands 600°F. Always verify manufacturer specifications, but treat them as conservative estimates. Real-world grill conditions—with direct flame contact and rapid temperature swings—are harsher than controlled lab tests.
Avoiding Thermal Shock on the Grill
Thermal shock occurs when temperature changes faster than the material can expand or contract uniformly. On a grill, this happens when you place a cold Dutch oven directly onto 600°F grates or douse a hot pot with cold liquid. The result: microscopic cracks that propagate into catastrophic failure. Prevent this by preheating your Dutch oven gradually—start with indirect heat for 10 minutes before moving to direct flame. Never add cold beer or frozen ingredients to a ripping-hot pot; temper them to room temperature first. For enameled cookware, thermal shock is the primary failure mode, often invisible until the enamel suddenly flakes off.
Gradual Heating Protocols
Professional grill cooks follow a three-stage heating process: 1) Place the empty Dutch oven over indirect heat with the lid off for 5 minutes to warm gently, 2) Close the grill lid and allow the pot to reach 300-350°F over 10-15 minutes, 3) Move to direct heat or add coals for searing and main cooking. This protocol prevents stress concentrations and gives you time to check for any issues before committing ingredients. For chili, you can toast spices in the dry pot during stage two, building flavor while the metal acclimates.
Seasoning Considerations for Grill Environments
High-Heat Seasoning Techniques
Standard oven seasoning at 450°F creates a baseline, but grill seasoning at 600°F produces a harder, more durable polymerized layer. To season for grill use, apply an ultra-thin coat of flaxseed oil (high smoke point, 495°F) to a clean, warm pot. Place it upside-down over indirect heat for 20 minutes, then move to direct flame for 5-minute intervals, allowing it to cool slightly between exposures. This builds a carbon-rich patina that withstands grill conditions. For chili, this robust seasoning prevents acid interaction and provides a virtually non-stick surface for searing meat.
Maintaining Seasoning with Acidic Ingredients
Chili’s tomatoes and peppers contain acids that attack seasoning, especially during 3-hour simmers. The solution is building a foundation: after initial seasoning, cook several batches of non-acidic foods (bacon, cornbread) to strengthen the polymer layer. When making chili, ensure the pot is fully preheated before adding acidic ingredients—hot metal is less reactive. Some purists add a tablespoon of baking soda to neutralize acidity, but this dulls flavor. Instead, maintain a robust seasoning schedule: after every 2-3 chili cooks, lightly oil the interior and heat over the grill for 15 minutes to replenish the protective layer.
Re-seasoning Frequency for Grill Users
Grill cooking degrades seasoning faster than stovetop use due to higher temperatures and potential moisture loss. Inspect your Dutch oven before each use: if the interior appears dull or shows rust spots, it’s time to re-season. For heavy grill users, a monthly deep-seasoning session prevents problems. After cleaning post-chili, apply a light oil coating while the pot is still warm—this “maintenance seasoning” takes seconds but extends protection. Remember that the exterior also needs seasoning, as grill soot and moisture accelerate rust formation.
Bottom Design and Heat Distribution
Flat vs. Ridged Bottoms
Flat-bottomed Dutch ovens maximize contact with grill grates, ensuring even heat transfer across the entire surface. This design excels on gas grills where heat distribution is already relatively uniform. Ridged or “grill-bottom” designs with concentric rings are marketed for improved heat circulation but create air gaps that reduce conductive transfer by 20-30%. For chili, where even heating prevents scorching, flat bottoms are superior. The exception is charcoal setups: slight ridges can help position the oven above hot spots, but this is better managed through coal arrangement.
Heat Diffuser Compatibility
Heat diffusers—cast iron plates placed between grill and pot—serve two purposes: they eliminate hot spots and reduce thermal shock by moderating temperature transfer. For chili, a diffuser allows you to maintain a gentle simmer (180-200°F) even when grill surface temperatures exceed 500°F. Choose a diffuser that extends 1 inch beyond your Dutch oven’s diameter for optimal coverage. While this adds another heavy piece to manage, it transforms inconsistent grills into precision cooking instruments. Some diffusers feature built-in legs, elevating the pot for true indirect cooking.
Preventing Hot Spots
Grills create notorious hot spots—areas 100-150°F hotter than the surrounding surface. Combat this by rotating your Dutch oven 90 degrees every 30 minutes during cooking. For charcoal grills, arrange coals in a ring around the perimeter rather than directly under the pot, creating an oven-like environment. Gas grill users should leverage multiple burners: light outer burners while leaving the center off, placing the Dutch oven in the middle. This indirect setup mimics a convection oven, surrounding your chili with gentle, even heat.
Cleaning and Maintenance After Grilling
Dealing with Soot and Carbon Buildup
Grill cooking leaves a distinctive black residue that’s more than cosmetic—soot is acidic and can degrade seasoning. For exterior cleaning, avoid soap initially; instead, scrub with a stiff brush and hot water while the pot is still warm. A paste of coarse salt and oil acts as an abrasive that cuts through carbon without damaging seasoning. For stubborn buildup, heat the empty pot over high heat until the soot carbonizes and flakes off. Never use oven cleaner or harsh chemicals on seasoned cast iron—they strip the protective layer and contaminate the porous metal.
Post-Grill Cleaning Protocols
After cooking chili, let the Dutch oven cool naturally on the grill with the lid off for 20 minutes—this prevents thermal shock and makes cleaning easier. Scrape out food residue with a wooden spoon, then add hot water to deglaze and loosen stuck bits. Use a chainmail scrubber for the interior, which removes food without stripping seasoning. Dry immediately over low heat, then apply a micro-thin oil layer while warm. For enameled interiors, a nylon brush and baking soda paste remove stains without scratching. Store with the lid slightly ajar or a paper towel inside to trap moisture and prevent rust.
Storage Best Practices
Grill-used Dutch ovens require different storage than kitchen-kept counterparts. The exterior soot, while cleaned, leaves residual oils that can transfer to surfaces. Designate a storage spot in your garage, shed, or outdoor kitchen. If you must bring it indoors, wrap the pot in an old towel to contain residue. Always store with desiccant packets or dry paper towels inside, as residual moisture from grill humidity causes rapid rust. For long-term storage, apply a slightly heavier oil coat to the exterior and heat until it smokes—this creates a protective varnish that seals the metal from oxidation.
Direct vs. Indirect Heat Techniques
Setting Up Your Grill Zones
Mastering heat zones transforms your grill into a precision cooking tool. For charcoal, bank coals to one side, creating a direct zone (500-700°F) and an indirect zone (250-350°F). Start chili by searing meat over direct heat, then slide the Dutch oven to the indirect side for simmering. On gas grills, light burners on one side only. For pellet grills, use the “smoke” setting for the first hour to infuse flavor, then increase to 300°F for the remainder. Two-zone cooking gives you complete control, allowing you to adjust intensity without moving food.
When to Use Each Method for Chili
Begin with direct heat to sear meat and toast spices—this Maillard reaction layer provides the foundation of flavor. Once liquids are added, transition to indirect heat for the 2-4 hour simmer. If your chili needs thickening in the final 30 minutes, return to direct heat (with frequent stirring) to drive off moisture rapidly. Direct heat also revives a cooled pot if you’ve paused cooking. The key is intentionality: direct heat for development, indirect for maturation.
Heat Management Throughout Cooking
Chili progresses through three thermal stages: 1) High-heat searing (400-450°F surface temp), 2) Simmering (180-200°F internal chili temp), 3) Finishing (gentle heat, 160-180°F). Monitor with an infrared thermometer pointed at the pot exterior—aim for 350-400°F for simmering. If the chili boils vigorously, it’s too hot; you should see occasional bubbles breaking the surface. Add cool water or move to a cooler grill zone to regulate temperature. The goal is maintaining a consistent, gentle simmer that extracts flavors without scorching.
Temperature Control Strategies
Using Grill Vents Effectively
Charcoal grill vents are your thermostat. Fully open vents raise temperatures by increasing oxygen flow; partially closed vents reduce heat by 50-100°F. For chili, start with vents 50% open to establish a 300-350°F environment. If temperature climbs too high, close bottom vents by 75% while leaving top vents open—this restricts oxygen to coals without trapping smoke. Gas grill users should manipulate burner knobs in small increments; these controls are sensitive, and a quarter-turn can change temps by 75°F. Mark your ideal settings with a grease pencil for future reference.
Dutch Oven Placement Techniques
Positioning matters as much as heat source. For even cooking, center the Dutch oven over your heat diffuser or indirect zone. On round charcoal grills, place the pot in the middle and arrange coals in a doughnut pattern. For rectangular gas grills, position lengthwise across two burners, centered between them. Elevate the pot 1-2 inches using fire bricks or a grill grate extender to create true indirect cooking—this prevents bottom scorching and encourages convection currents that cook from all sides. Rotate the pot 180 degrees halfway through cooking to compensate for any grill hot spots.
Monitoring Internal Temperature
Don’t guess—use a probe thermometer inserted through the lid vent (or slightly ajar lid) to track chili temperature. The sweet spot is 185-195°F internally; above 200°F, you risk breaking down meat fibers into mush and extracting bitter compounds from spices. Clip the probe to the pot rim, positioning the tip 2 inches above the bottom to avoid false readings from conductive heat. Wireless thermometers with grill probes allow you to monitor both ambient grill temp and chili temp simultaneously, giving you complete thermal awareness without lifting the lid and losing precious moisture.
Compatibility with Different Grill Types
Charcoal Grill Considerations
Charcoal grills offer the highest temperatures and best smoke integration but require the most skill. Use natural lump charcoal, which burns hotter and cleaner than briquettes. Create a two-zone fire and add a water pan beneath the indirect zone to stabilize temperatures and add humidity. The downside: ash accumulation can block airflow, so clean vents before each cook. Charcoal’s radiant heat is ideal for Dutch ovens, providing the intense initial sear and gentle ambient heat for simmering. Plan on adding 8-10 fresh coals every hour to maintain temperature during long chili cooks.
Gas Grill Adaptations
Gas grills provide convenience but less heat intensity. Maximize performance by using all burners on high for 10 minutes to preheat the grill box, then adjusting to your target temperature. Add a smoker box with wood chips (hickory or mesquite complement chili beautifully) to compensate for lack of natural smoke. Gas grills cool quickly when opened, so minimize lid lifting. The primary advantage is precise temperature control—once dialed in, a gas grill maintains steady heat for hours without intervention. Ensure your grates are heavy cast iron or stainless steel; thin wire grates sag under Dutch oven weight.
Pellet Grill and Smoker Integration
Pellet grills are Dutch oven dream machines, offering set-it-and-forget-it temperature control with built-in smoke. Use the “slow cook” or “smoke” setting (180-225°F) for the first hour to infuse deep wood flavor, then increase to 275-300°F to finish. The convection fan ensures even heat distribution, eliminating hot spots. One caveat: pellet grills produce less intense heat, so pre-searing meat in the Dutch oven on a burner first, then transferring to the pellet grill, yields better flavor development. The consistent temperature is perfect for overnight chili cooks—set it before bed and wake to perfectly finished chili.
Common Mistakes That Ruin Dutch Ovens
Thermal Shock Scenarios
The fastest way to destroy a Dutch oven is placing a cold pot on a 600°F grill. This 500-degree differential creates stress fractures that may not appear immediately but will cause failure within months. Another common mistake: adding ice-cold beer or frozen tomatoes to a ripping-hot pot. The bottom contracts instantly while the sides remain expanded, shearing the material. Even hot water added to a scorching pot can cause issues. Always temper ingredients to room temperature and preheat gradually.
Improper Preheating
Tossing a Dutch oven onto max heat and immediately adding oil leads to smoking, sticky residue, and uneven seasoning. The metal expands unevenly, causing microscopic warping that prevents flat contact with grill grates. Instead, follow the three-stage preheat: indirect warming, moderate heating with oil, then final temperature adjustment. This patience pays dividends in performance and longevity. Never preheat an empty enameled Dutch oven—always include a small amount of oil to prevent enamel from drying and crazing.
Neglecting Maintenance
Post-chili cleaning laziness destroys more Dutch ovens than cooking accidents. Leaving acidic chili residue overnight etches seasoning and promotes rust. Failing to dry thoroughly leaves moisture in the porous iron, causing flash rust within hours. Skipping the light oil coat after cleaning leaves the metal vulnerable. Create a ritual: clean immediately, dry on heat, oil lightly, store properly. This 5-minute process after each use ensures your Dutch oven becomes a family heirloom rather than a rusted relic.
Long-Term Value and Investment Perspective
Price vs. Performance Analysis
Quality grill-safe Dutch ovens range from $60 for basic bare cast iron to $300+ for premium enameled models. The price reflects casting quality, material thickness, and handle design—not necessarily cooking performance. A $70 bare cast iron pot, properly seasoned and maintained, will outperform a $250 enameled oven for grill chili because it has no temperature ceiling. The investment equation changes when considering multi-use: enameled ovens excel for kitchen braising and bread baking, while bare iron is purely a high-performance cooking tool. For dedicated grill chili cooks, allocate budget toward size and thickness rather than brand prestige.
Warranty and Manufacturer Support
Read warranty fine print carefully—many exclude “outdoor cooking,” “direct flame contact,” or “temperatures exceeding 400°F,” effectively voiding coverage for grill use. Companies specializing in camp and outdoor cookware offer robust warranties covering thermal shock and structural failure. Some provide lifetime replacement for cracked cast iron, while enameled warranties typically cover defects but not thermal damage. Save receipts and register your product; many warranties require online registration within 30 days. For grill use, prioritize manufacturers with proven outdoor cooking support over kitchen-centric brands.
Multi-Generational Durability
A properly maintained cast iron Dutch oven improves with age and can last centuries. The seasoning becomes more non-stick, the iron more stable. Enameled ovens have finite lifespans—typically 20-30 years before enamel wears thin. Consider your goals: do you want a tool for decades of chili competitions, or a versatile kitchen workhorse that occasionally sees grill duty? For pure grill chili performance, bare cast iron’s multi-generational durability makes it the clear winner. Your grandchildren could be cooking in the same pot, building on seasoning layers you’ve established.
Frequently Asked Questions
Can any Dutch oven be used on a grill?
No. Standard enameled Dutch ovens with phenolic knobs and temperature limits below 450°F will fail on grills that exceed 500°F. Only Dutch ovens explicitly rated for high-heat cooking or bare cast iron models are truly grill-safe. Check manufacturer specifications for “direct flame” or “outdoor cooking” approval before attempting grill use.
What’s the maximum safe temperature for an enameled Dutch oven on a grill?
Most enameled Dutch ovens max out at 400-450°F, but some “grill-grade” models with dark enamel withstand 600°F. The limiting factor is the lid knob material and the enamel’s thermal shock resistance. For high-heat searing or direct flame contact, bare cast iron is the safer choice. Always verify your specific model’s rating in the manual.
How do I prevent chili from burning on the bottom when cooking on a grill?
Use indirect heat for the majority of cooking, positioning the Dutch oven away from direct flames. A heat diffuser between grill grates and pot eliminates hot spots. Stir every 30-45 minutes, scraping the bottom with a wooden spoon. Maintain a gentle simmer (185-195°F internal temp) rather than a rolling boil. Adding a quarter-cup of water if the chili thickens too quickly also prevents scorching.
Is bare cast iron or enameled cast iron better for grill chili?
Bare cast iron is superior for grill chili due to its unlimited temperature tolerance, superior searing capability, and ability to develop deep fond. Enameled cast iron offers easier cleanup and acid resistance but has temperature limitations and can’t achieve the same level of browning. For authentic, complex chili flavor, seasoned bare cast iron is the professional choice.
How do I clean soot and carbon buildup from the exterior?
Scrub the exterior with hot water and a stiff brush while the pot is warm. For stubborn buildup, make a paste of coarse salt and vegetable oil, scrubbing in circular motions. Avoid soap initially—it can drive soot into the porous iron. For heavy carbon, heat the empty pot until buildup turns to ash, then brush away. Always re-season the exterior after aggressive cleaning.
Can I use my Dutch oven on a gas grill, or is charcoal better?
Both work excellently. Gas grills offer precise temperature control and convenience, while charcoal provides higher heat and natural smoke flavor. Gas grills may require a smoker box for flavor, whereas charcoal inherently imparts smokiness. Dutch ovens perform equally well on both; choose based on your preference for convenience versus traditional flavor.
What size Dutch oven should I buy specifically for chili?
A 7-quart Dutch oven is the sweet spot for most users, yielding 10-12 servings. It accommodates 3-4 pounds of meat plus liquids without overflowing. For couples or small families, 5 quarts suffices. Competition cooks or frequent entertainers should consider 9 quarts. Remember that larger pots require more fuel and become very heavy when full.
How do I control temperature on a charcoal grill for a 3-hour chili cook?
Arrange coals in a ring around the perimeter, leaving the center empty. This creates indirect heat and extends burn time. Start with 40-50 coals, adding 8-10 fresh ones every hour. Control airflow with vents: start 50% open, adjusting to maintain 300-350°F grill temperature. A water pan beneath the pot adds humidity and stabilizes temperature fluctuations.
Will the acidity in chili damage my cast iron seasoning?
Extended cooking of acidic foods can degrade seasoning, but a well-established patina withstands occasional chili cooks. To minimize impact, ensure the pot is fully preheated before adding acidic ingredients, and avoid storing leftover chili in the cast iron. Re-season lightly after 2-3 chili sessions. The flavor benefits of cast iron far outweigh minor seasoning maintenance.
Can I use olive oil for seasoning a Dutch oven that will be used on a grill?
Olive oil is a poor choice for grill seasoning due to its low smoke point (375-400°F) and tendency to become sticky. Use oils with high smoke points: flaxseed (495°F), grapeseed (420°F), or refined avocado oil (520°F). These polymerize into harder, more durable seasoning layers that withstand grill temperatures without becoming gummy or breaking down.