As winter’s chill threatens your precious crops, the difference between a thriving greenhouse and a costly failure often comes down to one critical decision: your heating strategy. While forced-air systems have dominated the market for decades, savvy commercial growers and serious hobbyists are increasingly turning to radiant tube heaters as the gold standard for achieving truly uniform warmth. The technology has evolved dramatically, and 2026’s crop of systems promises unprecedented precision, efficiency, and smart integration capabilities that would have seemed like science fiction just five years ago.
But here’s the thing: not all radiant tube heaters are created equal, and the wrong choice can leave you with hot spots that scorch tender seedlings, cold zones that stunt growth, and energy bills that devour your profits. This comprehensive guide cuts through the marketing hype to examine what actually matters when selecting a system for your specific operation. We’ll explore the engineering principles, installation nuances, and maintenance protocols that separate exceptional performance from expensive disappointment—without mentioning a single brand name. Because understanding the underlying technology and selection criteria will serve you far better than any product list ever could.
Top 10 Radiant Tube Heaters for Greenhouses
Detailed Product Reviews
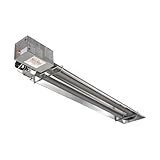
1. SunStar Heating Products Garage Tube Heater - LP, 45,000 BTU, Model Number SIR45-15-L

Overview: The SunStar SIR45-15-L is a professional-grade propane tube heater engineered for demanding garage and workshop environments. Delivering 45,000 BTU of infrared warmth, this unit targets large spaces requiring consistent, reliable heating. Its 110-inch compact profile facilitates installation in standard garages, while CSA certification ensures compliance with stringent safety standards. The vacuum-based combustion system sets it apart from conventional forced-air heaters.
What Makes It Stand Out: The patented vacuum system actively draws combustion products through the chamber, virtually eliminating the risk of carbon monoxide leakage—a critical safety advantage. Installation flexibility at just 8 feet above floor level accommodates lower ceilings than many competitors. Efficiency ratings up to 84.5% translate fuel into usable heat effectively, reducing long-term operational costs. The infrared technology heats objects directly, creating comfortable working conditions without wasting energy warming air.
Value for Money: At $999.99, this represents a premium investment justified by commercial-grade construction and advanced safety engineering. While electric heaters cost less initially, the SunStar’s lower operating expenses for large spaces (2-3 car garages) deliver payback within a few heating seasons. Propane availability makes it practical for rural locations lacking natural gas infrastructure. Professional installation adds cost but ensures warranty compliance and safe operation.
Strengths and Weaknesses: Strengths include exceptional heat output, superior vacuum safety system, CSA certification, low-clearance installation, and durable construction. Weaknesses involve high upfront cost, mandatory professional installation, permanent mounting (no portability), and ongoing propane fuel expenses. The unit requires proper ventilation clearance and cannot be used in living spaces.
Bottom Line: Best suited for serious DIYers, mechanics, or commercial workshops needing permanent, powerful heating. The SunStar SIR45-15-L justifies its price through unmatched safety features and robust performance, making it a smart long-term investment for large garage spaces.
2. SunStar Heating Products Garage Tube Heater -Natural Gas 45,000 BTU
Overview: This natural gas variant of SunStar’s tube heater delivers identical 45,000 BTU performance optimized for users with existing gas lines. Sharing the same 110-inch compact footprint and vacuum safety technology as its propane sibling, this model provides permanent, high-capacity heating for large garages and workshops. CSA certification ensures reliable operation in demanding environments where consistent warmth is non-negotiable.
What Makes It Stand Out: The vacuum combustion system remains the standout feature, actively preventing dangerous gas leaks by pulling exhaust through the chamber. Natural gas connectivity offers convenience and typically lower fuel costs compared to propane. The 8-foot minimum installation height provides flexibility for standard garage ceilings, while infrared technology delivers efficient object-based heating rather than wasteful air warming. The certified design accepts standard residential gas pressure.
Value for Money: Priced at $999.99, the value proposition strengthens for homes with natural gas service. Fuel costs run 20-40% less than propane, accelerating return on investment. The premium over electric heaters is offset by superior heating capacity and lower operating expenses in large spaces. Installation requires a gas line extension, adding $200-500 in professional costs, but eliminates tank refueling hassles and provides unlimited runtime.
Strengths and Weaknesses: Strengths mirror the LP model: powerful output, advanced safety vacuum, CSA approval, compact design, and lower fuel costs. Weaknesses include high initial price, requirement for proximate gas line, professional installation necessity, and zero portability. Natural gas dependency means it won’t function during utility outages, unlike propane models with tanks.
Bottom Line: Optimal for large garages with accessible natural gas service. If your home already has gas lines, this model offers superior convenience and lower operating costs than the propane version, making it the preferred choice for permanent workshop heating installations.
3. DR. INFRARED HEATER Portable Infrared Indoor and Outdoor Space Heater for Patio, Garage, Commercial & Residential With Remote Control, With Thermostat, Black

Overview: The DR. INFRARED HEATER offers versatile 1500-watt portable heating for both indoor and outdoor applications. With IPX5 weather resistance and multiple mounting options, this unit adapts to garages, patios, greenhouses, and workshops. The dual-layer aluminum construction maximizes heat retention while the digital thermostat and remote control provide modern convenience. ETL certification ensures safe operation across varied environments.
What Makes It Stand Out: True IPX5 weatherproofing distinguishes this from typical indoor-only heaters, enabling patio and greenhouse use during damp conditions. The corded thermal probe delivers accurate temperature sensing for precise climate control. Multiple mounting options—wall, ceiling, or chain-hung—provide installation flexibility unmatched by portable units. The infrared technology directly warms objects and people, making it particularly effective in drafty garages where convection heating fails.
Value for Money: At $164.79, this heater occupies a sweet spot between budget models and professional systems. The versatility justifies the price—you’re essentially getting three heaters in one: garage warmer, patio heater, and greenhouse climate controller. Compared to disposable sub-$50 heaters, the aluminum construction and weatherproofing ensure multi-season durability. Operating costs remain reasonable at 1500W maximum, though large garage heating requires supplemental units.
Strengths and Weaknesses: Strengths include weatherproof design, multiple mounting options, remote operation, accurate thermostat control, and durable aluminum construction. Weaknesses involve limited 1500W output insufficient for large spaces, requirement for electrical outlet proximity, and potential remote control lag. The IPX5 rating protects against water jets but not full immersion.
Bottom Line: An excellent choice for users needing flexible, weather-resistant heating across multiple locations. Perfect for small-to-medium garages, covered patios, or greenhouses where portability and moisture protection are priorities. The DR. INFRARED HEATER delivers reliable performance and modern features at a fair mid-range price.
4. VEVOR Greenhouse Heater, 1500W PTC Fast Heating With Overheat Protection, 3-Speed Setting Small Grow Tent Fan, Electric Portable for Green House, Flower Room, Workplace

Overview: The VEVOR Greenhouse Heater is a budget-friendly 1500W PTC ceramic unit designed for small-scale horticultural and workshop applications. Delivering 5,120 BTU through rapid 3-second heating, this compact heater addresses humidity and temperature control in confined spaces. The IP20-rated alloy steel construction provides basic protection, while overheat protection ensures safe operation. Its lightweight design facilitates easy repositioning between grow tents, chick brooders, or renovation drying tasks.
What Makes It Stand Out: The aggressive sub-$35 pricing makes this remarkably accessible for hobbyists and casual users. PTC ceramic technology enables near-instant heating without the glow of infrared elements, while the fan-only mode provides year-round utility for air circulation. The 25° adjustable angle and stable base offer decent positioning flexibility. At under 5 pounds, it’s genuinely portable without compromising heating capacity.
Value for Money: At $34.99, this represents exceptional value for targeted small-space heating. The price point allows purchasing multiple units for zone heating at the cost of a single mid-range heater. While construction quality and longevity can’t match premium models, the 1-2 season lifespan expected at this price still delivers cost-effective performance. Energy consumption remains efficient for PTC technology, though noise levels run higher than convection heaters.
Strengths and Weaknesses: Strengths include unbeatable price, rapid heating, dual hot/cold modes, extreme portability, and overheat protection. Weaknesses involve IP20 limited moisture protection, noisy fan operation, basic thermostat accuracy, and questionable long-term durability. The lightweight construction feels less substantial than metal-housing competitors.
Bottom Line: Ideal for budget-conscious users heating small greenhouses, grow tents, or temporary workspaces. The VEVOR excels as a starter unit or supplemental heat source but shouldn’t be relied upon as a primary heater for large or critical applications. For $35, it delivers acceptable performance with managed expectations.
5. Shinic Garage Heaters for Indoor Use, Metal Portable Space Heater with Thermostat, Greenhouse heater, Adjustable Head, Tubular Stand, Padded Handle, and Wide Base for Stability

Overview: The Shinic portable heater combines traditional metal construction with modern safety features in a 1500W unit delivering 5,120 BTU. Designed for garages, greenhouses, and workshops, this heater emphasizes durability with its all-metal housing and stability through a wide tubular base. Three heating modes (750W, 1500W, fan-only) and an adjustable thermostat provide flexible climate control. ETL listing and overheat protection ensure safe operation in demanding environments.
What Makes It Stand Out: The robust all-metal construction distinguishes it from plastic-dominant competitors in the sub-$50 category. The 60° adjustable head provides superior directional control compared to fixed-angle units, allowing precise heat targeting. The padded handle and wide base demonstrate thoughtful ergonomic and safety design. The tubular stand elevates the heating element for improved airflow and reduced fire risk near floor debris.
Value for Money: At $42.99, the Shinic offers impressive durability for the price point. The metal housing and stable base justify the $8 premium over plastic alternatives like the VEVOR. While lacking weatherproofing, the build quality suggests longer service life for indoor applications. The three-mode operation and adjustable thermostat deliver features typically found in more expensive units, making it a smart value proposition for garage and workshop use.
Strengths and Weaknesses: Strengths include durable metal construction, excellent stability, wide adjustment angle, overheat protection, and ETL certification. Weaknesses involve lack of weather resistance (indoor-only), limited 5,120 BTU output, noisy operation at high setting, and basic thermostat precision. The unit requires manual shutoff rather than programmable controls.
Bottom Line: A solid workhorse for indoor garage, basement, or greenhouse heating where durability matters. The Shinic balances affordability with robust construction, making it ideal for users prioritizing longevity over advanced features. For $43, you get reliable performance and metal durability that plastic competitors can’t match.
6. Wall Mounted Infrared Heater with 1 Seconds Instant Warmth, Quiet Electric Radiant Heating for Garage Greenhouse Porch, 1500W Adjustable Temperature Patio Heater

Overview: This wall-mounted infrared heater delivers 1500W of instant warmth with a 1-second heat-up time, designed for both indoor and outdoor applications. The IP34 waterproof rating enables use in garages, greenhouses, patios, and restaurants. It includes dual remote controls and features a durable aluminum housing engineered to withstand rain, snow, sand, and dust.
What Makes It Stand Out: The inclusion of two remote controls eliminates downtime if one is misplaced—a practical touch rarely seen in this category. Its ultra-quiet operation sets it apart from noisy fan-forced alternatives, while the weatherproof aluminum construction ensures longevity in harsh conditions. The protective cover allows year-round outdoor mounting without disassembly, adding significant convenience for seasonal users.
Value for Money: At $115, this heater offers mid-range pricing with premium features. The comprehensive accessory package (dual remotes, protective cover) and IP34 rating justify the cost over basic models. Comparable infrared heaters typically lack this level of weatherproofing and convenience features at the same price point, making it a wise investment for permanent installations.
Strengths and Weaknesses: Strengths include near-silent operation, instant heating, robust IP34 weatherproofing, dual remote controls, protective cover, space-saving wall-mount design, and overheat protection. Weaknesses include the single 1500W setting limiting flexibility, wall-mount-only design reducing portability, and directional infrared heat potentially creating uneven warmth. The IP34 rating, while adequate, falls short of higher IP ratings available in some competitors.
Bottom Line: An excellent choice for permanent heating solutions in covered outdoor areas or workshops. The dual remotes and protective cover add practical value, while quiet operation makes it ideal for peaceful environments. Best suited for users prioritizing durability and convenience over portability.
7. DR. INFRARED HEATER DR218-1500W Greenhouse Garage Workshop Infrared Heater, 1500-watt

Overview: The DR218 delivers 1500W of focused infrared warmth specifically engineered for greenhouses, garages, and workshops. This lightweight, portable unit features IPX4 water resistance and covers approximately 150 square feet. Its straightforward design prioritizes plant protection and low-maintenance operation over complex features.
What Makes It Stand Out: This heater’s singular focus on plant protection distinguishes it from multi-purpose units. Engineered specifically for maintaining optimal temperatures for tender plants, its lightweight design enables easy repositioning as seasons change. The IPX4 rating provides sufficient protection against water splashes in humid greenhouse environments, while the low-maintenance design appeals to busy gardeners who prefer set-it-and-forget-it reliability.
Value for Money: Priced at $105, this represents exceptional value for dedicated greenhouse heating. While lacking multiple settings and advanced features, its specialized design and reliable performance offer excellent return on investment. You’re paying for purposeful simplicity rather than unnecessary complexity, making it ideal for budget-conscious gardeners who need dependable plant protection.
Strengths and Weaknesses: Strengths include lightweight portability, greenhouse-specific engineering, IPX4 water resistance, low maintenance requirements, and straightforward operation. The infrared technology efficiently warms plants without excessively heating ambient air. Weaknesses include the single 1500W setting (no temperature control), limited 150 sq ft coverage, basic design lacking modern features, and absence of tip-over protection. The lack of adjustable settings may cause energy inefficiency in smaller spaces.
Bottom Line: A no-frills, reliable heater perfect for dedicated greenhouse use. Its simplicity is both its strength and limitation. Recommended for gardeners seeking an affordable, plant-focused heating solution without needing advanced controls or multiple heat settings.
8. Fanspex 600W Hanging Heater for Poultry Chicken Coop Pet House Livestock Greenhouse, 2 Heating Mode with Adjust Height, 3S Fast Heating

Overview: The Fanspex 600W Hanging Heater provides targeted warmth for poultry, livestock, and greenhouse applications. This budget-friendly unit features two power modes (300W/600W), a carbon fiber heating element, and an adjustable-height chain mounting system. The metal construction includes a protective mesh cage for safety.
What Makes It Stand Out: The hanging design with 6.5-foot chain offers unmatched flexibility for positioning heat exactly where animals or plants need it most. The carbon fiber element boasts an impressive 10,000+ hour lifespan, doubling typical tungsten wire durability. The protective metal mesh cage prevents direct contact, ensuring animal safety while allowing optimal heat distribution in coops and greenhouses.
Value for Money: At just $39.99, this is the most economical heating solution in the lineup. The dual power settings provide energy-saving flexibility, while the durable metal construction ensures longevity. Comparable hanging heaters typically cost 50-100% more, making this exceptional value for small-scale poultry keepers and greenhouse enthusiasts seeking affordable reliability.
Strengths and Weaknesses: Strengths include affordable pricing, adjustable height mounting, dual power modes, long-lasting carbon fiber element, protective safety cage, and 3-second rapid heating. The metal construction withstands farm environments. Weaknesses include lower 600W maximum output limiting coverage area, no thermostat or temperature control, hanging-only design restricting placement options, and no waterproof rating mentioned. The basic on/off operation lacks precision for sensitive applications.
Bottom Line: An outstanding budget option for chicken coops and small greenhouses. The adjustable height and dual power modes provide practical flexibility. Best suited for users comfortable with manual operation who need affordable, reliable warmth for livestock or plants in compact spaces.
9. Greenhouse Heater with Thermostat, 1500W Outdoor Heater with Fast Heating, Overheat Protection, Grow Tent Heat for Greenhouse, Garden, Flower Room

Overview: This 1500W Greenhouse Heater features a precise digital thermostat controlling temperatures from 40-108°F, ideal for protecting plants in spaces up to 200 square feet. The stainless steel construction includes overheat protection and a generous 7.5-foot power cord, enabling flexible placement in greenhouses, grow tents, and flower rooms.
What Makes It Stand Out: The integrated digital thermostat with waterproof probe offers professional-grade temperature control typically found in commercial greenhouse equipment. This allows automated maintenance of optimal growing conditions without constant manual adjustment. The flame-retardant material and overheat protection provide dual safety layers, while the non-slip base ensures stable placement on various surfaces.
Value for Money: At $119.99, this heater balances advanced features with reasonable pricing. The digital thermostat alone justifies the cost compared to basic models, potentially saving plants from damaging temperature fluctuations. While pricier than simple infrared heaters, the automated control and 200 sq ft coverage offer superior value for serious gardeners requiring precision.
Strengths and Weaknesses: Strengths include precise digital thermostat, wide temperature range, overheat protection, stainless steel durability, 200 sq ft coverage, long power cord, and flame-retardant construction. Automated operation reduces monitoring needs. Weaknesses include no remote control or app connectivity, limited portability due to design, potential complexity for casual users, and no waterproof rating mentioned for outdoor use. The 1500W single setting may be excessive for very small spaces.
Bottom Line: A top choice for dedicated gardeners requiring precise temperature control. The digital thermostat automates plant protection, making it worth the premium over basic models. Ideal for greenhouses and grow rooms where maintaining specific temperatures is critical for plant health and productivity.
10. Greenhouse Heater 1500W with APP Remote Control, Greenhouse Heater With Thermostat, Portable Outdoor Heater for Plants Vegetables Flowers,Smart Electric Safe Heater for Green house,Grow Tents,Garage

Overview: This smart 1500W Greenhouse Heater integrates with the “Smart Life” app for remote temperature monitoring and control. It features dual-mode operation (heating/fan), 70° oscillation, and comprehensive safety certifications including FCC and UL compliance. The unit heats up to 150 sq ft in one second.
What Makes It Stand Out: Smartphone connectivity revolutionizes greenhouse management, allowing temperature adjustments from anywhere. The dual-season functionality with heating and fan modes provides year-round utility, while the 70° oscillation ensures even heat distribution. Multiple safety features including tip-over protection and overheat shutoff at 65°C demonstrate exceptional attention to plant and property safety.
Value for Money: At $149.99, this is the premium option in the lineup. The smart features, dual-mode operation, and advanced safety certifications justify the higher price for tech-savvy gardeners. Comparable smart heaters often exceed $200, making this competitively priced. Year-round usability significantly enhances overall value.
Strengths and Weaknesses: Strengths include app-based remote control, dual heating/fan modes, 70° oscillation, 1-second rapid heating, comprehensive safety features, FCC/UL certifications, and tip-over protection. Smart functionality enables vacation use. Weaknesses include highest price point, potential Wi-Fi connectivity issues in outbuildings, app dependency may not suit all users, and 150 sq ft coverage being less than some competitors. The smart features may be unnecessary for simple setups.
Bottom Line: The ultimate greenhouse heater for technology enthusiasts and frequent travelers. Remote monitoring provides peace of mind, while dual-mode operation extends usability across seasons. Recommended for serious gardeners wanting maximum control and safety, provided the greenhouse has reliable Wi-Fi connectivity.
Understanding Radiant Tube Heaters: The Science Behind Greenhouse Warmth
Radiant tube heaters operate on a beautifully simple principle: they warm objects directly rather than heating the air itself. Think about how the sun feels on your face on a crisp day—the air temperature might be cool, but you’re comfortable because infrared radiation is transferring heat directly to your skin and clothing. These systems replicate that effect by burning fuel inside a steel tube, which then radiates infrared energy downward onto your plants, soil, benches, and structure.
How Radiant Heating Differs from Conventional Systems
Traditional forced-air heaters function like giant hair dryers, blasting hot air that quickly rises to the ceiling while leaving floor-level plants in a cold microclimate. This creates a vicious cycle of stratification, where you’re paying to heat the roof structure while your crops shiver. Radiant tube heaters flip this model entirely. They emit electromagnetic waves that travel until they strike a solid surface, converting to heat upon contact. This means your soil temperature stays consistent, leaf surfaces remain frost-free, and you eliminate the drafts that stress plants and dry out growing media.
The Physics of Infrared Heat Distribution in Enclosed Spaces
The infrared spectrum emitted by these tubes typically falls in the 2-10 micron range, perfectly suited for absorption by organic materials. Your plants become thermal mass, storing and slowly releasing heat throughout the night. This creates a self-regulating ecosystem where temperature swings are dampened naturally. The key is proper mounting height and tube configuration—too low and you’ll create scorch zones; too high and the energy dissipates before reaching your crop canopy. Modern systems use computer-modeled reflector designs that optimize the radiation pattern for specific greenhouse geometries.
Why Uniform Heating Matters: The Hidden Costs of Temperature Variations
A mere 5°F difference across your growing area can translate to weeks of uneven maturity, inconsistent yields, and compromised crop quality. What looks like a minor temperature gradient on your thermometer creates distinct microclimates where pests thrive, diseases take hold, and nutrient uptake becomes erratic. You’re essentially running multiple experiments simultaneously without controlling the variables.
Cold Spots and Crop Stress: What the Research Shows
Studies from agricultural extension services reveal that plants in chronically cool zones develop 20-30% slower root systems, making them more susceptible to drought stress and pathogen invasion. Tomatoes grown in uneven temperatures show increased blossom end rot. Lettuce bolts prematurely when exposed to temperature fluctuations exceeding 3°F per hour. These aren’t minor inconveniences—they’re profit killers that show up as reduced marketable weight, irregular harvest schedules, and increased input costs.
Energy Waste from Overcompensation Heating
When your thermostat sits in a warm zone while remote corners of your greenhouse remain cold, your system runs longer and harder than necessary. This overcompensation can increase fuel consumption by 15-40% compared to a uniformly heated space. You’re not just wasting money; you’re accelerating equipment wear and creating excessive temperature swings that further stress your crops. Uniform heating eliminates this inefficiency by ensuring every square foot reaches target temperature simultaneously.
Key Features That Define 2026’s Leading Radiant Tube Heaters
The latest generation of systems incorporates materials science breakthroughs and digital controls that transform these from simple heaters into precision climate management tools. Understanding which features actually deliver value versus marketing fluff is crucial for making an informed investment.
Advanced Burner Technology and Combustion Efficiency
Look for modulating burners that can throttle between 40-100% of rated output rather than simple on/off operation. This prevents temperature overshoot and maintains steady-state conditions. The best 2026 systems utilize pre-mixed combustion with precisely controlled air-to-fuel ratios, achieving efficiencies above 92% while producing minimal NOx emissions. Some incorporate recuperative designs that capture exhaust heat to pre-warm incoming combustion air, squeezing every possible BTU from your fuel.
Precision Controls and Smart Integration Capabilities
Modern units feature PID controllers that learn your greenhouse’s thermal characteristics and anticipate heating needs rather than simply reacting to temperature changes. Integration with environmental control systems allows coordination with ventilation, shading, and irrigation systems. The most sophisticated models offer zone-specific control, letting you maintain different temperatures in propagation areas versus finishing zones—all from a single central interface accessible via smartphone.
Corrosion-Resistant Materials for Humid Environments
Your greenhouse atmosphere is essentially a continuous corrosion challenge. Premium systems now use aluminized steel tubes with ceramic coatings on the interior, extending service life from 7-10 years to 15+ years. Stainless steel reflectors with protective coatings prevent the degradation that reduces efficiency by 2-3% annually in unprotected systems. Pay attention to fastener quality—galvanized hardware fails quickly; stainless or specially coated fasteners are non-negotiable for longevity.
Sizing Your System: The Goldilocks Principle for Greenhouse Heating
Oversizing causes short-cycling that reduces efficiency and creates temperature swings. Undersizing leaves you vulnerable during cold snaps. Proper sizing requires more than matching BTU output to square footage—it’s about understanding your specific heat loss characteristics.
BTU Calculations: Beyond Square Footage
Start with your greenhouse’s heat loss factor (U-value), which accounts for glazing type, wall materials, infiltration rates, and insulation. A double-wall polycarbonate structure loses heat differently than single-layer glass. Calculate baseline requirements, then add capacity for your coldest anticipated night plus a 20% safety margin. But here’s the nuance: that safety margin should be handled through staging multiple smaller units rather than one oversized heater, allowing more granular control and redundancy.
Ceiling Height and Mounting Considerations
Mounting height directly affects heat distribution uniformity. General rule: tubes mount at 8-14 feet for most greenhouse applications, but this varies with tube diameter and reflector design. Higher mounting requires higher BTU output and larger tube diameters to maintain intensity at plant level. Low-profile greenhouses might need compact U-tube designs that fold the radiant surface into a tighter configuration without sacrificing coverage area.
Zone Heating Strategies for Diverse Crop Layouts
If you’re running multiple crop types with different temperature requirements, consider several smaller systems rather than one large unit. This approach lets you heat propagation benches to 75°F while keeping mature crops at 65°F in the same structure. Modern controls make zone management seamless, and the energy savings from not overheating unused areas typically pay for the additional equipment within two seasons.
Installation Mastery: Professional vs. DIY Approaches
While skilled growers can handle basic installations, radiant tube heaters involve gas lines, electrical connections, and combustion venting that demand respect. A botched installation doesn’t just perform poorly—it creates serious safety hazards.
Ventilation Requirements and Clearance Specifications
Combustion requires oxygen, and greenhouses are notoriously tight structures. You’ll need dedicated fresh air intakes sized at 1 square inch per 2,000 BTU of heater output. Clearance specifications matter: maintain at least 3 feet from combustible materials below and 1 foot above the reflector. But also consider clearances from hanging baskets, irrigation lines, and shade cloth systems that might move during operation.
Electrical Hookups and Gas Line Considerations
Most systems require 120V for controls and ignition, but verify amperage requirements—some high-efficiency units need dedicated circuits. Gas line sizing is critical; undersized lines cause pressure drop that prevents proper combustion. Plan for sediment traps, shutoff valves within reach, and flexible connections that accommodate thermal expansion. Propane systems need regulators sized for total system BTU load plus 25% for future expansion.
Thermostat Placement for Accurate Temperature Reading
Never mount thermostats on exterior walls or near heat sources. Place them at plant height, away from direct radiant exposure, in representative locations. For larger operations, use multiple sensors averaging readings to prevent control based on a single point. Wireless sensors offer flexibility but verify battery life and signal reliability in your specific greenhouse environment—metal structures can create dead zones.
Energy Efficiency Metrics: What the Numbers Really Mean
Manufacturers love to tout efficiency ratings, but those numbers only tell part of the story in real-world greenhouse conditions. Understanding how to interpret and apply these metrics saves thousands over a system’s lifetime.
Understanding AFUE Ratings in Greenhouse Applications
Annual Fuel Utilization Efficiency (AFUE) measures combustion efficiency under standardized test conditions. A 95% AFUE rating sounds impressive, but actual efficiency depends on cycling frequency, mounting height, and how well the radiation pattern matches your plant layout. A properly sized 90% AFUE system that runs continuously often outperforms a 95% unit that short-cycles due to oversizing. Focus on modulation capability and turndown ratios rather than peak efficiency numbers alone.
Modulating vs. Single-Stage Burners
Single-stage burners blast full output until the thermostat satisfies, then shut off completely. This creates temperature swings of 3-5°F and inefficient operation during mild weather. Modulating burners continuously adjust output to maintain steady-state temperatures within 1°F. The fuel savings typically range from 15-25% annually, and your crops benefit from consistent conditions that optimize photosynthesis and transpiration rates.
Reflective Tube Designs and Heat Distribution Patterns
The reflector shape determines where heat goes. Parabolic reflectors create narrow, intense beams ideal for bench heating. Wide-angle reflectors distribute heat broadly for floor crops. Some 2026 systems feature adjustable reflectors that let you tune the pattern post-installation. Look for reflectors with polished aluminum surfaces protected by high-temperature silicone coatings that maintain reflectivity despite constant humidity exposure.
Smart Technology Integration: The Future of Climate Control
The line between heating equipment and data-driven farm management tools has blurred. Today’s best systems are IoT-enabled nodes in your greenhouse’s digital nervous system.
IoT Connectivity and Remote Monitoring
Cloud-connected systems let you monitor combustion efficiency, tube temperature, and fuel consumption from anywhere. More importantly, they alert you to anomalies before they become failures—like a gradual decline in burner performance indicating a pending ignition failure. This predictive capability transforms maintenance from reactive emergency repairs to scheduled preventive care that happens during off-hours.
Integration with Existing Environmental Control Systems
Your heater shouldn’t operate in isolation. Leading systems offer BACnet or Modbus protocols for seamless integration with climate computers, allowing coordinated responses to external conditions. When your weather station detects approaching cloud cover, the system can preemptively increase output before temperatures drop. When ventilation ramps up, heating output automatically adjusts to compensate for increased heat loss.
Predictive Maintenance and Diagnostic Features
Advanced controllers log operational data and use algorithms to predict component life. They’ll alert you when ignition electrodes are approaching end-of-life or when combustion efficiency has degraded enough to warrant service. Some systems even generate service reports that technicians can review remotely, arriving with the right parts rather than making diagnostic visits. This capability reduces downtime by 60-70% compared to traditional break-fix maintenance models.
Maintenance Protocols for Peak Performance
Even the finest system becomes an expensive paperweight without proper maintenance. Greenhouse environments accelerate wear through humidity, chemical exposure, and dust. A disciplined maintenance schedule is non-negotiable.
Annual Inspection Checklists
Before each heating season, inspect the entire tube length for corrosion spots, especially at joints and hangers. Check reflector alignment and cleanliness—dust accumulation can reduce output by 5-10%. Test all safety controls: high-limit switches, flame safeguard systems, and gas valves. Verify combustion using a digital analyzer; CO levels above 50 ppm indicate problems requiring immediate attention. Document everything; trends in performance degradation reveal issues before they cause failures.
Tube Cleaning Techniques and Frequency
Interior tube cleaning typically isn’t necessary annually, but exterior surfaces need attention. Use a soft brush and mild detergent on reflectors—never abrasive cleaners that scratch reflective surfaces. For the tubes themselves, a damp cloth removes dust and chemical residues. In operations using sulfur burners for disease control, monthly cleaning is essential because sulfur compounds aggressively corrode standard tube materials. Consider upgrading to sulfur-resistant coatings if this applies to your operation.
Ignition System Troubleshooting
Intermittent ignition failures often trace to moisture in the gas line or deteriorating electrodes. Check that ignition cables aren’t routed near hot surfaces that degrade insulation. Spark gap should be precisely per manufacturer specification—typically 1/8 to 3/16 inch. Modern hot surface igniters last 3-5 years but fail gradually; if ignition time exceeds 10 seconds, replacement is imminent. Keep a spare igniter on hand during heating season; it’s a $50 part that can save a $10,000 crop.
Safety Standards and Certifications to Demand
Greenhouse heating involves combustion in a structure filled with combustible materials and limited ventilation. Cutting corners on safety certifications is gambling with your livelihood and potentially your life.
CSA and UL Listings Explained
CSA (Canadian Standards Association) and UL (Underwriters Laboratories) certifications indicate third-party testing for safety and performance. But pay attention to the specific standard: CSA 2.14 covers low-intensity infrared heaters, while CSA 2.20 addresses high-intensity units. For greenhouse use, low-intensity tube heaters are generally preferred for their gentler, more uniform heat distribution. Verify the certification mark is current; some manufacturers display outdated certifications on older literature.
Overheat Protection and Flame Safeguard Systems
Every system needs redundant high-limit controls that shut down the burner if tube temperatures exceed safe limits. Flame safeguard controls must prove flame presence within 4 seconds and lock out after a failed ignition attempt, requiring manual reset. This prevents dangerous gas accumulation. The best systems use self-checking microprocessor-based controls that continuously verify sensor operation rather than relying on single-point failures.
Carbon Monoxide Monitoring in Semi-Enclosed Structures
Even perfect combustion produces trace CO. In tight greenhouses, levels can accumulate surprisingly quickly. Install dedicated CO monitors at plant height, not just near the heater. Set alarms at 25 ppm to give early warning before reaching OSHA’s 50 ppm threshold. Consider monitors that integrate with your climate control system to automatically increase ventilation if CO rises. Remember: CO is slightly lighter than air and distributes quickly; one monitor per 2,000 square feet provides adequate coverage.
Cost Analysis: Total Ownership Beyond the Purchase Price
The sticker price is just the down payment. True cost analysis spans fuel consumption, maintenance, expected lifespan, and crop loss prevention. A $3,000 system that fails during a cold snap can cost $50,000 in lost production.
Fuel Type Comparisons: Natural Gas, Propane, and Biogas
Natural gas offers lowest cost per BTU where available, but infrastructure costs can be prohibitive for remote operations. Propane provides portability but requires tank rental and delivery fees. Biogas from anaerobic digesters is emerging as a viable option for larger operations, though heating value varies with methane content (typically 500-700 BTU/cubic foot versus 1,000 BTU for natural gas). Some 2026 systems feature adaptive combustion controls that automatically adjust for variable biogas quality, making this sustainable option practical.
Lifecycle Cost Calculations
Model your costs over 10-15 years. Include: initial purchase, installation, annual fuel (use 5-year average prices, not current rates), maintenance (2-3% of purchase price annually), and expected major repairs (ignition systems, controls). A high-efficiency system costing 30% more upfront often pays for itself within 3-5 years through fuel savings alone. Factor in crop value: if uniform heating increases yields by 5-10% (typical), that’s $5,000-$10,000 annually on a $100,000 crop, dwarfing heating equipment costs.
Tax Incentives and Energy Rebates for 2026
The Inflation Reduction Act extended agricultural energy efficiency tax credits through 2032, offering up to 30% of equipment cost for high-efficiency heating systems. Many utilities offer rebates for equipment exceeding 90% AFUE. Some states provide additional incentives for systems that reduce greenhouse gas emissions. Check with your state’s agricultural extension service; they maintain current databases of available programs. Proper documentation during installation is crucial—photograph equipment labels, installation details, and efficiency certifications.
Environmental Impact and Sustainability Considerations
Modern agriculture faces increasing pressure to reduce carbon footprints. Your heating choice significantly impacts both direct emissions and indirect environmental costs.
Emissions Standards and Low-NOx Technology
New EPA regulations effective 2026 require NOx emissions below 40 ng/J for commercial heaters. Leading systems achieve this through staged combustion and flue gas recirculation, reducing NOx to 20-30 ng/J. This matters because NOx contributes to ground-level ozone formation and can directly damage sensitive crops at concentrations above 100 ppb. In tightly sealed greenhouses, heater emissions can accumulate to phytotoxic levels without proper venting.
Compatibility with Renewable Energy Sources
The most forward-thinking operations pair efficient radiant tube heaters with solar thermal pre-heating or ground-source heat pumps for mild weather. While these systems can’t fully replace combustion heating during deep winter, they can handle 30-50% of the load during shoulder seasons, cutting fuel use dramatically. Some 2026 controllers accept inputs from renewable systems and automatically blend heat sources for optimal efficiency and carbon footprint.
Carbon Footprint Reduction Strategies
Beyond equipment efficiency, consider fuel sourcing. Renewable propane made from animal fats and vegetable oils reduces carbon intensity by 40-50% compared to fossil propane. Carbon capture and storage (CCS) systems for greenhouse operations are emerging, though currently cost-prohibitive for most growers. More practical: optimize greenhouse insulation and air sealing first, then size heating systems for the reduced load. Every BTU saved through conservation is a BTU you don’t need to generate.
Troubleshooting Common Performance Issues
Even premium systems develop problems. The difference between minor inconvenience and major crisis lies in your ability to diagnose and address issues quickly.
Uneven Heat Distribution Patterns
If one area is consistently cooler, check reflector alignment first. Even 1-2 inches of misalignment redirects significant heat. Verify tube mounting is level; sagging tubes change radiation angles. In longer systems, temperature varies along the tube length—designers account for this with tapered reflectors, but these can be installed backward. Use an infrared thermometer to map actual surface temperatures at plant level; the pattern reveals whether the problem is installation, equipment design, or external factors like drafts.
Pilot Light and Ignition Failures
These typically stem from three sources: inadequate gas pressure, dirty/defective igniters, or improper flame sensing. Check pressure with a manometer; it should remain steady throughout the ignition sequence. Clean flame sensors with fine steel wool—oxidation insulates them from the flame’s rectification current. Verify the sensor is positioned in the flame’s hottest zone. If problems persist, check for ground faults in the ignition module; poor grounding prevents proper flame rectification detection.
Condensation Management in High-Humidity Environments
Greenhouses generate enormous moisture, which condenses on cool tube surfaces during startup and shutdown. This water drips onto crops and creates corrosion. Quality systems include sloped tube designs with collection points and drains. Ensure these drains remain clear and direct water outside the growing area. During startup, run the system at low output for 10-15 minutes to gradually warm tubes and minimize condensation shock. Some advanced units feature pre-warming cycles that automatically handle this transition.
Warranty and Support: What Quality Manufacturers Offer
A warranty is only as good as the company backing it. In the heating industry, longevity matters—companies that have weathered decades tend to honor commitments better than fly-by-night operations.
Coverage Periods and What’s Actually Included
Premium manufacturers offer 10-15 year warranties on heat exchangers, 3-5 years on burners, and 1-2 years on controls. But read the exclusions: many void warranties if units aren’t installed by certified technicians or if maintenance logs aren’t documented. Some prorate coverage, meaning a 10-year warranty provides minimal value in year 9. Look for non-prorated coverage on major components and clear definitions of what constitutes a covered failure versus normal wear.
Technical Support Availability and Response Times
When your heater fails at 2 AM during a polar vortex, phone support matters. Leading manufacturers offer 24/7 technical assistance from actual engineers, not call center scripts. Ask about average hold times and first-call resolution rates. Some provide remote diagnostic access, where technicians can connect to your controller via cellular modem to troubleshoot without a site visit. This capability can mean the difference between a 30-minute fix and a 48-hour wait for a service technician.
Parts Availability for Older Systems
Nothing’s worse than a failed 8-year-old heater that can’t be repaired because parts are obsolete. Quality manufacturers guarantee parts availability for 15-20 years minimum. They use standardized components across product lines, so a control board from a current model often retrofits to decade-old units. Check whether the company stocks parts regionally or ships everything from a central warehouse—regional availability cuts downtime dramatically.
Preparing Your System for Seasonal Transitions
How you shut down in spring and start up in fall directly impacts equipment lifespan and reliability. These procedures take time but prevent costly failures when you need heat most.
Spring Shutdown Procedures
When night temperatures stay above 50°F consistently, perform a thorough cleaning and inspection. Run the system for 30 minutes to burn off moisture, then shut off gas and electricity. Remove and store batteries from wireless thermostats. Seal combustion air intakes to prevent insect nesting. Cover the unit with a breathable fabric cover (never plastic, which traps moisture). Document any issues observed during final operation for attention during off-season maintenance.
Fall Startup Protocols
Begin startup 2-3 weeks before you actually need heat. Inspect for pest damage, corrosion, and loose connections. Test-fire the system and verify combustion with an analyzer. Check that all safety controls function properly. This lead time lets you order parts and schedule service without crop risk. Run the system for several full cycles before cold weather arrives to ensure stable operation. Many failures occur on first startup after months of disuse—discover them before your crops depend on the heat.
Off-Season Storage Recommendations
If you remove portable units for summer storage, keep them in a dry, rodent-free location. Store upright to prevent tube distortion. Place silica gel packets inside control boxes to absorb moisture. For permanently mounted systems, monthly operation during summer prevents corrosion by burning off condensation. Just 15 minutes per month maintains component condition and identifies problems early. Think of it like starting a stored car periodically—use prevents decay.
Frequently Asked Questions
How do I calculate the correct BTU output for my specific greenhouse configuration?
Start by calculating heat loss: multiply your greenhouse’s total surface area by the temperature difference between your target inside temperature and the coldest expected outdoor temperature, then by your structure’s U-value (typically 0.75-1.2 BTU/hr·ft²·°F for double-wall polycarbonate). Add 20% for infiltration and another 20% safety margin. Then divide by the number of heating degree days in your region. Most agricultural extension offices offer free heat loss calculators that account for local climate data and specific glazing materials.
What’s the ideal mounting height for radiant tube heaters in a greenhouse with mixed crop heights?
Mount 10-12 feet above the floor for most operations, but consider your tallest crop plus 3 feet minimum clearance. For vine crops growing to 8 feet, mount at 11-12 feet. For seedling production with 2-foot benches, 9-10 feet works better. The key is maintaining consistent distance from the tube to the top of your crop canopy. Adjustable hangers let you fine-tune height seasonally as crops grow, optimizing efficiency throughout production cycles.
Can radiant tube heaters be used in greenhouses with supplemental lighting?
Absolutely, and they complement each other beautifully. LED grow lights emit minimal radiant heat, leaving heating entirely to your tube system. This separation of light and heat gives you precise independent control. Position tubes to avoid casting shadows from light fixtures—typically mounting them perpendicular to light bar orientation. The infrared heat won’t interfere with plant photoreceptors, and the warm tube surfaces actually reduce condensation on light fixtures by raising surrounding air temperature slightly.
How often should I expect to replace major components like the burner or ignition system?
Quality burners last 15-20 years with proper maintenance. Hot surface igniters typically need replacement every 3-5 years (keep spares on hand). Flame sensors last 5-7 years but should be cleaned annually. Control boards have 10-15 year lifespans but are vulnerable to power surges—use surge protectors. Heat exchanger tubes should last the system’s life (15+ years) unless corrosion occurs. In humid greenhouses with aggressive pathogens, consider models with upgraded corrosion protection to maximize component longevity.
Do radiant tube heaters work effectively in greenhouses with high ventilation rates?
Yes, but sizing becomes critical. Because radiant heat warms objects, not air, ventilation has less impact than with forced-air systems. However, high air exchange still increases heat loss from warmed surfaces. Increase system capacity by 25-30% if you run continuous exhaust fans or have frequent ventilation cycles. Consider staging multiple units so you can run some continuously at low output while others cycle on during peak demand—this maintains more stable conditions than a single large unit cycling frequently.
What’s the typical payback period when upgrading from forced-air to radiant tube heating?
Most operations see 3-5 year payback through fuel savings alone (15-30% reduction typical). When you factor in increased yields from uniform heating (5-10% improvement common) and reduced disease pressure from eliminating drafts, payback often drops to 2-3 years. Operations heating over 5,000 square feet typically see faster returns due to economies of scale. The calculation depends heavily on your local fuel costs and crop value—high-value crops like herbs or microgreens can justify premium systems with paybacks under 18 months.
Are there any crops that don’t respond well to radiant tube heating?
Very few, but some considerations apply. Extremely delicate seedlings in contact with soil can experience uneven germination if tubes create hot spots directly above trays—use thermal mats for bottom heat in propagation areas. Leafy greens grown hydroponically in nutrient film technique systems may show slower growth directly under tubes if roots overheat—ensure adequate air movement at plant level. Orchids and some tropical plants prefer air movement and may benefit from supplemental circulation fans to prevent microclimates around foliage.
How do I prevent condensation from dripping onto crops below the tubes?
Specify sloped tube designs with integral condensate collection systems during purchase. During operation, maintain consistent night temperatures rather than large setbacks—rapid cooling causes condensation. Ensure adequate greenhouse air movement with horizontal airflow fans to keep moisture from settling on tube surfaces. Some growers install simple drip trays below tubes during critical crop stages, though this reduces radiant effectiveness slightly. The best solution is proper equipment selection and gradual temperature transitions.
Can these systems be integrated with renewable energy like solar or geothermal?
Yes, and this is a growing trend for 2026. Use renewables for base load heating during mild weather, with radiant tubes providing supplemental heat during cold snaps. Most modern controllers accept 0-10V or 4-20mA signals from renewable system controllers, allowing seamless blending. Some operations use solar thermal to preheat combustion air, boosting efficiency by 5-8%. Geothermal loops can pre-warm the greenhouse to 45-50°F, letting radiant tubes handle only the final temperature lift to 65-70°F, dramatically reducing fuel consumption.
What maintenance can I safely perform myself versus what requires a certified technician?
You can handle cleaning reflectors, checking for visible damage, testing thermostat operation, and verifying that vents are clear. Anything involving gas line connections, combustion analysis, or control system diagnostics requires a certified technician with proper test equipment. Annual professional service should include combustion analysis, gas pressure verification, safety control testing, and heat exchanger inspection. Think of it like car maintenance: you can check oil and wash the car, but engine diagnostics belong to professionals. Never bypass safety controls or attempt repairs on gas valves—it’s not worth the risk.