Rodents have a knack for turning your carefully organized storage shed into their personal condominium complex. One day you’re storing holiday decorations and gardening tools; the next, you’re facing chewed wiring, contaminated supplies, and a nest where your lawnmower used to sit. The culprit? A vulnerable floor frame that might as well have a “Welcome Mice” sign posted at ground level. As we look toward 2026, the game has changed dramatically—modern storage shed floor frame kits now incorporate sophisticated rodent-deterring technologies that go far beyond simple chicken wire and good intentions.
Investing in a rodent-resistant floor frame kit isn’t just about pest control; it’s about protecting your valuable equipment, eliminating health hazards, and avoiding the endless cycle of traps and poisons. Today’s engineered solutions combine heavy-duty materials, precision manufacturing, and smart design features that create an impenetrable barrier between your belongings and nature’s most persistent invaders. Whether you’re building a new shed or retrofitting an existing structure, understanding what makes these kits effective will save you thousands in potential damage and countless hours of frustration.
Top 10 Storage Shed Floor Frame Kits for Rodent Prevention
Detailed Product Reviews
1. Arrow Sheds Floor Frame Kit for Arrow Classic and Select Storage Sheds, Extra Large Sheds

Overview: This steel floor frame kit is designed specifically for Arrow’s Classic and Select series sheds in 10’ x 11’, 10’ x 12’, and 10’ x 14’ configurations. It provides a robust elevated foundation that keeps stored items off the ground, preventing moisture damage and pest intrusion. The kit installs after shed assembly, offering a straightforward upgrade to your existing or new Arrow storage building.
What Makes It Stand Out: The hot-dipped galvanized steel construction delivers exceptional corrosion resistance, far outlasting raw steel alternatives. Its brand-specific engineering ensures perfect compatibility with designated Arrow models, eliminating guesswork about fitment. The post-assembly installation design is particularly clever—you can erect your shed first and add the floor framework later, allowing for flexible project scheduling.
Value for Money: At $94.39, this kit positions itself as a mid-range investment for Arrow shed owners. While generic pressure-treated lumber framing might cost slightly less, the precision engineering and guaranteed compatibility justify the premium. You’re paying for a purpose-built solution that integrates seamlessly with your shed’s existing structure, potentially saving hours of custom fabrication.
Strengths and Weaknesses: Pros: Hot-dipped galvanized steel provides superior rust protection; engineered specifically for Arrow Classic/Select models; installs after shed assembly for convenience; includes all necessary hardware; elevates floor to prevent moisture issues.
Cons: Limited to specific Arrow shed sizes (10’ width only); flooring material not included; must be installed after shed erection (could be awkward); pricier than DIY lumber options.
Bottom Line: This frame kit is an essential upgrade for Arrow Classic or Select shed owners wanting a durable, moisture-resistant floor foundation. The galvanized steel construction and perfect fit make it worth the investment over generic alternatives.
2. Floor Frame Kit for 10 x 12 and 10 x 14 ft Sheds

Overview: Marketed for 10 x 12 and 10 x 14 foot sheds, this frame kit actually supports larger Arrow Elite models including 12 x 16, 14 x 14, and 14 x 16 foot configurations. Constructed from hot-dipped galvanized steel, it creates a sturdy flooring framework without requiring concrete pouring, making it ideal for DIY builders seeking a robust foundation solution.
What Makes It Stand Out: The kit’s heavy-duty galvanized steel framework is engineered to support significantly larger footprints than the title suggests, accommodating substantial storage structures. Its corrosion-resistant coating ensures longevity in harsh weather conditions. The basic-tool assembly approach keeps installation accessible for homeowners without specialized equipment.
Value for Money: Priced at $139.99, this kit commands a premium over smaller alternatives. However, for Arrow Elite shed owners, it’s practically a mandatory accessory. The cost reflects its expanded size capacity and load-bearing capability. While DIY lumber framing could save money, the engineered precision and time savings offer solid value for those invested in larger Arrow structures.
Strengths and Weaknesses: Pros: Supports large shed sizes up to 14 x 16 feet; superior galvanized steel construction; eliminates need for concrete slab; includes necessary hardware; relatively straightforward assembly.
Cons: Confusing product title doesn’t match actual compatible sizes; significantly more expensive than smaller kits; limited to Arrow Elite series; no flooring material included; requires shed assembly first.
Bottom Line: Despite the misleading title, this is the go-to floor frame for Arrow Elite shed owners with 12’ or 14’ wide models. The heavy-duty construction justifies the price premium for large-scale storage needs.
3. Arrow FDN1014 Storage Shed Base Kit for 10’x12’, 10’x13’ & 10’x14’ Arrow sheds
Overview: The FDN1014 serves as both a floor frame and structural base kit for Arrow and Storboss sheds in 10’ x 12’, 10’ x 13’, and 10’ x 14’ sizes. Beyond simple floor support, this HDG steel foundation system self-squares your building during assembly and can function as a concrete form, offering unparalleled versatility for shed installation and long-term stability.
What Makes It Stand Out: The self-squaring feature is a game-changer, automatically aligning your shed walls perfectly during construction—a common challenge for DIY builders. Its dual-purpose design as both a permanent base and concrete form provides future-proofing; start with a framed floor and pour concrete later if desired. The durable HDG (hot-dip galvanized) steel ensures decades of rust-free service.
Value for Money: At $169.99, this is the premium option in Arrow’s accessory lineup. The additional cost over standard frame kits is justified by the squaring assistance and concrete-form capability. For novice builders, the alignment help alone can prevent costly mistakes. It essentially combines a floor frame and assembly jig into one package.
Strengths and Weaknesses: Pros: Self-squaring feature ensures perfect alignment; doubles as concrete pouring form; heavy-duty HDG steel construction; compatible with multiple 10’ wide Arrow models; provides excellent elevation.
Cons: Most expensive frame option; not compatible with swing-door models; overkill for experienced builders; flooring material still not included; limited to specific shed widths.
Bottom Line: This base kit is worth every penny for first-time shed builders or those wanting maximum foundation flexibility. The squaring assistance and concrete-form option make it superior to basic frame kits.
4. 50% Structurally Stronger Truss Design Easy Shed Kit Builds 6’–14’ Widths Any Length - Bonus Miter Template, Storage Shed Garage Barn Playhouse Easy Framing Kit, Peak Roof 2x4 Basic DIY EZ Framer Kit
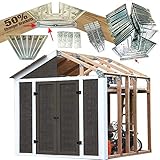
Overview: EZBUILDER’s universal framing kit revolutionizes shed construction with 50% stronger galvanized steel brackets and a patent-pending miter template. Unlike brand-specific kits, this system builds any width from 6’ to 14’ and any length, accommodating everything from tool sheds to playhouses. The kit includes 24 steel angles, 12 base plates, 4 door headers, and comprehensive plans.
What Makes It Stand Out: The EZ Miter Template eliminates complex angle calculations, ensuring precise cuts every time—a major advantage for novice woodworkers. The reinforced truss design with multiple screw points prevents bracket bending during assembly, a common complaint with competitor kits. The lifetime warranty demonstrates exceptional manufacturer confidence. Complete customization means you’re not locked into standard sizes.
Value for Money: At $69.99, this is the most cost-effective structural solution available. One kit builds a 7’x8’ shed; two create an 8’x10’; three assemble a 10’x22’. While you must purchase lumber separately, the total cost typically undercuts pre-fabricated options by hundreds. The included template and versatile brackets provide professional results without contractor fees.
Strengths and Weaknesses: Pros: Universal sizing fits any need; 50% stronger brackets prevent failure; miter template ensures accurate cuts; lifetime warranty; extremely affordable; works for sheds, garages, barns, playhouses.
Cons: Wood and roofing materials not included; requires more DIY skill than pre-engineered kits; no flooring solution provided; assembly time longer than branded kits.
Bottom Line: For confident DIYers wanting custom sizing without premium prices, this kit is unbeatable. The miter template and reinforced brackets make professional-quality construction accessible to homeowners.
5. ToLanbbt Outdoor Storage Shed Floor Mat - 6 x 4 FT Waterproof Carport Mat, Washable Furniture Pad with Non Slip Backing for Dust, Oil, Protection, Storage Shed Not Included

Overview: This 6’ x 4’ floor mat offers a radically different approach to shed flooring, providing a waterproof, washable barrier rather than structural support. Constructed from high-quality felt with a PE backing, it protects against moisture, oil, and dust while cushioning stored items. The non-slip backing and foldable design make it instantly deployable without tools or construction skills.
What Makes It Stand Out: The mat’s versatility extends far beyond sheds—use it under pools, grills, treadmills, or as a car repair pad. Its waterproof PE backing prevents ground moisture from seeping up, while the felt layer absorbs spills and condensation. The cut-to-fit design adapts to any space, and corner weights secure it against wind. At just 6x4 feet, it stores compactly when not needed.
Value for Money: Priced at only $20.77, this is the budget champion. For light-duty storage needs, it costs 75% less than steel frame kits. While it provides no structural support, it effectively prevents rust and floor damage for items like lawn equipment, bicycles, and storage boxes. The multi-use functionality increases its value proposition significantly.
Strengths and Weaknesses: Pros: Extremely affordable; instant tool-free installation; waterproof and washable; cut-to-fit customization; multi-purpose usage; lightweight and portable.
Cons: No structural support (not a true floor); limited 6’ x 4’ size requires multiple mats for larger sheds; not suitable for heavy machinery; provides minimal pest protection; may shift without corner weights.
Bottom Line: This mat is perfect for budget-conscious users needing basic moisture protection rather than structural flooring. It’s a practical, versatile solution for light storage applications but cannot replace framed floors for heavy-duty use.
6. 6 x 4 FT Outdoor Storage Shed Mat, Waterproof Storage Shed Flooring Mat, Anti-Slip Patio Furniture Floor Scratch Prevention Mat, Dustproof Outdoor Carport Mat (6 x 4 FT)

Overview: This 6x4 foot shed mat provides a protective barrier between your storage shed and the ground. Constructed with a felt surface and PE backing, it prevents moisture damage, rust, and floor deterioration while keeping interiors clean. The mat’s versatile design suits various outdoor applications beyond just sheds.
What Makes It Stand Out: The dual-layer construction combines water-absorbing felt with a waterproof, non-slip PE base, offering comprehensive protection. Its cuttable design allows customization for any space, while machine-washability ensures easy maintenance. The mat’s multipurpose functionality extends to hot tubs, BBQs, treadmills, and office use, maximizing utility.
Value for Money: At $22.99 for 24 square feet of protection, this mat delivers exceptional value. Comparable waterproof mats typically cost $1.50-$2.00 per square foot, making this product highly competitive. The reusable, washable design eliminates replacement costs, while its versatility across multiple applications provides additional savings over single-purpose products.
Strengths and Weaknesses: Strengths include affordability, waterproof protection, easy cleaning, customizable sizing, and multipurpose use. The non-slip backing prevents dangerous shifting. Weaknesses involve limited structural support—it won’t level uneven ground—and potential edge fraying over time. The mat may also shift on very smooth surfaces without additional anchoring, and extreme UV exposure could degrade the felt surface.
Bottom Line: An excellent budget-friendly solution for protecting shed floors from moisture and scratches. Ideal for renters or those seeking temporary, versatile floor protection. While not a substitute for proper foundations, it effectively extends shed lifespan and maintains cleanliness.
7. LEMBERI 5x3 FT Outdoor Storage Shed with Floor,Tool Garden Metal Sheds with Lockable Door,Outside Waterproof Galvanized Steel Storage House for Backyard Garden, Patio, Lawn Brown
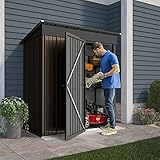
Overview: This compact 5x3 foot galvanized steel shed offers a complete storage solution with integrated flooring. Designed for small spaces, it features a sloped roof, lockable door, and steel foundation kit. The brown finish blends naturally into garden settings while providing secure, weather-resistant storage for tools and equipment.
What Makes It Stand Out: The all-in-one package includes a steel floor and foundation kit—rare at this price point. The sloped roof prevents water accumulation, while pad-lockable doors enhance security. Its thick steel construction with deep ribs ensures durability against harsh weather, making it a self-contained unit requiring no separate base preparation.
Value for Money: At $99.98, this shed represents remarkable value for a metal storage unit with floor and foundation. Similar sized metal sheds typically range $150-$250 without flooring. The galvanized steel construction resists rust, reducing long-term maintenance costs, while the included components eliminate additional foundation expenses.
Strengths and Weaknesses: Strengths include exceptional affordability, integrated floor and foundation, lockable security, weather-resistant sloped roof, and durable galvanized steel. The compact footprint suits small yards. Weaknesses include limited 15-square-foot capacity, potential for metal denting, brown paint may fade under UV exposure, and assembly requires basic DIY skills. The thin steel gauge may not withstand heavy impacts.
Bottom Line: Perfect for budget-conscious buyers needing basic, secure outdoor storage. Despite its small size, it delivers complete functionality. Best for storing garden tools, small equipment, or seasonal items in protected locations. An unbeatable value proposition for entry-level metal shed needs.
8. Haull 2 Pcs 6 x 4 ft Outdoor Storage Shed Floor Mat Waterproof Carport Storage shed mat Non Slip Patio Furniture Mat for Protect

Overview: This two-pack of 6x4 foot mats provides extensive floor protection for outdoor structures. Each mat features a felt surface with waterproof PE backing, offering moisture barrier and scratch prevention. The set covers 48 square feet total, making it ideal for larger sheds, carports, or multiple smaller applications requiring durable, reusable floor protection.
What Makes It Stand Out: The dual-mat package doubles coverage area at a modest price increase over single mats. Foldable design enables compact storage when not in use. The black color hides dirt and stains effectively. Versatile applications extend to yoga, BBQ areas, and car repair zones, providing exceptional utility beyond shed flooring alone.
Value for Money: At $35.99 for 48 square feet, the per-square-foot cost drops to just $0.75—significantly cheaper than purchasing two individual mats. This bulk offering saves 35-40% compared to buying separately. The washable, reusable design extends lifespan indefinitely, while multipurpose use eliminates need for separate specialized mats.
Strengths and Weaknesses: Strengths include exceptional coverage area, foldable storage convenience, cost-effective two-pack pricing, versatile indoor/outdoor use, and effective water/oil absorption. The non-slip backing stays secure. Weaknesses include potential separation between mats leaving gaps, edges may fray without sealing, black color absorbs heat, and the thin profile offers minimal cushioning. Not suitable for uneven terrain.
Bottom Line: Outstanding value for covering large areas or multiple spaces. Ideal for homeowners with several protection needs or oversized sheds. While requiring careful placement to avoid gaps, the cost savings and versatility make this two-pack a smart purchase for comprehensive floor protection.
9. Greesum 6x8FT Plastic Outdoor Storage Shed with Floor, Resin Sheds with Lockable Double Door, Windows & Vents, All-Weather Tool Sheds for Garden, Backyard, Patio, Light Gray

Overview: This spacious 6x8 foot resin shed delivers premium storage with double-layer construction, lockable double doors, and integrated ventilation. The light gray finish complements modern outdoor aesthetics while providing 48 square feet of weatherproof storage. Windows allow natural light, and the sloped roof prevents water accumulation, creating an ideal environment for valuable equipment.
What Makes It Stand Out: Double-wall resin panels offer superior rigidity and weather resistance compared to single-wall alternatives. The inclusion of windows and ventilation vents addresses condensation issues common in resin sheds. Lockable double doors provide wide access for lawnmowers and large equipment, while the UV-resistant construction prevents sun damage and fading.
Value for Money: At $629.99, this shed sits in the mid-range for resin structures of this size. Comparable sheds with windows and vents typically cost $700-$900. The double-wall construction adds durability worth the premium over budget resin models. Considering included features and 48-square-foot capacity, it offers solid long-term value for serious storage needs.
Strengths and Weaknesses: Strengths include robust double-wall construction, excellent weatherproofing, spacious interior, ventilation system, natural lighting, and secure double doors. The resin material won’t rust or rot. Weaknesses include complex assembly requiring 2 people and 3-5 hours, four-package delivery may arrive separately, lock not included, and foundation preparation still recommended despite included floor. The light color may show dirt.
Bottom Line: An excellent mid-range resin shed for homeowners needing reliable, spacious storage. The ventilation and windows set it apart from basic models. While assembly demands time and planning, the durable construction and thoughtful features justify the investment for protecting valuable outdoor equipment.
10. Rubbermaid Resin Outdoor Storage Shed With Floor (7 x 7 Ft) Weather Resistant Gray Organization for Home/Backyard/Garden Tools/Lawn Mower/Bike Storage/Pool Supplies

Overview: This premium 7x7 foot Rubbermaid shed represents the pinnacle of resin storage solutions. Engineered with double-wall construction and 50% stronger walls, it withstands heavy snow loads up to 15 pounds per square foot. The integrated rain gutter system and 180-degree door opening demonstrate thoughtful design for maximum functionality and weather protection.
What Makes It Stand Out: Rubbermaid’s proprietary design offers 50% more wall strength than competitors, preventing warping under weight or temperature fluctuations. The innovative rain gutter channels water away from contents, while full 180-degree door access accommodates riding mowers and bulky items. These premium features distinguish it from standard resin sheds.
Value for Money: At $1,105.70, this is a premium investment. However, the superior engineering, brand reputation, and exceptional durability justify the cost for those facing harsh weather. Comparable heavy-duty sheds cost $1,200-$1,500. The 49-square-foot capacity, combined with load-bearing roof and warping resistance, delivers long-term value that outlasts cheaper alternatives.
Strengths and Weaknesses: Strengths include unmatched durability, superior snow load capacity, innovative gutter system, full door access, warp-resistant double walls, and trusted brand quality. The gray color resists fading. Weaknesses include high initial cost, heavy weight requiring solid foundation preparation, lock sold separately, and premium price may exceed casual users’ needs. Assembly still requires significant effort despite better engineering.
Bottom Line: The ultimate choice for homeowners in severe climates demanding maximum protection. While expensive, its engineering excellence ensures decades of reliable service. Ideal for storing high-value equipment, riding mowers, and pool supplies where failure isn’t an option. A worthwhile premium investment for permanent, heavy-duty storage.
Understanding the Rodent Threat to Storage Sheds
Why Rodents Target Shed Floors
Rodents don’t randomly choose where to infiltrate—they’re tactical invaders following instinctual drives. Shed floors sit directly on or near ground level, making them prime real estate for mice, rats, chipmunks, and other small mammals seeking shelter, warmth, and nesting materials. The dark, undisturbed space beneath your shed provides ideal conditions for breeding, while the interior offers easy access to soft materials like cardboard boxes, fabric, and even insulation.
Your stored items inadvertently create a five-star hotel experience. Seed bags, pet food, grass clippings in garbage bags, and even cardboard provide both food and bedding. Once established, rodents create pheromone trails that attract more pests, turning a single mouse into a full-blown infestation within weeks. The real danger lies in their constant gnawing—they’ll chew through wood, plastic, and even soft metals to expand their access routes, compromising your shed’s structural integrity.
Common Entry Points Most Owners Miss
The average storage shed has more entry points than a sieve, and most owners inspect only the obvious spots. Gaps between skids and floor joists, spaces around anchor bolts, corners where framing members meet, and the inevitable warping that occurs as wood ages all create openings as small as 1/4 inch—more than enough for a determined mouse. Even pressure-treated lumber eventually develops cracks and splits, especially at screw holes and knot locations.
The transition points deserve special attention. Where the floor meets walls, around doors (even sealed ones), and at any utility penetrations for electrical wiring are vulnerable areas. Rodents are contortionists; they can squeeze through gaps you’d swear were impossible to breach. Many DIY builders unknowingly create highways during construction by leaving slight gaps between joists or failing to properly seal corners. Professional pest control experts consistently find that 90% of shed infestations originate from floor-level compromises that were invisible to the untrained eye during initial construction.
What Makes a Floor Frame Kit Rodent-Proof?
Key Design Features That Deter Pests
A truly rodent-proof floor frame kit operates on the principle of layered defense. First, it incorporates integrated physical barriers—typically galvanized steel mesh with specific gauge and aperture sizing that prevents chewing while allowing ventilation. The mesh isn’t an afterthought; it’s engineered into the frame itself, welded or mechanically fastened at stress points to prevent separation over time.
Second, premium kits feature interlocking components that eliminate gaps at joints. Tongue-and-groove or lap-joint connections between joists and rim boards create tight seals without relying solely on fasteners. Third, elevated designs keep the actual floor deck 6-12 inches above ground level, removing the moisture and darkness rodents crave. This elevation also allows for visual inspection from the exterior, so you can spot attempted breaches before they succeed.
Advanced models include integrated flashing systems that extend from the floor frame down the foundation, creating a smooth, unclimbable surface. Some even incorporate subtle bends or curves at the bottom edge—rodents struggle to gain purchase on rounded surfaces, effectively blocking their primary climbing method.
Material Matters: Steel vs. Treated Lumber
The material composition debate isn’t just about strength; it’s about creating an environment rodents can’t manipulate. Galvanized steel framing components offer zero chewability and won’t warp or split over time. The zinc coating prevents rust, while the inherent rigidity maintains tight joints for decades. Steel kits typically integrate mesh barriers directly into the manufacturing process, welding them to the frame for permanent protection.
Pressure-treated lumber, when properly selected, can be effective but requires specific grades and treatment levels. Look for lumber treated to ground-contact standards (UC4A or higher) with borate-based preservatives that are both rot-resistant and unpalatable to rodents. However, even the best-treated wood remains vulnerable to determined chewing at corners and edges. Hybrid systems that combine a steel mesh barrier with treated lumber framing offer the best of both worlds—familiar construction methods with modern protective elements.
Composite materials are emerging as a third option, though they’re still evolving. Recycled plastic lumber mixed with fiberglass strands creates a material too dense for rodent teeth and impervious to moisture. The downside? Cost and limited load-bearing capacity compared to steel or traditional lumber. For 2026, the market is seeing reinforced composites that address these weaknesses, making them viable for light to medium-duty applications.
The Evolution of Rodent-Resistant Technology in 2026
Smart Barrier Systems
The most significant advancement in 2026 is the integration of smart barrier technology. These aren’t gimmicks—they’re practical enhancements that alert you to compromise attempts before they become full breaches. Embedded pressure sensors in mesh panels detect when rodents attempt to chew or push through, sending alerts to your smartphone via Bluetooth or WiFi. Think of it as a security system specifically for your shed floor.
Some kits now incorporate ultrasonic emitters powered by small solar panels, creating a frequency barrier that rodents find intolerable. These devices activate only when motion is detected, preserving battery life while maintaining 24/7 protection. The frequencies are tuned to target specific pest species without affecting pets or wildlife, addressing a common concern with older ultrasonic devices.
Photovoltaic mesh represents another leap forward. Tiny solar fibers woven into the steel mesh generate a mild, harmless electric charge that rodents can sense through their whiskers. This creates a psychological barrier they learn to avoid, effectively training the local rodent population to bypass your shed entirely.
Integrated Pest Management Features
Modern kits don’t just block rodents; they create an environment hostile to colonization. Vented panels with one-way airflow systems maintain dryness while preventing rodent entry—moisture control is critical because damp wood is easier to chew and more attractive for nesting. These vents incorporate baffles that allow air passage but block light and rodent access.
Copper-infused coatings are becoming standard on high-end models. Rodents naturally avoid copper due to a taste aversion, and these coatings prevent algae and mold growth that can soften materials over time. The copper is embedded in a polymer base, so it won’t oxidize or lose effectiveness, providing decades of protection.
Perhaps most impressively, some manufacturers now include pheromone disruption technology. Small, replaceable canisters emit synthetic predator scents that keep rodents on high alert and unwilling to settle. These are designed for seasonal replacement and are harmless to humans and pets, creating an invisible force field of psychological deterrence.
Critical Features to Evaluate Before Buying
Mesh Size and Gauge Specifications
The difference between effective protection and false security often comes down to numbers. For rodent exclusion, mesh aperture should never exceed 1/4 inch (6.35mm)—this blocks adult mice and most juvenile rats. However, smaller isn’t always better; 1/8 inch mesh can restrict necessary ventilation and trap moisture. The sweet spot for most applications is 3/16 inch to 1/4 inch.
Mesh gauge tells you about durability. A 19-gauge wire (approximately 1mm thick) represents the minimum for lasting protection—anything thinner can be bent or chewed through over time. For areas with heavy rodent pressure or larger rat species, 16-gauge (1.29mm) provides substantially better security. The gauge should be consistent across the entire panel, not just reinforced at edges.
Pay attention to the weave pattern too. Welded wire mesh outperforms woven because rodents can’t separate individual wires. Look for spot welds at every intersection, with a minimum of four welds per square inch. Some premium kits use continuous wire feed welding, creating a virtually unbreakable grid that maintains its integrity even if individual welds fail.
Load-Bearing Capacity vs. Protection Level
Here’s where many buyers make costly mistakes: they prioritize rodent protection so heavily that they undersize the structural capacity. A floor frame must support your intended load—lawn equipment, shelving, workbenches, and stored items—without deflection that could compromise the barrier system.
Calculate your load requirements first. Light storage (200-300 pounds total) can use 2x4 framing on 24-inch centers. For medium-duty use (500-800 pounds), step up to 2x6 joists on 16-inch centers. Heavy-duty workshops storing tractors or ATVs require 2x8 or larger, potentially with double joists at stress points.
The protection level shouldn’t reduce capacity. Effective kits integrate barriers without sacrificing structural integrity—mesh panels are recessed into the frame rather than attached to the underside, maintaining full joist height. Check the manufacturer’s specifications for both live load (dynamic weight) and dead load (static weight) ratings. A kit rated for 50 pounds per square foot (psf) live load handles most residential needs, but bump that to 75 psf if you’re storing dense materials like boxes of books or metal tools.
Weather Resistance and Longevity
Rodent-proofing fails when materials degrade. In 2026, quality kits undergo accelerated aging tests that simulate 20 years of UV exposure, freeze-thaw cycles, and moisture saturation. Look for certifications like ASTM D785 or similar weathering standards. The frame components should maintain their protective qualities even after surface coatings begin to wear.
Galvanization class matters enormously. G90 galvanizing (0.90 ounces of zinc per square foot) represents the residential standard, but for coastal or high-humidity regions, G185 provides nearly double the corrosion resistance. Some manufacturers now offer powder-coated galvanized steel, adding a polymer layer that seals the zinc and provides color options while extending lifespan to 30+ years.
For wood components, treatment retention levels indicate longevity. Borate treatments should show a minimum retention of 0.17 pcf (pounds per cubic foot) for ground contact. The best kits use dual-treatment processes: pressure treatment for rot resistance plus a surface-applied borate solution for pest deterrence. This two-stage approach protects both the core and the surface, where initial chewing attempts occur.
Foundation Types and Their Rodent-Proofing Implications
Concrete Slab Integration
Slab foundations offer the best inherent rodent protection, but only when properly integrated with your floor frame kit. The critical detail is the connection point where wood meets concrete. Even hairline cracks in the slab can become highways for determined pests. Quality kits for slab applications include specialized anchor plates with integrated mesh barriers that extend 6-8 inches onto the concrete, sealed with non-shrink grout or hydraulic cement.
The slab should be poured with a turned-down edge or curb that raises the frame at least 4 inches above grade. Kits designed for this configuration feature notched joists that fit over the curb, eliminating gaps while maintaining level floors. For existing slabs, retrofit kits use adhesive-backed mesh flanges that create a seal against the concrete—look for epoxy-based adhesives rated for masonry and resistant to moisture wicking.
Control joints in the slab require special attention. Rodents travel along these weakened lines, so your floor frame kit should include flexible mesh strips that bridge these joints while allowing slab movement. These strips compress and expand without breaking the barrier, a feature particularly important in regions with expansive soils.
Skid Foundation Adaptations
Skid foundations—pressure-treated beams that support the shed—remain popular for portability but present unique challenges. The space between skids and the ground is prime rodent real estate. Effective kits for skid foundations incorporate wrap-around mesh barriers that extend from the floor deck down to at least 6 inches below the skid bottom, creating a skirt that prevents burrowing underneath.
The mesh must be attached with corrosion-resistant fasteners every 4-6 inches; rodents will exploit any loose section. Some advanced kits use continuous bands of perforated metal flashing at the bottom edge, which can be staked into the ground. This ground seal prevents rodents from digging under while allowing drainage. For added security, consider kits that include buried mesh aprons extending 12 inches outward from the skid perimeter—rodents encountering this barrier typically give up rather than dig that far.
Skid spacing is another critical factor. Kits designed for this foundation type include cross-bracing that prevents joist sagging between skids, which can create gaps. The maximum span between skids should never exceed 6 feet for 2x6 framing, and quality kits provide engineered load tables specific to skid applications.
Pier and Beam Considerations
Pier foundations elevate sheds for excellent ventilation but create multiple rodent access points around each pier. The solution lies in kits featuring modular barrier panels that fit between piers, creating a continuous perimeter shield. These panels should attach to the floor frame with tamper-resistant hardware and extend to within 1 inch of the ground—close enough to prevent entry but allowing for ground movement.
Each pier requires individual protection. Wrap-around mesh collars that encircle the pier and seal against both the pier and the floor frame block climbing rodents. These collars should be adjustable to accommodate slight variations in pier diameter and height. For concrete piers, look for kits with expandable foam seals that fill gaps where pipes or rebar penetrate.
The open space beneath pier foundations actually works in your favor when properly sealed—it allows for easy inspection. Choose kits with removable inspection panels at corners and mid-span points. These panels let you check for burrowing attempts without dismantling the entire barrier system, making maintenance practical rather than prohibitive.
Installation Best Practices for Maximum Protection
Site Preparation Techniques
Your rodent-proof floor frame is only as effective as the ground it sits on. Begin by removing all vegetation within a 3-foot perimeter—rodents use plants as cover and climbing aids. Excavate the top 4-6 inches of topsoil, which contains organic matter and insect populations that attract rodents. Replace it with compacted gravel or crushed stone that creates a hostile burrowing environment.
Grade the site to slope away from the shed at 1/4 inch per foot minimum. Standing water softens soil, making it easier for rodents to dig and potentially compromising your barrier materials. Install a geotextile fabric beneath the gravel to prevent weed growth and soil migration that could create gaps under your frame.
For heavy rodent pressure areas, consider installing a buried hardware cloth barrier before placing your floor frame kit. This subsurface apron—typically 2 feet wide and buried 6 inches deep—creates a final defense layer that stops burrowers who somehow penetrate your primary barrier. It’s insurance that pays dividends in high-infestation zones.
Sealing Gaps and Overlaps
The installation process lives or dies at the seams. Every joint, overlap, and penetration represents a potential failure point. Start by dry-fitting all components and marking where mesh panels meet. Apply a continuous bead of rodent-proof sealant—look for products containing steel wool fibers or copper mesh embedded in polyurethane—along these junctions before final fastening.
Mesh overlaps should be a minimum of 6 inches, not the 2-3 inches common in older kits. Secure overlaps with stainless steel staples or screws every 2 inches along the seam, then cover with metal flashing or a specialized seam tape. The tape should be at least 4 inches wide and contain an aluminum layer that rodents can’t chew through.
Fastener holes require individual attention. Pre-drill all holes to prevent wood splitting, which creates gaps. Apply sealant to each screw before driving it, filling the void around the shank. For bolt-through connections, use neoprene washers that compress to form a tight seal. After installation, spray all fasteners and seams with a bittering agent—non-toxic but extremely unpalatable to rodents that might test these spots.
Common Installation Mistakes That Compromise Security
Even the best kits fail when installed improperly. The number one error is over-tightening fasteners, which can warp frame members and create gaps on the opposite side. Use a torque wrench set to the manufacturer’s specification, typically 15-20 foot-pounds for wood screws and 25-30 for lag bolts.
Another critical mistake is failing to account for material expansion. Wood swells in humidity; steel expands in heat. Leave a 1/8-inch gap at the ends of steel mesh panels, filled with flexible sealant that accommodates movement. Without this, thermal cycling will eventually break welds or pull fasteners loose.
Ignoring the “crawl space” factor is a classic oversight. If your floor frame creates a hollow area beneath, you must install access points for inspection. Sealing it completely seems logical but prevents you from noticing compromised areas. Install at least two 12x12 inch inspection hatches with tamper-proof latches, positioned at opposite corners for complete visibility.
Material Deep Dive: What Works Best?
Galvanized Steel Mesh Integration
Not all steel mesh is created equal. The gold standard is welded wire mesh made from drawn steel wire, galvanized after welding (GAW). This process ensures every cut end is coated, preventing rust that starts at weld points. The mesh should be hot-dipped galvanized, not electro-galvanized, which provides a thinner, less durable coating.
Mesh orientation matters. Square openings are standard, but hexagonal (chicken wire style) patterns actually provide better resistance to spreading once a rodent begins chewing. The interconnected hexagons distribute stress, making it harder to create a hole. For maximum security, look for “reverse twist” hex mesh, where the wire intersections are twisted in opposite directions, preventing unraveling if one wire breaks.
Integration method separates premium kits from pretenders. The mesh should be recessed into a channel in the floor joists, not simply stapled to the bottom. This protects the mesh edges from direct attack and creates a mechanical lock. Some manufacturers use a two-stage process: the mesh is set into a groove, then a compression strip is screwed over it, sandwiching the barrier in place.
Pressure-Treated Lumber Grades
When selecting kits with wood components, the treatment type determines both longevity and rodent resistance. Alkaline Copper Quaternary (ACQ) treatment provides excellent rot resistance but doesn’t deter chewing. Copper Azole (CA) is slightly better, but the real winner for rodent-prone areas is Borate treatment (disodium octaborate tetrahydrate).
Borate treatments penetrate deep into the wood fibers and remain toxic to insects and unpalatable to rodents for the life of the wood. The key is ensuring adequate treatment retention—0.28 pcf for above-ground use, 0.40 pcf for ground contact. Request a treatment certificate from the manufacturer; reputable suppliers provide documentation for each batch.
Avoid lumber with large knots, especially on joists and rim boards. Knots are weak points that can fall out over time, creating instant holes. Select Structural (SS) grade lumber has the fewest knots and defects, maintaining the integrity of your barrier system. The premium is worth it when you consider the cost of replacing a compromised floor frame.
Composite and Alternative Materials
The composite revolution has finally reached shed floor frames, with exciting implications for rodent control. Wood-plastic composites (WPC) with 70% wood fiber and 30% recycled plastic create a material that’s too dense for rodent teeth and won’t absorb moisture. The downside has been structural capacity, but 2026 formulations include fiberglass reinforcement that increases span ratings to match pressure-treated lumber.
Ultra-high-molecular-weight polyethylene (UHMWPE) panels represent the cutting edge. This material is self-lubricating, making it nearly impossible for rodents to climb, and its molecular structure is too tough to chew. Panels are bolted to traditional framing, creating a slick, impenetrable barrier. While currently premium-priced, UHMWPE lasts 50+ years and requires zero maintenance, making it cost-effective over a shed’s lifetime.
For the eco-conscious, mycelium-based composites—literally grown from mushroom roots—offer surprising rodent resistance. The material is dense, doesn’t rot, and contains natural compounds rodents avoid. While load capacity is still limited to light storage applications, rapid advancements suggest mycelium frames could be mainstream by 2027.
Size and Customization Considerations
Standard vs. Custom Dimensions
Most manufacturers offer kits in standard sizes: 8x8, 8x10, 10x12, and 12x16 feet. These mass-produced options provide the best value because the barrier systems are pre-engineered and tested. The mesh panels are cut to exact dimensions, and all fastening points are pre-drilled for precision. For these common sizes, you’ll find the most competitive pricing and fastest availability.
However, standard sizes assume ideal site conditions. If your shed needs to fit between existing structures or accommodate specific equipment, custom dimensions become necessary. Custom kits cost 20-40% more but offer rodent-proofing advantages: every component is fabricated for your exact specifications, eliminating the field modifications that often create gaps. The manufacturer can adjust joist spacing, barrier placement, and reinforcement locations based on your specific load requirements and local rodent pressure.
When ordering custom, provide exact interior dimensions, not exterior. The floor frame should be sized to your shed’s footprint, but the barrier system needs to extend slightly beyond. Reputable manufacturers will add a 2-inch overhang for mesh panels and flashing, ensuring complete coverage without on-site trimming that could leave sharp, vulnerable edges.
Expandability for Future Additions
Smart buyers think ahead. Your 8x10 shed might suffice today, but what about five years from now? Some modular floor frame kits include expansion connectors that let you add sections later while maintaining rodent integrity. These systems use interlocking rim boards with integrated mesh couplers—essentially a barrier bulkhead that connects two frames seamlessly.
Look for kits with pre-punched expansion slots along rim joists. These allow you to bolt on additional framing members without drilling new holes that require sealing. The best systems include matching mesh panels with overlapping flanges that create a factory-seal quality connection at the addition point.
Consider vertical expansion too. If you might add a loft or mezzanine, the floor frame needs to support the additional load and potential new rodent access points. Kits with double top plates on joists provide the nailing surface for future walls while maintaining a continuous barrier below. Some include reinforced access points where stairs or ladders would penetrate the floor, with pre-framed openings that maintain the protective envelope.
Cost Analysis: Investment vs. Long-Term Savings
Initial Price Points
Entry-level rodent-resistant floor frame kits start around $400-$600 for an 8x8 size, using pressure-treated lumber with basic galvanized mesh. These provide fundamental protection but may lack advanced features like integrated flashing or smart sensors. They’re suitable for low-pressure areas with minimal rodent activity.
Mid-range options ($800-$1,200 for 10x12) offer the sweet spot of value and performance. These typically include steel-reinforced corners, heavier gauge mesh, pre-sealed components, and comprehensive hardware packs with corrosion-resistant fasteners. Most homeowners find this tier provides the best balance of upfront cost and long-term reliability.
Premium kits ($1,500-$2,500+) incorporate advanced materials like UHMWPE panels, smart monitoring technology, and professional-grade sealing systems. While the sticker shock is real, these systems often include 20-30 year warranties and eliminate the need for supplemental pest control measures. For sheds storing valuable equipment or in high-infestation areas, the premium pays for itself in prevented damage.
Maintenance Cost Projections
Budget for ongoing maintenance, even with the best kits. Annual inspection and touch-up sealing runs $50-$100 in materials if you DIY. Professional inspection services charge $150-$300 per visit. Factor in replacing sensor batteries every 2-3 years ($20-$40) and refreshing pheromone disruptors seasonally ($30-$60 per year).
Wood components require periodic treatment. Even borate-treated lumber benefits from a surface reapplication every 5-7 years, costing approximately $0.50 per square foot. Steel frames need inspection for coating wear, with touch-up galvanizing spray for any scratches—a $15 can covers most sheds for multiple applications.
The hidden cost is what you’re not spending on traditional pest control. Without a rodent-proof floor, homeowners typically spend $200-$400 annually on traps, poisons, and professional extermination. Over a shed’s 20-year lifespan, that’s $4,000-$8,000 in reactive measures versus a one-time investment in prevention.
ROI of Rodent Prevention
Calculate your potential losses to understand true ROI. A riding mower damaged by chewed wiring costs $300-$800 to repair. Contaminated storage—clothing, bedding, holiday decorations—often totals $500-$2,000 per incident. Structural damage to floor joists can require complete replacement, a $1,500-$3,000 project.
Insurance rarely covers rodent damage, classifying it as preventable maintenance. Your floor frame kit is essentially an insurance policy with a one-time premium. Most homeowners break even within 2-3 years when factoring in prevented damage and eliminated pest control costs. For sheds storing business equipment or inventory, the payback period can be under a year.
The value extends beyond dollars. Consider the time saved not cleaning up droppings, the peace of mind knowing your belongings are safe, and the health benefits of eliminating allergen sources. These intangibles often outweigh pure financial calculations, especially for families with allergy sufferers or immunocompromised members.
Climate-Specific Recommendations
Humid and Coastal Regions
Salt air and constant moisture demand G185 galvanizing or stainless steel components. Standard G90 galvanized mesh can fail in as little as 5 years in coastal environments, while stainless steel (Type 316) lasts indefinitely. The premium is non-negotiable—corrosion doesn’t just weaken the barrier; it creates rough edges rodents can exploit.
Ventilation becomes paramount in humid climates. Choose kits with elevated designs that create at least 18 inches of clearance beneath the floor. This prevents moisture wicking and allows air circulation that keeps the underside dry. Install vapor barriers between joists and mesh panels to prevent condensation from forming on the barrier itself, which can lead to rust even on galvanized surfaces.
Fastener selection is critical. Hot-dipped galvanized fasteners are minimum; stainless steel is better. The combination of dissimilar metals (galvanized mesh with stainless screws) can cause galvanic corrosion, so use nylon washers to isolate them. Apply anti-corrosion paste to all threaded connections before assembly.
Cold and Snowy Climates
Freeze-thaw cycles wreak havoc on barriers if not properly designed. Choose kits with flexible mesh panels that can expand and contract without breaking welds. The mesh should be attached with slotted holes rather than fixed points, allowing 1/8-inch movement per linear foot.
Snow load adds weight that can compress barriers against the ground, creating gaps when the snow melts. Kits with elevated skids or adjustable piers let you raise the floor height seasonally. Some include “snow skirts”—removable mesh extensions that prevent rodents from tunneling through snow banks to reach the floor frame.
Borate-treated wood performs poorly in constantly wet snow conditions, as the treatment can leach out. In these environments, steel framing or composite materials are superior choices. If you must use treated lumber, specify a water-repellent additive (WRA) in the treatment process, which locks the borate in place for 10+ years even in wet conditions.
Arid and Desert Environments
Desert rodents like pack rats and kangaroo rats are incredibly persistent and can chew through materials that deter common mice. In these regions, mesh gauge becomes critical—minimum 16-gauge, with 14-gauge preferred for high-pressure areas. The mesh should be made from harder steel alloys that resist the powerful jaws of desert species.
UV degradation is the primary enemy. Even galvanized coatings break down under intense desert sun. Look for kits with UV-stabilized powder coatings rated for 3,000+ hours of exposure. The coating should be a light color to reflect heat, as extreme temperature swings can cause materials to expand and contract dramatically.
Desert kits should include “dust flaps”—fine mesh screens that prevent blowing sand from accumulating against the barrier. Sand buildup can create bridges rodents use to bypass your defenses. These flaps attach to the bottom edge of the main barrier and lay on the ground, allowing sand to blow over while maintaining the seal.
Integration with Existing Shed Structures
Retrofitting Older Sheds
Most sheds over 10 years old have existing rodent highways that must be eliminated before installing a new floor frame. Start by completely removing the old floor if possible, allowing inspection of the foundation and removal of contaminated soil. If the shed has an existing infestation, treat it professionally before beginning—installing a barrier over active rodents simply traps them inside.
Retrofit kits use a “sleeve” approach: a complete floor frame with integrated barrier that slides under the existing walls. This requires temporarily jacking up the shed 2-3 inches, which most homeowners can manage with hydraulic jacks and proper safety precautions. The kit includes lifting brackets that distribute the load across wall studs, preventing damage during the process.
For sheds that can’t be lifted, interior barrier systems install from inside. These are less effective but still valuable. They consist of mesh panels screwed to the underside of existing joists, sealed with expanding foam at edges. While rodents can still access the wall cavities, they’re blocked from the interior space. Combine this with exterior trench barriers—buried mesh around the perimeter—for a two-layer defense.
New Construction Planning
Building new? This is your opportunity to create an impenetrable fortress. Specify your rodent-proof floor frame kit before pouring the foundation so you can integrate anchor points and barriers into the concrete. Install conduit for any electrical wiring before the floor frame goes in—running wires later requires drilling holes that compromise your barrier.
Plan your shed layout with rodent control in mind. Position storage shelves away from walls, leaving a 6-inch gap that prevents rodents from using shelving as a ladder to reach upper walls or the ceiling. Designate a “clean zone” around the perimeter—no stored items within 12 inches of walls—to allow visual inspection of the floor-wall junction.
Consider future access needs. Install a subfloor hatch in one corner, framed into the floor kit, that lets you inspect beneath the shed without removing floor decking. This hatch should have the same barrier specifications as the rest of the floor and be secured with tamper-resistant screws. It’s a small addition during construction that proves invaluable for maintenance.
Maintenance and Inspection Protocols
Seasonal Checkpoints
Establish a quarterly inspection routine that takes 15 minutes but prevents major failures. In spring, check for winter damage: look for mesh that’s been pushed down by frost heave or ice, and inspect for gaps created by freeze-thaw cycles. Summer inspections focus on vegetation—trim any plants growing against the shed that could provide cover or climbing aids.
Fall preparation involves ensuring the barrier is secure before rodents seek winter shelter. Pay special attention to the ground seal, as summer rains may have eroded soil away from the barrier edge. Winter checks are visual only—look for snow buildup that could create bridges, and clear any ice dams forming at the barrier base.
Document each inspection with photos. This creates a baseline that makes it easier to spot subtle changes over time. Use a checklist that includes every potential failure point: mesh tension, fastener integrity, sealant condition, vegetation clearance, and ground seal contact. Consistency is key—skip one season, and you might miss the start of a breach.
Signs of Compromise to Watch For
Early detection saves your shed. Look for “gnaw marks” on the exterior of mesh panels—shiny spots where rodent teeth have scraped the galvanizing. These appear as small, polished areas and indicate investigation attempts. If you find them, enhance deterrents in that area with bittering agents or ultrasonic devices.
Droppings on top of your floor decking are a red flag that rodents have penetrated the barrier. Don’t just clean them—conduct a forensic inspection. Check directly below the droppings on the underside of the floor; you’ll often find a tiny gap or a mesh panel that’s been bent. Rodents can squeeze through openings as small as a dime once inside the structure.
Listen for sounds. Rodents are most active at dawn and dusk. If you hear scratching or gnawing, use a stethoscope or even a glass pressed against the floor to pinpoint the location. The sound will be loudest directly over the breach. Mark the spot and inspect from underneath—most breaches occur at corners where multiple components meet.
Warranty and Certification Standards
Industry Certifications to Look For
Legitimate rodent-proof floor frames carry certifications from recognized bodies. The National Pest Management Association (NPMA) now offers a “Rodent-Resistant Construction” certification for products that pass rigorous testing. Look for their seal—it means the kit has been evaluated against live rodent colonies under controlled conditions.
ASTM E699 tests structural pest management devices and is the gold standard for barrier effectiveness. Kits meeting this standard have demonstrated they can withstand 30 days of exposure to determined rodents without compromise. The test includes multiple species and accounts for both chewing and pushing/pulling forces.
For steel components, UL 752 rating indicates ballistic resistance, which correlates surprisingly well with rodent resistance. While designed for security applications, the same properties that stop bullets—toughness and integrity—prevent rodent penetration. A Level 1 rating is more than sufficient and indicates a robust mesh panel.
What Warranties Actually Cover
Read the fine print. Most warranties cover manufacturing defects—failed welds, premature corrosion, treatment leaching—for 10-25 years. However, they specifically exclude damage from improper installation or “acts of rodents.” This seems ironic, but it’s standard. The warranty protects you from product failure, not from a super-determined rat that somehow defeats a properly installed barrier.
Premium manufacturers now offer “rodent intrusion warranties” that cover damage if their product fails when installed correctly. These are limited warranties—typically $500-$1,500 payout—and require professional installation and documented maintenance. While not comprehensive, they demonstrate manufacturer confidence.
Pay attention to transferability. A transferable warranty adds value if you sell your property. Also check for prorated vs. non-prorated coverage—non-prorated means full replacement value throughout the warranty period, while prorated reduces coverage as the product ages.
DIY vs. Professional Installation
Skill Level Assessment
Installing a rodent-proof floor frame kit is intermediate-level DIY, not beginner-friendly. You need competency with power tools, ability to read engineering drawings, and understanding of load distribution. The critical factor is attention to detail—a single missed sealant application or improperly torqued bolt creates a vulnerability.
Assess your patience level. This project requires methodical work, not speed. Rushing leads to gaps. If you’re the type who skips reading instructions, hire a professional. The installation manual for a quality kit runs 20-30 pages with specific torque values, sealant types, and inspection checkpoints.
Physical demands matter too. You’ll be working on your hands and knees, lifting heavy framing members, and potentially jacking up an existing shed. Most installations take 8-16 hours for an average-sized shed. If you have back problems or mobility issues, professional installation is worth the cost.
Tools Required
Beyond basic carpentry tools, you’ll need specialized equipment for proper installation. A torque wrench is non-negotiable—guessing tightness leads to over-compression or loose joints. A pneumatic stapler with 1-inch stainless steel staples speeds mesh installation dramatically and provides more consistent attachment than manual stapling.
Sealant application requires a quality caulk gun (not the $5 hardware store special) and backer rod foam for larger gaps. A metal brake lets you custom-bend flashing for perfect fits at corners and penetrations. While you can rent these, owning one ensures you can make adjustments as needed during installation.
For foundation work, a rotary hammer drill with masonry bits is essential for concrete anchors. A laser level ensures your frame is perfectly flat—any twist or sag creates stress points that can separate seals over time. Finally, invest in a good inspection mirror and bright LED work light to check your work from underneath before calling the project complete.
When to Call an Expert
Call a professional if your shed stores high-value items like motorcycles, expensive tools, or business inventory. The cost of installation (typically $800-$1,500 for a standard shed) is cheap insurance compared to potential losses. Also consider professional help if you live in an area with known rodent pressure from aggressive species like roof rats or Norway rats—these pests require expert-level barrier installation.
Professional installation becomes mandatory for complex foundations. Pier foundations with varying heights, slab foundations with extensive cracking, or sites with severe drainage issues need an experienced installer who can adapt the kit and maintain barrier integrity. They’ll also spot potential problems you might miss, like soil conditions conducive to burrowing or nearby rodent attractants.
Finally, if you’ve had a previous infestation, hire a professional. They can identify and remediate contamination, ensure all access points are sealed, and often provide a warranty on their work. Many pest control companies now partner with floor frame kit manufacturers, offering package deals that include both barrier installation and initial treatment.
Frequently Asked Questions
How long does a typical rodent-proof floor frame kit last before needing replacement?
With proper installation and maintenance, quality kits last 20-30 years. Steel components with G185 galvanizing often exceed 30 years, even in harsh climates. Wood-based systems typically need evaluation at 15-20 years, though borate-treated lumber can match steel’s longevity in dry conditions. The key is annual inspections and prompt repairs of any damage.
Can rodents really chew through galvanized steel mesh?
Adult rats can eventually damage light-gauge (20-gauge or thinner) mesh through persistent gnawing. However, 16-gauge or heavier welded wire mesh with proper galvanizing is effectively chew-proof. The real risk is at edges and fasteners, which is why premium kits integrate mesh into the frame rather than attaching it as a separate component.
Will these floor kits also prevent snakes and other pests from entering?
Yes, the same barriers that stop rodents also exclude most snakes, skunks, opossums, and crawling insects. The 1/4-inch mesh aperture blocks all but the smallest snakes, and the ground seals deter larger animals. For venomous snake regions, consider kits with 1/8-inch mesh for the first 12 inches above ground level.
Do I need to treat the ground underneath my shed before installation?
While not always required, treating the soil with a rodent repellent granule creates an additional deterrent layer. More importantly, remove organic debris and install a gravel base. This eliminates food sources and makes burrowing difficult. For severe infestations, consider a buried hardware cloth apron extending 12 inches outward from the foundation.
Are smart floor frame kits with sensors worth the extra cost?
For sheds storing valuable items or in high-pressure areas, smart sensors provide peace of mind that’s worth the 20-30% price premium. The ability to detect compromise attempts before they succeed prevents damage rather than just alerting you after the fact. However, for basic garden sheds in low-pressure areas, traditional passive barriers are sufficient.
Can I install a rodent-proof floor frame on a slope?
Absolutely, but you’ll need a kit designed for sloped sites. These include adjustable pier brackets and flexible mesh panels that accommodate grade changes. The key is maintaining a consistent barrier height above ground—typically 12 inches minimum—while keeping the floor itself level. Some kits offer telescoping legs that adjust from 8 to 24 inches to handle significant slopes.
How do I know if my existing shed already has rodents before installing a new floor?
Look for droppings (small, dark pellets), gnaw marks on wood or stored items, nesting materials like shredded paper or fabric, and oily rub marks along walls where rodents travel. Listen for scratching sounds at dawn and dusk. If you suspect an infestation, set snap traps for a week before installation to catch any residents—you don’t want to seal them inside.
What’s the difference between rodent-resistant and rodent-proof?
“Resistant” means the design deters rodents but may not withstand persistent attempts. “Proof” indicates the system has been tested and certified to prevent entry by specified rodent species under aggressive conditions. Look for kits with third-party testing certification (like NPMA or ASTM) to ensure you’re getting true rodent-proof performance, not just marketing language.
Can I use a rodent-proof floor frame kit for other structures like chicken coops or rabbit hutches?
Yes, but specify the intended use when ordering. These structures have different load requirements and may need specialized coatings that are animal-safe. For chicken coops, you’ll want kits with smaller mesh (1/2-inch) to exclude weasels and snakes. Rabbit hutches require solid flooring with mesh only at edges to prevent foot injuries while still blocking diggers.
How do these kits affect shed ventilation and moisture control?
Properly designed kits actually improve ventilation by elevating the floor and incorporating vented panels. The mesh barrier allows air circulation that prevents moisture buildup, while integrated baffles block driving rain. For humid climates, choose kits with vapor-permeable mesh that lets moisture escape but keeps pests out. The result is a drier, healthier shed interior compared to solid, ground-contact floors.