A well-defined pathway does more than guide footsteps through your garden—it creates visual structure, prevents erosion, and transforms ordinary landscaping into a polished, intentional design. Yet too many garden paths dissolve into surrounding mulch or lawn, losing their definition within a single season. Stone and concrete edging pieces act as architectural punctuation, providing that crucial finishing touch while solving practical problems like weed encroachment and soil migration.
Whether you’re refreshing an existing walkway or designing a new garden path from scratch, understanding the nuances between different edging materials, profiles, and installation methods will save you from costly mistakes. This comprehensive guide explores everything you need to know about selecting and installing stone and concrete pathway edging that will elevate your outdoor space for decades to come.
Top 10 Stone Concrete Edging for Garden Pathways
Detailed Product Reviews
1. Beuta Landscape Edging | Garden Edging Border | Faux Stone Bricks for Lawn edging, Flower beds, Pathways & Yard Edging– 4 Packs | Each Section Has 6 Bricks 48"L x 4"W x 2.25"H | 12 Spikes |Cobblestone

Overview: The Beuta 4-Pack Cobblestone edging delivers a premium solution for homeowners wanting natural stone aesthetics without the weight and installation difficulty. Each 48-inch section features six realistic faux stone bricks that interlock seamlessly, providing 16 total linear feet of coverage. Manufactured in the USA from durable, all-season materials, this system includes 12 anchoring spikes to secure landscape boundaries and prevent mulch migration effectively.
What Makes It Stand Out: The authentic cobblestone texture creates a high-end appearance that closely mimics real masonry. The interlocking design accommodates both straight runs and gentle curves, while the lightweight construction makes handling dramatically easier than genuine stone. Multiple spikes per section ensure the edging stays firmly in place, protecting against weed trimmer damage. Domestic manufacturing guarantees consistent quality control and material integrity throughout all seasons.
Value for Money: At $99 for four sections ($24.75 per section), this sits in the mid-to-premium range. While pricier than basic plastic edging, it’s considerably cheaper than natural stone when factoring in material and labor costs. The durability and realistic appearance justify the investment for front-yard applications where curb appeal matters. For projects requiring 10-20 feet of edging, this 4-pack hits the sweet spot between cost and convenience.
Strengths and Weaknesses: Pros: Highly realistic stone appearance; durable all-weather construction; straightforward interlocking installation; effective mulch barrier; protects against trimmer damage. Cons: Per-linear-foot cost is high; plastic may fade with prolonged sun exposure; anchoring spikes might require reinforcement in loose soil; Function Bricks for complex shapes sold separately.
Bottom Line: This Beuta 4-Pack delivers professional-grade aesthetics with DIY-friendly installation. It’s ideal for visible areas where appearance matters and represents a smart compromise between cost and authenticity. Recommended for homeowners tackling small to medium projects who value American-made quality and realistic design.
2. Beuta Landscape Edging | Garden Edging Border | Faux Stone Bricks for Lawn Edging, Flower beds, Pathways & Yard Edging– 1 Pack | Each Section Has 6 Bricks 48" L x 4" W x 2.25" H | 3 Spikes |Sandstone

Overview: The single-pack Beuta Sandstone edition provides an accessible entry point into premium faux stone edging. Offering the same 48-inch section with six realistic bricks as its multi-pack siblings, this option allows homeowners to purchase exactly what they need without overcommitting. The sandstone colorway provides a warmer, lighter alternative to traditional gray stone, complementing Mediterranean or desert-inspired landscapes perfectly while delivering the same USA-made quality.
What Makes It Stand Out: This single-section package eliminates waste for tiny projects like isolated flower beds or tree rings. It serves as an ideal sample, letting you evaluate quality and color match before investing in larger quantities. The same interlocking design found in bulk packs ensures you’re not sacrificing quality for quantity. For renters or those with evolving landscape plans, the ability to add sections incrementally proves invaluable, making it a flexible long-term solution.
Value for Money: At $25.50 per section, the per-unit cost is higher than bulk options, but the minimal upfront investment makes it economically sensible for small applications. Covering just four linear feet, it’s perfect for a single garden bed or pathway accent. When compared to the cost and effort of real stone for a similar small area, the value proposition remains strong. The ability to purchase exactly one section prevents leftover material waste and storage headaches.
Strengths and Weaknesses: Pros: Lowest financial barrier to entry; same premium quality as larger packs; allows incremental project expansion; lightweight and easy to handle; perfect for testing color match. Cons: Highest per-section cost in the Beuta lineup; only three spikes may be insufficient for uneven terrain; limited to very small projects; connectors for curves sold separately.
Bottom Line: This single pack excels as a trial unit or for diminutive edging needs. It’s the most practical choice when you need less than eight feet of coverage or want to verify the product meets your expectations before a major purchase. Smart for cautious buyers and small-scale applications where flexibility matters more than maximum value.
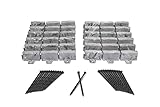
3. Beuta Landscape Edging | Garden Edging Border | Faux Stone Bricks for Lawn edging, Flower beds, Pathways & Yard Edging– 10 Packs | Each Section Has 6 Bricks 48"L x 4"W x 2.25"H | 30 Spikes|Cobblestone

Overview: The Beuta 10-Pack Cobblestone bundle targets large-scale landscaping projects, delivering 40 linear feet of premium faux stone edging in one comprehensive package. Each of the ten 48-inch sections contains six realistic bricks that interlock to create continuous, professional-looking boundaries for extensive flower beds, winding pathways, or comprehensive yard perimeter treatments. With 30 spikes included, this kit provides ample hardware for secure installation across varied terrain.
What Makes It Stand Out: Bulk packaging ensures color consistency across your entire project, eliminating the risk of batch variations that can occur when purchasing separately. For substantial undertakings, having all materials arrive together streamlines planning and installation. The sheer quantity allows for ambitious designs that smaller packs cannot accommodate. The interlocking system scales beautifully, maintaining alignment over long runs while still accommodating curves and angles with additional components.
Value for Money: At $240 ($40 per section), this 10-pack presents a confusing value proposition—it’s significantly more expensive per section than the 4-pack option. While bulk purchases typically offer discounts, this pricing structure penalizes large-project buyers. The total cost covers substantial linear footage, but savvy shoppers should compare against purchasing multiple 4-packs. The convenience of a single shipment may justify the premium for some, but the per-unit math demands scrutiny before committing to this quantity.
Strengths and Weaknesses: Pros: Comprehensive solution for large projects; guaranteed color consistency; reduces packaging waste; same high-quality USA construction; adequate spike supply. Cons: Poor per-unit value compared to smaller packs; large upfront investment may be excessive; requires significant storage if not used immediately; pricing structure lacks bulk discount logic.
Bottom Line: Only consider this 10-pack if you require exactly 40 feet and the 4-pack configuration is unavailable. The pricing defies conventional bulk-buying logic, making multiple smaller packs the smarter financial choice. Verify current pricing before committing, as this may reflect a third-party markup rather than manufacturer pricing, potentially costing you significantly more than necessary.
4. EasyFlex No-Dig Landscape Edging with Anchoring Spikes, 2.7 in Tall Decorative Stone-Look Garden Border, 15 Foot Kit, Slate Gray
Overview: The EasyFlex No-Dig system revolutionizes landscape edging with its trench-free installation process. This 15-foot kit includes twelve 2.5-inch-tall stone-look sections and 24 spiral anchoring spikes, offering a practical alternative to traditional edging. The slate gray color provides a neutral, contemporary aesthetic that blends with various landscape styles. Designed for DIYers who prioritize efficiency, this solution eliminates the most labor-intensive aspect of edging installation while delivering reliable performance.
What Makes It Stand Out: The no-dig methodology is the star feature—simply position the edging and drive spikes through integrated tabs. This saves hours of backbreaking trenching work. The built-in spines allow the rigid sections to flex into curves or cut for corners, providing design versatility without separate components. The generous spike count (24 for 15 feet) ensures superior anchoring compared to many competitors. The system’s ability to withstand string trimmers and temperature fluctuations adds practical longevity for busy homeowners.
Value for Money: At $49.99 for 15 feet, the cost per linear foot is approximately $3.33, making it one of the most budget-friendly options available. This pricing democratizes professional-looking landscape borders for cost-conscious homeowners. When factoring in the eliminated labor of trenching, the value increases substantially. While it may not match the realism of faux stone, the functionality-to-price ratio is exceptional for basic border definition and mulch containment needs.
Strengths and Weaknesses: Pros: Extremely easy no-dig installation; flexible design options; abundant anchoring spikes; durable plastic construction; excellent price point. Cons: Stone appearance is less realistic than faux brick options; shorter height may not suit deep mulch beds; plastic aesthetic can look budget up close; limited to 15-foot increments for optimal pricing.
Bottom Line: The EasyFlex kit excels for DIYers who want quick, effective results without excavation. It’s ideal for backyard beds and areas where installation speed trumps premium aesthetics. Highly recommended for first-timers and those with physical limitations that make digging difficult. This system proves that convenience and affordability can coexist without sacrificing basic functionality.
5. 25 ft. Decorative Plastic Brick Edging Kit Garden Pathway Lawn Tree Edge Border, Landscaping Bricks, Landscape Edging Stone, Garden Boarders Stone

Overview: This 25-foot decorative plastic brick kit offers the most extensive coverage of any option reviewed, containing 35 individual bricks, 34 connectors, and 2 end caps. The modular design allows for unprecedented flexibility in creating both straight borders and curved pathways. Capable of forming circles as small as 42 inches in diameter, this system adapts to trees, garden beds, and walkway edges with equal proficiency. The lightweight construction ensures anyone can handle installation without heavy lifting or specialized tools.
What Makes It Stand Out: The connector-based system provides superior customization compared to fixed-length sections. Each brick can pivot on its connectors, enabling true curves rather than approximated angles. The 25-foot length accommodates substantial projects in a single purchase, while the end caps provide finished, professional terminations. This adaptability makes it suitable for complex layouts that stump rigid systems. The ability to create perfect circles around trees is a distinct advantage that competing products struggle to match.
Value for Money: At $75.50 for 25 feet, the per-foot cost is approximately $3.02—the best value for coverage area among all reviewed products. This pricing structure makes large-scale edging financially accessible. While the generic branding raises questions about long-term durability, the initial investment is low enough to justify replacement if needed. For budget-conscious landscapers covering substantial distance, this kit maximizes linear footage per dollar spent while maintaining functional flexibility.
Strengths and Weaknesses: Pros: Longest coverage per kit; highly flexible connector system; includes end caps; excellent price per foot; suitable for complex curves. Cons: Generic brand with unknown quality; plastic appearance less realistic; many small pieces increase assembly time; connector durability concerns; may shift without adequate ground preparation or additional anchoring.
Bottom Line: This kit serves budget-minded DIYers with large or unusually shaped areas to edge. The connector system solves layout challenges that frustrate rigid alternatives. Accept the potential quality trade-off for the unbeatable coverage and flexibility. Best for backyard projects where function supersedes high-end appearance and where the ability to create custom shapes outweighs concerns about premium materials.
6. VEVOR Faux Stone Landscape Edging, No Dig Garden Edging Border, Flexible Blocks for Lawn Edging, Flower Beds, Driveway, Yards with 12 Spikes, 4 Pack 24 Bricks 16FT Kit, 46.5" Lx 3.7" W x 2.2" H, Brown

Overview: The VEVOR Faux Stone Landscape Edging delivers premium aesthetic appeal through rotational-molded PE plastic that convincingly mimics natural stone. This 16-foot kit includes 24 substantial interlocking bricks in warm brown, each measuring 46.5 inches long, creating significant visual impact for driveways, pool edges, and garden beds requiring elevated landscape definition.
What Makes It Stand Out: The hyper-realistic texture features raised surface patterns that add genuine depth uncommon in plastic edging. The modular design flexes for creative curves without cutting, while the hollowed-out bottom shell prevents sinking in soft soil—a thoughtful engineering detail rarely seen. Rotational molding ensures consistent thickness and superior durability compared to injection-molded alternatives.
Value for Money: At $69.98 ($4.37 per foot), this commands premium pricing. However, the manufacturing quality, realistic appearance, and anti-sink design justify the cost versus basic PVC options. For homeowners seeking masonry aesthetics without professional installation expenses, this represents strong long-term value despite higher upfront investment.
Strengths and Weaknesses: Strengths include exceptional realism, durable weather-resistant construction, flexible configuration, and the innovative hollow base. The lightweight 2.2-pound bricks enable easy handling despite their size. Weaknesses involve the price premium and a discrepancy between the advertised 12 spikes and features listing 8 spikes. The brown color may also limit design versatility compared to neutral grey options.
Bottom Line: This is the premier choice for discerning homeowners prioritizing authentic stone appearance and lasting durability. While pricier than alternatives, the VEVOR kit delivers professional-grade results that enhance property value, making it worth the investment for permanent, high-visibility landscape upgrades.
7. 8Pcs Landscape Edging with 24 Pieces 8-Inch Spikes | for Flower Beds, Tree Rings, Pathways | Garden Edging Border Stone 12ft Long, 3-Inch Tall,Faux Stone Edging for Landscaping (Dark Grey)

Overview: This eight-piece faux stone edging kit provides 12 feet of dark grey border solution for fundamental landscaping needs. Designed for flower beds, tree rings, and pathways, the system includes an impressive 24 spikes for secure installation, making it a practical choice for DIY gardeners seeking straightforward functionality without complexity.
What Makes It Stand Out: The generous 3:1 spike-to-panel ratio ensures exceptional stability, particularly crucial in loose or sandy soils where edging tends to shift. Its 3-inch height strikes a practical balance between visibility and subtlety, while the dark grey color offers neutral versatility that complements most outdoor schemes and effectively conceals dirt and debris.
Value for Money: Priced at $29.99 ($2.50 per foot), this occupies the mid-range sweet spot. It delivers adequate quality without the premium cost of rotational-molded alternatives. For budget-conscious homeowners covering smaller areas or experimenting with layouts, this represents sensible spending with reasonable durability expectations for the price point.
Strengths and Weaknesses: Strengths include the abundant spike supply, easy interlocking design, effective grass barrier functionality, and affordable pricing. The neutral dark grey finish provides design flexibility. Weaknesses are the modest 3-inch height, which may not contain deeper mulch layers, and thinner plastic construction that may degrade faster under intense UV exposure. Limited flexibility for tight curves is another constraint.
Bottom Line: A reliable workhorse for basic edging projects, this kit offers excellent spike coverage and straightforward installation at a fair price. While not the most durable or attractive option available, it delivers solid performance for homeowners seeking functional, no-frills landscape definition on a moderate budget.
8. Suncast Interlocking Border Edging - Stone -Like Poly Construction for Garden, Lawn, and Landscape Edging - Water Resistant Border for Containing Trees, Flower Beds and Walkways - Light Taupe, 20

Overview: Suncast’s 20-piece interlocking edging system leverages the brand’s reputation for durable outdoor products. The light taupe, stone-like poly construction provides approximately 20 feet of coverage, offering a water-resistant solution for containing trees, flower beds, and walkways with minimal installation effort and proven weather resistance.
What Makes It Stand Out: The effortless slide-together connection system eliminates separate connectors, reducing failure points and accelerating installation. Suncast’s proprietary poly formulation demonstrates superior weatherproofing, maintaining structural integrity through freeze-thaw cycles that compromise lesser plastics. The system readily forms both curves and 90-degree corners without cutting.
Value for Money: At $51.99 (approximately $2.60 per foot), you’re paying a modest premium for brand reliability and proven durability. This costs slightly more than generic alternatives but significantly less than premium realistic options, positioning it as a smart middle-ground investment for long-term applications where consistent performance matters.
Strengths and Weaknesses: Strengths include the intuitive connection system, robust weather resistance, versatile layout capabilities, and established brand warranty support. The light taupe color reflects heat, reducing soil temperature fluctuations. Weaknesses involve unspecified height (likely under 3 inches), limited aesthetic realism compared to high-end alternatives, and a higher price point than budget competitors offering similar coverage.
Bottom Line: Suncast delivers dependable, hassle-free performance for homeowners prioritizing durability over hyper-realism. The tool-free assembly and weather-resistant construction make it ideal for large projects or regions with harsh climates. A trustworthy choice that balances cost, convenience, and longevity for practical landscape management.
9. Landscape Edging, 4 Inch Tall Faux Stone Edging for Landscaping, 20pcs Plastic Garden Edging Border (Total 16FT) for Flowerbeds, Yard, with 20pcs Anchoring Spikes, Greystone

Overview: This 20-piece greystone edging kit delivers an impressive 4-inch height across 16 feet of coverage, making it the tallest option in its price class. The PVC construction with imitation stone texture provides basic landscape separation for flowerbeds and yards, supported by 20 anchoring spikes for straightforward, no-dig installation suitable for DIY projects.
What Makes It Stand Out: The exceptional 4-inch height effectively contains deep mulch layers and prevents aggressive grass rhizome infiltration better than standard 2-3 inch borders. At $1.37 per foot, it offers the lowest cost-per-foot ratio reviewed, enabling large-scale projects on minimal budgets. The 9.6-inch panel length allows reasonable customization without excessive connections.
Value for Money: Priced at just $21.99, this represents unbeatable value for covering substantial linear footage. While PVC lacks the longevity of PE plastic, the cost savings allow for replacement every few years while still spending less than premium alternatives. Perfect for renters, experimental designs, or expansive properties requiring maximum coverage per dollar.
Strengths and Weaknesses: Strengths include the superior height, excellent affordability, adequate spike count, and easy no-dig installation. The greystone color provides decent camouflage. Weaknesses involve thinner PVC material prone to cracking in cold weather, less realistic texture, and potential UV fading within 2-3 seasons. The shorter panels require more connections, creating additional potential failure points.
Bottom Line: The ultimate budget champion for maximum coverage and height. Accept the durability trade-offs and you get remarkable functionality for minimal investment. Ideal for large properties, temporary installations, or gardeners who frequently redesign layouts. Consider purchasing extra spikes for softer soils to compensate for the lighter-weight construction.
10. EasyFlex No-Dig Landscape Edging with Anchoring Spikes, 2.7 in Tall Decorative Stone-Look Garden Border, 15 Foot Kit, Brown

Overview: EasyFlex’s 15-foot kit revolutionizes installation with its innovative no-dig spiral spike system. The 2.7-inch tall stone-look border comes in twelve 15-inch-wide sections, designed for tool-free placement around flower beds, trees, and gardens. The brown color provides natural earth-tone integration for seamless landscape blending.
What Makes It Stand Out: The spiral anchoring spikes deliver superior grip compared to standard straight stakes, resisting frost heave and ground movement. Built-in spines allow precise bending for curves and tree rings without cutting, while the material withstands direct string trimmer contact—an engineering feat that solves a common edging failure point and extends product lifespan significantly.
Value for Money: At $49.99 ($3.33 per foot), this commands a premium justified by its innovative hardware and professional-grade durability. The time saved on installation and replacement costs from trimmer damage makes it economical for serious landscapers despite higher upfront cost. The included 24 spikes provide double the anchoring power of standard kits.
Strengths and Weaknesses: Strengths include the exceptional spike design, trimmer resistance, flexible yet rigid construction, and true no-dig convenience. The brand’s reputation for landscape products ensures quality consistency. Weaknesses are the relatively short 2.7-inch height, limited coverage per kit, and premium pricing that may exceed casual gardeners’ budgets for simple projects.
Bottom Line: The professional’s choice for hassle-free, long-lasting landscape definition. While expensive and modest in height, the innovative spike system and trimmer-proof construction eliminate common failure modes. Invest in this for permanent, maintenance-free borders that save labor and replacement costs over time, particularly in high-maintenance areas.
Why Stone and Concrete Edging Transforms Your Garden Pathways
The magic of proper edging lies in its dual-purpose functionality. Physically, it creates a barrier that contains pathway materials—whether gravel, pavers, or stepping stones—preventing them from scattering into garden beds or lawn areas. This containment reduces maintenance while preserving clean lines that make your garden appear professionally designed. Aesthetically, edging frames your pathway like a picture frame, drawing the eye forward and creating visual rhythm that enhances the overall landscape composition.
Unlike plastic or metal alternatives that can look temporary or industrial, stone and concrete edging brings permanence and natural beauty that ages gracefully. These materials develop character over time, with natural weathering that adds patina rather than deterioration. The weight and mass of stone and concrete also mean they stay put through freeze-thaw cycles, heavy rains, and the occasional errant lawnmower wheel.
Understanding the Core Benefits of Pathway Edging
Before diving into specific materials, it’s worth examining why edging deserves a place in your landscaping budget. Beyond the obvious visual upgrade, quality stone or concrete edging provides several underappreciated advantages that compound over time.
Structural Integrity: Edging acts as a retaining edge for your pathway base material, preventing lateral movement that leads to ruts, sunken spots, and uneven surfaces. This is particularly crucial for gravel paths, where edge containment can extend the path’s lifespan by 50% or more.
Weed and Grass Control: A properly installed edging barrier extends several inches below ground, blocking invasive runners from bermuda grass and preventing weed seeds from establishing along path edges. This cuts weeding time dramatically while keeping your pathway looking crisp.
Water Management: Strategic edging helps direct water flow away from your path and adjacent plantings, reducing erosion and preventing waterlogging in sensitive garden areas. Some concrete edging systems even incorporate subtle drainage channels.
Property Value: Permanent hardscaping improvements consistently rank among the highest ROI landscaping projects. Stone and concrete edging signals quality and attention to detail that appraises well and impresses potential buyers.
Natural Stone vs. Concrete: Making the Right Material Choice
The fundamental decision between natural stone and concrete shapes every subsequent choice in your project. Neither material is universally superior—each excels in different situations, and your specific garden conditions, aesthetic preferences, and maintenance expectations should drive the decision.
Natural stone offers unparalleled authenticity, with each piece bearing unique color variations, textures, and weathering characteristics that can’t be replicated. It’s the premium choice for heritage gardens, naturalistic landscapes, and high-end designs where authenticity matters. However, this beauty comes with higher material costs, weight considerations, and often more complex installation.
Concrete provides remarkable consistency, versatility, and value. Modern manufacturing techniques have closed the aesthetic gap considerably, with stamped and colored options that convincingly mimic natural stone at a fraction of the cost. Concrete also allows for interlocking designs and uniform dimensions that simplify installation and create clean, contemporary lines.
Consider your garden’s existing materials. A stone cottage with natural slate patios demands stone edging for cohesion, while a modern home with clean lines might benefit from the crisp geometry of concrete. Your local climate also plays a role—regions with extreme freeze-thaw cycles may see better performance from certain dense stone types or air-entrained concrete formulations.
Exploring Natural Stone Edging Options
Flagstone Edging Characteristics
Flagstone provides a flat, relatively thin profile that creates a subtle, natural edge. Typically 1-3 inches thick and available in irregular shapes or dimensional cuts, flagstone edging works beautifully for informal paths and cottage gardens. The broad surface area distributes weight effectively, reducing sinking or shifting.
When selecting flagstone, examine the stone’s density and composition. Sandstone flagstone offers warm, earthy tones and natural slip resistance but may be more porous in wet climates. Bluestone and quartzite provide exceptional durability and a more refined aesthetic, though at premium price points. Always inspect samples for consistent thickness—variations exceeding ½ inch will complicate installation and create tripping hazards.
Cobblestone Edging Features
Cobblestone delivers classic Old World charm with remarkable durability. These rectangular or cube-shaped stones, typically 4-6 inches on each side, create a pronounced edge that clearly defines pathway boundaries. Their mass—often 10-15 pounds per piece—means they stay put once installed.
The key to successful cobblestone edging lies in the joint width and pointing. Tight joints (¼ inch) with mortar create a formal, continuous edge, while wider joints with creeping thyme or moss soften the look for cottage gardens. Granite cobblestones offer the ultimate in longevity, often outlasting the pathways they border, while limestone provides softer color palettes that blend with traditional architecture.
Fieldstone and River Rock Profiles
For the most naturalistic edge, fieldstone and river rock pieces create an organic, meandering border that looks as though it emerged naturally from the landscape. These irregular, rounded stones work exceptionally well for woodland paths, water features, and Asian-inspired gardens where rigid geometry feels out of place.
Installation requires more artistry than other stone types. You’ll need to partially bury each stone to create stability while varying heights and projections for authenticity. The irregular nature means you’ll spend more time sorting and fitting pieces, but the result is a one-of-a-kind edge that softens the transition between path and planting bed.
Concrete Edging Solutions Demystified
Precast Concrete Curbing
Precast concrete edging has evolved far beyond the bland gray strips of decades past. Modern manufacturing produces pieces in various profiles—from beveled and bullnose to decorative scallops—that can be laid like pavers. These units typically measure 12-24 inches in length with interlocking or butt-joint designs.
Quality varies dramatically in precast products. Examine pieces for adequate reinforcement—fiber mesh should be visible in cross-section—and proper curing, indicated by uniform color throughout. Avoid pieces with surface-only color treatments, which will reveal gray concrete as soon as chips occur. The best products use integral color that runs through the entire piece.
Stamped and Decorative Concrete
Stamped concrete edging offers the aesthetic of natural stone with the installation ease of concrete. Manufacturers create rubber molds from actual stone, then cast concrete to capture authentic texture and variation. These pieces often include subtle color variations that mimic natural weathering.
The advantage lies in consistency—you get the look of irregular stone with uniform thickness and dimensions that speed installation. Many systems include corner pieces, end caps, and custom lengths that create a cohesive look. However, inspect the stamp depth; shallow impressions can look artificial, while deeper stamps collect dirt and require more cleaning.
Poured-in-Place Concrete Options
For ultimate customization, poured-in-place concrete edging allows you to create any shape, height, or profile. Using flexible forms, you can follow complex curves, integrate drainage slopes, and match existing architectural details precisely. This method excels for modern designs requiring crisp, minimalist lines.
The process demands more skill and planning. You’ll need to excavate a continuous trench, install formwork, place rebar reinforcement, and finish the concrete surface. Consider adding integral color and a surface hardener to improve durability and appearance. While DIY-friendly in short sections, long runs or complex designs benefit from professional installation to ensure proper consolidation and curing.
Key Design Considerations for Your Garden Style
Your garden’s architectural style should heavily influence your edging choice. A formal English garden demands different treatment than a xeriscape or Japanese stroll garden.
Cottage and Informal Gardens: Embrace irregularity with fieldstone, tumbled cobblestones, or stamped concrete with varied edges. Allow plants to spill over the edging slightly, softening the transition. Wider joints planted with creeping thyme or sedum enhance the casual feel.
Modern and Contemporary Landscapes: Opt for concrete with clean lines, smooth finishes, and minimal joint width. Consider a low-profile, rectangular edge that sits flush with the pathway surface, creating a sleek, plane-like appearance. Dark charcoal or pure white concrete reinforces the contemporary aesthetic.
Traditional and Colonial Gardens: Cobblestone or brick-patterned concrete maintains historical authenticity. Choose warm, earthy tones and consider mortar-set installation for permanence. A soldier course—pieces set vertically—creates a classic, formal edge that complements traditional architecture.
Naturalistic and Woodland Gardens: Irregular fieldstone with varied heights mimics natural outcroppings. Select stones with moss or lichen already present, and install them to look like bedrock emerging from the soil. Avoid perfectly straight lines; instead, follow the path’s natural contours.
Critical Dimensions and Sizing Guidelines
Choosing the right physical dimensions impacts both aesthetics and functionality. Edging that’s too subtle fails to contain pathway materials, while overly massive edging overwhelms narrow paths.
Height Above Path: For most applications, 2-4 inches above the pathway surface provides adequate containment without looking heavy. Gravel paths benefit from the higher end of this range to prevent stone migration, while paved paths can use lower profiles for a subtle definition.
Below-Grade Depth: The hidden portion does the heavy lifting. A minimum of 4-6 inches below ground prevents frost heave and blocks root intrusion. In cold climates with deep frost lines, extend this to 8 inches or more. This depth also anchors the edging against lateral pressure from pathway base materials.
Width and Profile: The visible width typically ranges from 4 inches for subtle concrete curbing to 12 inches for statement stone pieces. Consider the pathway width—edging should occupy no more than 10% of the total path width. A 3-foot path looks balanced with 4-6 inch edging, while a grand 6-foot entrance walk can handle 8-12 inch borders.
Piece Length and Module: For precast concrete, 24-inch pieces create faster installation with fewer joints. Natural stone varies, but pieces longer than 18 inches become heavy and difficult to handle solo. Plan your path length in these modules to minimize cutting and waste.
Essential Features to Evaluate Before Buying
Durability and Weather Resistance
Not all stone and concrete withstands the elements equally. For concrete, examine the compressive strength rating—look for products exceeding 4,000 PSI for residential use. Higher strength indicates better cement content and curing, translating to longer life and crack resistance.
Natural stone durability depends on absorption rates. Water absorption under 1% indicates excellent freeze-thaw resistance. Test this by placing a few drops of water on the stone’s surface; rapid absorption suggests high porosity and potential durability issues. Slate and sandstone can delaminate in harsh winters, while granite and bluestone endure for generations.
Edge Profile and Safety Considerations
The top edge profile affects both safety and aesthetics. A bullnose (fully rounded) profile prevents shin scrapes and looks softer, ideal for family gardens. A beveled or chamfered edge provides a crisp, modern line while still being foot-friendly. Avoid sharp, square edges in high-traffic areas where children or elderly visitors might trip or fall.
Consider the front face profile as well. A tapered piece that widens at the base provides stability and resists tipping. Some concrete systems include a small lip on the backside that helps lock in base materials—a clever feature that improves performance without affecting appearance.
Color Fastness and Fading
Color treatment determines long-term appearance. For concrete, integral color—pigment mixed throughout the entire batch—maintains its hue even if the surface chips or wears. Surface-applied color hardeners offer better initial color depth but can fade unevenly over time.
Natural stone color stability varies by type. Iron-rich stones like some sandstones can develop rust stains when exposed to water and fertilizers. Light-colored limestones may darken with organic staining. Ask suppliers about the stone’s source and any known color-change issues in your climate.
Installation Methods and Complexity Levels
Dry-Lay Techniques
Dry-laying stone edging involves placing pieces directly on a compacted gravel base without mortar. This method offers flexibility—pieces can be adjusted seasonally if frost heave occurs—and simplifies repairs. It’s ideal for informal gardens where slight movement won’t detract from the aesthetic.
Success requires meticulous base preparation. Excavate 6-8 inches deep, line with landscape fabric to prevent weed growth, then fill with compacted crushed stone (¾ inch minus). Level this base carefully, as any irregularities will telegraph through to the finished edge. Set each stone, check for level and alignment, then backfill with soil or gravel, tamping firmly to lock pieces in place.
Mortar-Set Applications
For permanent, unmovable edging, mortar setting provides maximum stability. This method suits formal gardens, high-traffic areas, and situations where you need to create a continuous barrier against aggressive grass spreaders. A proper mortar bed also allows for precise leveling across long runs.
Mix a stiff mortar (4 parts sand to 1 part cement) and apply a 1-2 inch bed in the trench. Set each piece, tapping gently with a rubber mallet to achieve level. For visible joints, strike them while the mortar is thumbprint-hard for a clean finish. In cold climates, consider adding a latex admixture to improve freeze-thaw resistance. Allow 24-48 hours for curing before backfilling or exposing to traffic.
No-Dig Solutions
Recent innovations include heavy-duty concrete edging designed for minimal excavation. These pieces feature a long, thin profile that gets hammered into the ground like a stake, with a decorative top visible above grade. While not suitable for all situations, they excel for retrofitting existing paths or situations where extensive digging isn’t feasible.
These systems work best in stable soils without significant frost heave. The installation involves slicing the soil with a spade, then driving the edging piece into the cut with a mallet. The key is ensuring the driving edge remains level—use a long board across multiple pieces as a guide. While faster, these systems offer less depth for weed blocking and may not contain heavy gravel as effectively as traditional methods.
Drainage and Foundation Considerations
Proper drainage extends edging life dramatically. Water trapped behind edging can freeze, causing heaving, or saturate soil, leading to settlement. Plan for water movement from the start.
Slope and Grade: Ensure your pathway slopes slightly away from structures (1-2% grade minimum). Edging should follow this grade without creating dams. If your path is level, incorporate weep holes—small gaps in mortar joints or drilled holes in concrete—every 4-6 feet to allow water escape.
Base Drainage: Lay a 2-inch bed of clean gravel (¾-1 inch diameter) behind your edging before backfilling with soil. This creates a French drain effect, collecting and redirecting water away from the edging’s foundation. In clay soils, extend this gravel bed 6-8 inches deep to prevent waterlogging.
Frost Protection: In cold regions, place a 2-inch layer of rigid foam insulation vertically behind the edging before backfilling. This prevents frost from gripping the back of the edging and heaving it forward. The insulation disappears below grade but provides insurance against winter damage.
Maintenance Requirements Across Materials
Natural Stone Care
Most natural stone requires minimal maintenance beyond occasional cleaning. Power washing with a wide fan tip removes dirt and algae, but keep pressure under 2,500 PSI to avoid eroding soft stones. Reseal porous stones like sandstone every 2-3 years with a breathable, penetrating sealer that won’t create a slippery surface.
Address efflorescence—that white powdery deposit—by scrubbing with a diluted vinegar solution. Prevent it by ensuring proper drainage and using a vapor barrier behind retaining-type edging. For organic stains from leaves or mulch, a poultice made from baking soda and water draws out discoloration without harsh chemicals.
Concrete Maintenance
Concrete edging benefits from annual inspection and minor repairs. Fill hairline cracks with a concrete caulk that remains flexible, preventing water infiltration that worsens cracking. Clean surfaces yearly with a mild detergent and soft brush—avoid harsh chemicals that degrade surface treatments.
Reseal decorative concrete every 2-3 years to maintain color vibrancy and stain resistance. Use a sealer appropriate for your climate—solvent-based for cold regions, water-based for milder areas. If pieces settle or tilt, they can often be lifted, base material added, and re-leveled without complete replacement, a major advantage over mortar-set stone.
Cost Factors and Budget Planning
Material costs vary widely, but understanding the full project scope prevents budget overruns. Natural stone typically runs $8-25 per linear foot for materials alone, with premium imported granite or bluestone reaching $40+ per foot. Concrete offers more budget-friendly options, with quality precast pieces ranging $3-12 per foot.
Installation costs often exceed material costs, especially for stone. Professional installation of natural stone edging averages $15-30 per foot, reflecting the labor-intensive fitting and leveling process. Concrete edging installation typically costs $8-15 per foot due to faster installation.
DIY installation saves labor costs but requires tool investment. Budget for a plate compactor ($50-75 daily rental), masonry saw ($60-80 daily), and miscellaneous hand tools. Factor in your time—an experienced DIYer can install 10-15 feet of stone edging per day, while concrete edging might progress at 20-30 feet per day.
Hidden costs include excavation disposal (if soil can’t be on-site repurposed), landscape fabric, base gravel, and delivery fees. Stone delivery often includes a pallet charge and forklift fee, while concrete may have minimum order quantities. Always order 10% extra to account for breakage and cutting waste.
Environmental Impact and Sustainability
Stone and concrete edging present different environmental profiles. Natural stone, particularly locally sourced material, has minimal processing energy and can last centuries, making its lifetime environmental impact quite low. However, transportation from distant quarries adds significant carbon footprint—source within 100 miles when possible.
Concrete production generates CO2, but its longevity and recyclability mitigate impact. Many manufacturers now incorporate fly ash or slag cement, reducing the Portland cement content by up to 40% while improving durability. Ask suppliers about recycled content and regional manufacturing.
Consider permeability. Solid concrete curbing can increase runoff, while stone edging with gravel joints allows water infiltration. For eco-conscious designs, choose dry-laid stone or concrete pieces with intentional gaps, supporting groundwater recharge and reducing stormwater loads.
At end-of-life, natural stone can be repurposed endlessly—reused in other projects or returned to the earth. Concrete can be crushed and recycled as base material for new construction, though this requires energy-intensive processing. Choose products from companies with take-back programs for the most sustainable option.
Seasonal Considerations for Installation
Timing your installation affects both ease of work and long-term success. Spring and fall offer ideal conditions—moderate temperatures and typically adequate moisture for curing. Avoid installing during extreme heat (above 90°F) when concrete can cure too quickly, leading to surface cracking and weak edges.
Spring Installation: Wait until frost has left the ground to at least 12 inches deep. Working in frozen or saturated soil leads to settlement problems. Spring rains can help with compaction but may delay work. Have tarps ready to cover fresh mortar or concrete if unexpected showers approach.
Summer Installation: Work early morning or late afternoon to avoid heat stress on materials and installers. Keep mortar and concrete mixes cooler than 80°F—use chilled mixing water and shade material piles. Mist concrete surfaces periodically during the first 48 hours to prevent rapid moisture loss.
Fall Installation: Complete mortar-set stone at least 4 weeks before the first hard freeze to ensure adequate curing. Dry-laid stone can be installed later, but finish before ground freeze makes compaction impossible. Fall’s cooler temperatures and reduced evaporation actually improve concrete quality.
Winter Planning: Use the dormant season to finalize designs, source materials (often at off-season discounts), and schedule contractors. Avoid installation in winter unless using specialized cold-weather concrete mixes and protection measures—generally not cost-effective for residential projects.
Design Inspiration: Creative Layout Patterns
Beyond straight lines, edging can create visual interest through creative placement. Consider alternating stone heights along a woodland path, creating a rhythmic pattern that mimics natural rock outcroppings. This requires careful planning but yields stunning results.
For formal gardens, incorporate occasional “jog” patterns—where the edging steps outward to create a planting pocket for a specimen plant or ornament. This breaks long runs and adds architectural detail. Use this technique every 8-10 feet for optimal effect.
Mix materials intentionally: combine smooth concrete curving with occasional natural stone “accent” pieces every few feet. This hybrid approach balances cost while adding bespoke character. Ensure the materials share similar height and color families to maintain cohesion.
Consider lighting integration. Some concrete edging systems include channels for low-voltage wiring, allowing you to install path lights that illuminate the edge itself. For stone edging, flat-topped pieces can receive recessed LED fixtures that cast a subtle glow, combining safety with ambiance.
Common Mistakes to Avoid
Inadequate Base Preparation: The most frequent error is skimping on the gravel base. A proper base should extend at least 6 inches deep and 2 inches wider than the edging on each side. Anything less invites settlement and frost heave.
Ignoring Expansion: Concrete expands and contracts with temperature changes. In runs longer than 20 feet, include expansion joints—gaps filled with compressible foam or caulk—to prevent cracking. Stone edging needs similar consideration; leave 1/8-inch gaps between pieces in long runs to accommodate movement.
Wrong Scale: Massive 12-inch edging overwhelms a 2-foot garden path, while skinny 2-inch edging disappears on a grand entrance walkway. Always mock up a short section before committing to the full installation. Use cardboard or lumber to visualize the scale in place.
Poor Color Matching: View material samples in your garden at different times of day before purchasing. Stone and concrete colors shift dramatically under varying light conditions. A sample that looks perfect at noon may clash horribly in the warm light of early evening when you’re most likely to enjoy your garden.
Forgetting Utilities: Call utility locating services before digging. Edging trenches often run 6-8 inches deep—shallow enough to miss major lines but perfect for slicing through irrigation wires or shallow cable lines. The cost of repairs far exceeds the wait for utility marking.
Frequently Asked Questions
What’s the real difference between stone and concrete edging for durability?
Natural stone typically outlasts concrete by decades when properly installed, with some types lasting centuries. However, high-quality concrete with proper reinforcement and installation can easily serve 30-50 years. The key difference lies in failure modes: stone weathers gracefully, while concrete may crack or spall. In practice, both materials will likely outlast your need for them, making the choice more aesthetic than practical.
How much should I budget for a 50-foot garden path edging project?
For DIY installation, budget $400-800 for concrete materials and $1,200-2,500 for natural stone. Professional installation typically doubles these figures. Always add 15-20% for contingencies, base materials, and tools. Complex designs with curves or elevation changes increase costs by 25-40% due to cutting and fitting time.
Can I install stone or concrete edging myself, or is this a pro-only project?
Straightforward precast concrete edging is very DIY-friendly, requiring only basic tools and careful leveling. Natural stone installation demands more skill in fitting and leveling but remains accessible to patient DIYers with good attention to detail. Poured-in-place concrete and complex stone patterns benefit from professional expertise. Most homeowners successfully handle runs under 30 feet, while longer or curved sections may justify hiring a landscaper.
Will concrete edging crack during winter freeze-thaw cycles?
Quality concrete edging with proper mix design (air-entrained concrete) and installation rarely cracks from freeze-thaw alone. Cracking usually results from improper base preparation, inadequate joint placement, or structural movement. In cold climates, ensure your concrete has a visible air content of 5-7% (tiny bubbles visible on broken edges) and install expansion joints every 15-20 feet. Proper drainage behind the edging is even more critical than the concrete mix.
How do I stop grass and weeds from invading between edging pieces?
Prevention starts with proper installation depth—edging must extend at least 4 inches below grade to block runners. For dry-laid stone, use polymeric sand in joints; it hardens when wet, preventing weed growth while remaining flexible. In mortar-set applications, ensure complete joint filling without voids. Annual application of pre-emergent herbicide in early spring along the edging line stops weed seeds from germinating. For organic gardens, a thick mulch layer against the edging suppresses most invaders.
What’s the best edging material for curved or winding pathways?
Flexible concrete curbing, poured-in-place concrete, or small natural stone pieces (6-8 inches long) handle curves best. Large, rigid precast pieces create awkward, segmented curves. For tight radii under 5 feet, consider using a single course of brick-sized pieces that can fan out to follow the curve naturally. Some decorative concrete systems offer wedge-shaped pieces specifically for curves—worth seeking out if your design includes many bends.
How deep should I dig the trench for installing pathway edging?
The trench depth equals the edging’s below-grade portion plus 4-6 inches for the base material. For a typical 6-inch tall edging, excavate 10-12 inches deep. The trench width should be edging width plus 4 inches (2 inches each side) for working space and backfill. In unstable soils, dig deeper and add more base material. Always call for utility locates before digging, even for shallow trenches.
Can I mix stone and concrete edging in the same garden?
Absolutely, when done intentionally. Use one material for primary pathways and the other for secondary paths to create a hierarchy. Or alternate materials every few feet for a custom, high-end look. The key is maintaining consistent height and a cohesive color palette—choose concrete that mimics your stone’s undertones. Avoid mixing randomly; establish a clear pattern or rhythm to prevent a chaotic appearance.
How often will I need to seal or maintain my edging?
Natural stone needs sealing only if it’s porous and located in a staining environment (near downspouts, under trees). Apply a breathable sealer every 2-3 years. Concrete edging benefits from sealing every 2-3 years to maintain color and prevent staining. Both materials need annual inspection for settlement or damage. Dry-laid stone may need occasional piece releveling as the base settles. Overall, budget 2-3 hours of maintenance per year per 50 feet of edging.
Will edging increase my property value enough to justify the cost?
Quality hardscaping consistently returns 80-100% of investment at resale, making edging one of the higher-ROI landscaping improvements. It signals meticulous maintenance and creates instant curb appeal. Unlike plants that take years to mature, edging provides immediate visual impact. For maximum value, choose classic materials and styles that appeal broadly—avoid trendy colors or overly unique designs that might not suit the next owner’s taste.