Starting seeds indoors doesn’t require a greenhouse budget or professional equipment. In fact, some of the most successful germination setups are built piece by piece with strategic purchases that maximize every dollar. Whether you’re a first-time gardener testing the waters or a seasoned grower scaling up your operation, understanding how to evaluate budget-friendly seed starting supplies can make the difference between leggy, struggling seedlings and robust plants ready to thrive.
The key to success lies not in brand names or expensive systems, but in knowing which features actually matter for germination and early seedling development. A $25 price point per item opens up a surprising range of professional-quality tools that can serve you for multiple growing seasons. Let’s explore the essential supplies that deliver maximum value without compromising on the science of successful seed starting.
Top 10 Seed Starting Supplies for Indoor Germination
Detailed Product Reviews
1. Patigrow 60-Cell Self-Watering Seed Starter Tray with Grow Light, Seed Starter Kit with 4.07” Humidity Dome, Indoor Seedling Starter Tray, Seed Starting Trays for Plant Germination, Seeds Growing

Overview: The Patigrow 60-Cell Self-Watering Seed Starter Tray represents a comprehensive solution for indoor gardeners seeking professional-grade results. This all-in-one kit combines advanced LED grow light technology with a self-watering system, eliminating the two most common pitfalls of seed starting: inadequate lighting and inconsistent moisture. Designed for serious hobbyists and beginners alike, the system accommodates 60 seedlings under a spacious 4.07-inch humidity dome.
What Makes It Stand Out: The integrated grow light system sets this kit apart, featuring 56 high-efficiency LED beads per tray that simulate natural sunlight with customizable brightness and timer functions. The self-watering mechanism uses a capillary mat system that maintains perfect moisture levels for extended periods, requiring only a single watering from germination to transplant. The adjustable humidity vents and enlarged drainage holes provide precise environmental control rarely found in consumer-grade kits.
Value for Money: At $39.99, this kit delivers exceptional value despite its premium price point. Comparable systems with integrated lighting often cost $60-80, while purchasing components separately would exceed $50. The durable BPA-free PET construction ensures years of reuse, amortizing the initial investment. For gardeners starting multiple seasons of seedlings, the quality and completeness justify every penny.
Strengths and Weaknesses: Strengths include professional-grade LED lighting, truly effective self-watering design, robust 1.5mm thick construction, and comprehensive accessory package. The 60-cell capacity offers excellent efficiency for home gardeners. Weaknesses: the price may deter casual gardeners, and the integrated electronics require careful cleaning. The 4.07-inch dome height, while generous, may limit very tall seedlings.
Bottom Line: This premium kit earns our highest recommendation for dedicated gardeners who value convenience and results. The combination of proper lighting and self-watering eliminates guesswork, making it ideal for beginners while satisfying experienced growers. If you’re serious about seed starting, this investment pays dividends in healthier seedlings and higher success rates.
2. Gardzen 5-Set Seed Starter Tray Kits, Durable Plant Germination Trays with Humidity Vented Domes and Bases, Ideal for Seed Starting, Indoor Gardening, and Greenhouse (Total 200 Cells)

Overview: The Gardzen 5-Set Seed Starter Tray Kits offer exceptional quantity and quality for gardeners managing large-scale propagation projects. This value-packed bundle provides five complete units, each featuring 40 cells, totaling 200 planting spaces—perfect for extensive vegetable gardens or flower collections. The upgraded design incorporates user-requested improvements that enhance functionality without inflating cost.
What Makes It Stand Out: The dual ventilation system on each dome represents a significant upgrade from basic models, allowing precise humidity control throughout germination stages. Gardzen’s attention to practical details shines through the included adhesive stickers that create a tighter seal between dome and base, maximizing heat and moisture retention. The 40-cell configuration hits the sweet spot between manageability and capacity, preventing the overcrowding issues common in 72-cell trays while offering more efficiency than 12-cell units.
Value for Money: At $19.99 for five complete kits ($4 per unit), this set delivers outstanding economy. Individual similar-quality trays typically retail for $8-12 each, making this bundle effectively 50% off market rate. The durable plastic construction withstands multiple growing seasons, further enhancing long-term value. For gardeners starting numerous varieties simultaneously, the per-unit cost becomes negligible compared to purchasing seedlings.
Strengths and Weaknesses: Strengths include unbeatable price-per-unit, upgraded adjustable vents, clear domes for easy monitoring, effective drainage design, and thoughtful sealing stickers. The 200-cell total capacity handles ambitious projects effortlessly. Weaknesses: lacks self-watering capability, no integrated lighting, and the plastic, while durable, isn’t as thick as premium brands. The absence of labels or tools requires separate purchases.
Bottom Line: This Gardzen set excels for volume seed starting on a budget. The upgraded ventilation and durable construction make it a smart choice for experienced gardeners and enthusiastic beginners with space for multiple trays. While it lacks advanced features, the sheer value and quality make it our top pick for large-scale propagation projects.
3. Back to The Roots Organic Seed Starting, Compressed Block expands to 12 Quarts, Made for Herbs, Veggies, Flowers
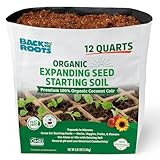
Overview: Back to The Roots Organic Seed Starting Mix revolutionizes the growing medium market with its space-saving compressed block design that expands to 12 quarts of premium potting mix. This peat-free, OMRI-listed organic blend caters to environmentally conscious gardeners seeking sustainable alternatives to traditional peat-based products. The balanced pH formulation supports diverse plant types from herbs to vegetables to flowers.
What Makes It Stand Out: The compressed brick format eliminates storage headaches while reducing environmental impact through minimal packaging. Unlike conventional peat moss, this mix uses renewable, peat-free components that don’t deplete fragile ecosystems. The OMRI listing guarantees organic integrity throughout production. The “Grow One Give One” program adds social value, donating kids’ grow kits to classrooms when you share your garden photos—transforming a purchase into community impact.
Value for Money: At $7.99 for 12 quarts, this mix costs approximately $0.66 per quart, competitive with premium organic blends while offering superior convenience. Traditional bagged organic mixes run $8-12 for similar volumes, and the compressed format saves shipping costs and storage space. The satisfaction guarantee eliminates purchase risk, while the charitable component provides intangible value beyond the product itself.
Strengths and Weaknesses: Strengths include eco-friendly peat-free composition, space-efficient storage, true organic certification, versatile pH balance, and innovative social mission. The expansion process is straightforward and satisfying. Weaknesses: requires hydration time before use, may need supplementation for heavy feeders, and the compressed format makes it difficult to use partial quantities. Some users might prefer pre-moistened convenience.
Bottom Line: This organic seed starting mix excels for eco-minded gardeners prioritizing sustainability and convenience. The peat-free formulation and charitable program distinguish it from competitors. While it requires preparation, the environmental benefits and cost-effectiveness make it an excellent foundation for any seed starting operation. Highly recommended for organic gardeners and space-conscious growers.
4. Burpee Greenhouse Indoor Starting Herbs, Flowers and Vegetables | Includes Dome, Watering, Seed Starter Tray, Coir Pellets | 10" W x 20" L x 5" H, One Size, 1 Kit (72 Cells)

Overview: The Burpee Greenhouse Indoor Seed Starting Kit leverages the trusted brand’s 145+ years of horticultural expertise into a comprehensive, no-fuss propagation system. This traditional yet effective setup includes two 36-cell trays, a water reservoir, 72 coconut coir pellets, and a humidity dome—everything needed for successful seed starting. The standardized 10"x20" footprint integrates seamlessly with professional growing equipment.
What Makes It Stand Out: Burpee’s inclusion of plant-o-gram diagrams and reusable plant markers demonstrates deep understanding of organizational challenges gardeners face. The coconut coir pellets provide a sustainable, mess-free alternative to bagged soil, expanding rapidly with warm water and delivering excellent moisture retention. The reservoir tray system maintains consistent bottom moisture without the complexity of capillary mats. Burpee’s germination guarantee and non-GMO seed commitment (when purchased separately) reflect their industry leadership.
Value for Money: At $19.99 for a complete 72-cell system with growing medium, this kit offers remarkable value. Purchasing coir pellets, trays, and reservoir separately would cost $25-30. The Burpee brand assurance and included organizational tools add intangible value. For gardeners seeking a straightforward, reliable method without electronic components, this represents optimal cost-effectiveness.
Strengths and Weaknesses: Strengths include trusted brand reputation, sustainable coir pellets, effective reservoir watering system, excellent organizational accessories, and perfect compatibility with heat mats and grow lights. The 72-cell capacity maximizes space efficiency. Weaknesses: no adjustable vents on dome, requires manual watering monitoring, and coir pellets may be too small for large seedlings. The basic design lacks modern automation features.
Bottom Line: Burpee’s kit excels for traditional gardeners who value simplicity and brand reliability. The coir pellet system and thoughtful organizational tools make it ideal for beginners, while the professional dimensions suit experienced growers. Though not feature-rich, its proven design and fair price make it a dependable choice for consistent germination success. Recommended for purists and Burpee loyalists.
5. Bonviee 5-Pack Seed Starter Trays, Seed Starter Kit with Adjustable Humidity Dome and Base Indoor Greenhouse Mini Propagator for Seeds Growing Starting (12 Cells Per Tray, Green)

Overview: The Bonviee 5-Pack Seed Starter Trays provide an ultra-affordable entry point into controlled propagation, offering five complete mini greenhouses with 12 cells each. The distinctive green base trays differentiate these from standard black trays while providing the same functionality. Designed for gardeners starting small batches of varied seeds, this kit prioritizes visibility and environmental control at an unbeatable price point.
What Makes It Stand Out: The crystal-clear domes and trays offer superior visibility compared to translucent alternatives, allowing detailed progress monitoring without disturbing the microclimate. The adjustable humidity vents provide professional-level control typically absent in budget options. Notably, these trays boast excellent temperature resistance, making them safe for heat mat use—a feature often compromised in inexpensive plastics. The 1.5-inch square cells accommodate larger seeds like tomatoes and peppers that struggle in smaller cells.
Value for Money: At $9.99 for five complete kits ($2 per unit), this represents the lowest cost-per-tray in our review. Comparable individual trays retail for $5-8 each, making this bundle 60-75% cheaper than buying separately. The durability and heat mat compatibility extend value further. For gardeners experimenting with small batches or teaching children, the minimal financial risk is ideal.
Strengths and Weaknesses: Strengths include exceptional affordability, outstanding clarity for observation, effective vent adjustment, heat mat compatibility, and appropriately sized cells for large seeds. The five-tray bundle allows variety separation. Weaknesses: limited 12-cell capacity per tray requires multiple units for large projects, thinner plastic than premium brands, and no included labels or growing medium. The green base may reduce light reflection compared to black.
Bottom Line: Bonviee’s trays excel for budget-conscious gardeners and small-scale propagators. The clarity and vent control punch well above the price class, while heat mat safety adds unexpected value. Though not suitable for mass production, these are perfect for hobbyists testing varieties or introducing children to gardening. An unbeatable value for starter gardens and experimental growing.
6. Qoolife Seed Starter Tray with Plant Light, 2 Pack Grow Lights for Seed Starting Kit with Humidity Domes, Timing Controller Adjustable Brightness for Greenhouse Propagator Station Planting Growing

Overview: The Qoolife Seed Starter Tray delivers a complete two-pack growing system for beginners seeking integrated lighting and environmental control. At $14.98, this kit combines 12-cell trays with built-in full-spectrum LEDs, humidity domes, and programmable timing features. Each tray includes eight LED lights mimicking natural sunlight, while adjustable vents and drainage holes prevent waterlogging. The PP plastic construction provides durability for multiple growing cycles, making it an accessible entry point for indoor gardening without requiring separate equipment purchases.
What Makes It Stand Out: This system excels through comprehensive automation rarely found at this price tier. Four timing cycles (4, 8, 12, 18 hours) and five brightness levels allow precise customization for different plant species and growth stages. The adjustable humidity vents create optimal microclimates, while the two-tray design enables simultaneous cultivation of varieties with different light requirements. Unlike budget trays lacking illumination, the integrated LEDs eliminate the need for costly separate grow lights and timers.
Value for Money: Under $15 for two illuminated trays represents exceptional bundled savings compared to purchasing components individually. The included digital controller removes the need for smart plugs or manual switching, reducing both cost and complexity. While serious growers may outgrow the 12-cell capacity, this price point makes it nearly risk-free for casual gardeners to experiment with indoor seed starting. The durability ensures multiple seasons of use, maximizing return on investment.
Strengths and Weaknesses: Pros include integrated full-spectrum lighting, customizable timer and brightness controls, effective humidity management, excellent affordability, and a two-pack configuration for versatility. The system simplifies seed starting for novices. Cons are the limited 12-cell capacity per tray, which restricts large-scale operations, and basic PP plastic that may become brittle over time. No self-watering feature means daily monitoring is necessary, and the light intensity may not suffice for light-hungry varieties.
Bottom Line: The Qoolife kit is ideal for beginners wanting a complete, automated seed-starting solution without complexity. Its integrated features and budget-friendly price make it a smart choice for casual gardeners growing modest quantities of seedlings.
7. Burpee SuperSeed Seed Starting Tray | 16 XL Cell | Reusable & Dishwasher Safe | for Starting Vegetable Seeds, Flower Seeds & Herb Seeds | Indoor Grow Kit for Deep-Rooted Seedlings, Green

Overview: Burpee’s SuperSeed tray leverages over a century of horticultural expertise in a thoughtfully engineered silicone design. Priced at $11.85, this 16-cell system features extra-large, flexible pop-out cells that cradle seedlings and reduce transplant shock. The food-grade silicone construction is dishwasher safe, while molded corner slots in each cell optimize drainage and soil aeration. Alphanumeric row labeling and an included Plant-o-Gram diagram help track varieties, making it a professional-grade solution for deep-rooted seedlings like tomatoes and peppers.
What Makes It Stand Out: The revolutionary silicone cells represent the standout feature, gently flexing to release seedlings with intact root systems—eliminating the damage common with rigid plastic trays. The smart watering tray design includes deep channels that draw excess water away while a raised perimeter prevents spills. Corner drainage slots prevent damping-off disease, a common seedling killer. Burpee’s 100% satisfaction guarantee provides confidence in this premium engineering.
Value for Money: While the per-cell cost exceeds basic plastic trays, the reusable silicone construction pays for itself within two growing seasons. The XL cell depth supports robust root development, reducing the need for intermediate transplanting. Considering the transplant success rate and dishwasher-safe convenience, it offers strong long-term value for serious gardeners who prioritize seedling health over minimal upfront expense. The brand reputation adds resale value.
Strengths and Weaknesses: Pros include innovative silicone cells that prevent root damage, superior drainage and aeration design, dishwasher-safe sterilization, trusted brand backing, and clear alphanumeric labeling. The XL size accommodates deep root growth. Cons include no integrated lighting or humidity domes, limiting its standalone functionality. With only 16 cells, capacity is modest for large-scale growers. The higher price may deter casual gardeners, and the silicone can attract dust when stored.
Bottom Line: Burpee’s SuperSeed tray is the premium choice for gardeners who value seedling health and plan to reuse equipment season after season. Its silicone design and smart engineering justify the investment for those serious about successful transplanting.
8. Bonviee 5-Pack Seed Starter Tray Seedling Kits,Plant Starter Kit with Adjustable Humidity Dome and Base Indoor Greenhouse Mini Propagator for Seeds Growing Starting (12 Cells per Tray,Black)

Overview: The Bonviee 5-Pack delivers exceptional quantity and versatility for budget-conscious gardeners starting numerous seedlings simultaneously. At $9.49 for five complete trays totaling 60 cells, this kit features high-quality clear plastic construction with adjustable humidity domes and ventilation controls. Each 1.5-inch square cell accommodates larger seeds like tomatoes, peppers, and eggplants. The black base trays withstand heat mat temperatures without warping, while included plant labels enable organized growing. Five trays equal the footprint of a standard 1020 flat, maximizing space efficiency.
What Makes It Stand Out: This kit’s primary advantage is sheer volume—five trays at a price competitors charge for one or two. The crystal-clear plastic allows root monitoring without disturbing seedlings, while adjustable vents provide precise humidity and temperature control from germination through hardening off. Specifically designed for heat mat compatibility, it handles temperature extremes without melting or deforming. The 1.5-inch cell size offers ample space for larger seeds that struggle in cramped quarters.
Value for Money: Unbeatable for large-scale starting, the per-tray cost under $2 makes this the market’s best bulk option. Gardeners can experiment with multiple varieties without financial risk. While lacking premium features, the essential components work reliably through multiple seasons when handled properly. For high-volume growers with existing lighting systems, this represents maximum cell count per dollar spent.
Strengths and Weaknesses: Pros include five-tray quantity, exceptional price point, heat mat compatibility, clear monitoring capability, adjustable humidity control, and ideal cell size for large seeds. The kit covers basic needs effectively. Cons involve no integrated lighting system, requiring separate grow light purchases. Manual watering demands daily attention, and standard plastic may crack with rough handling. The basic design lacks advanced automation like self-watering or timing controls.
Bottom Line: Bonviee’s 5-Pack is the go-to choice for gardeners needing maximum cell count on a minimal budget. It’s perfect for those with existing grow lights and heat mats who prioritize quantity and basic functionality over automated features.
9. Pawfly 6 Pack Seed Starter Kit, 72 Cells, Seed Starter Trays with Adjustable Grow Lights & 3.9" Humidity Domes, Indoor Seedling Starter Trays, Reusable Plant Germination Trays, Seed Starting Trays

Overview: Pawfly’s comprehensive six-tray system targets dedicated indoor gardeners seeking scalable, illuminated growing capacity. The $19.98 kit includes 72 cells across six trays, each equipped with individual full-spectrum LED lighting and 3.9-inch humidity domes. The thickened 0.8mm PVC construction resists warping and cracking through countless cycles, while USB-C connectivity modernizes power delivery. This all-in-one package provides professional-level control for year-round seed starting, complete with planting tools and labels for immediate use.
What Makes It Stand Out: Each tray operates independently with its own light source, allowing simultaneous cultivation of plants with vastly different photoperiod requirements. The 3.9-inch dome height provides superior vertical space compared to standard kits, preventing leggy growth in fast-developing seedlings. USB-C power distribution via a six-way cable reduces outlet clutter while offering modern connectivity. The thickened PVC material ensures season-after-season durability, maintaining structural integrity where thinner plastics fail.
Value for Money: At roughly $3.33 per tray, this system balances advanced features with reasonable pricing. Integrated lighting eliminates separate fixture costs, while the 72-cell capacity suits moderate-scale operations. Although requiring a separate wall adapter, the USB-C design future-proofs the investment. Compared to purchasing individual components, bundled savings are substantial for gardeners needing multiple illuminated trays. The included accessories add further value.
Strengths and Weaknesses: Pros include individual tray lighting, tall humidity domes, durable PVC construction, 72-cell capacity, USB-C connectivity, and included planting tools. The system scales efficiently for serious growers. Cons require purchasing a wall adapter separately, and the complexity may overwhelm beginners. The per-tray cost exceeds basic options, and integrated lights add potential failure points. Six trays may be excessive for casual gardeners.
Bottom Line: Pawfly’s kit excels for committed gardeners wanting multiple independent growing stations with professional-grade lighting. Its scalability and durability make it ideal for those transitioning from hobbyist to serious indoor growing operations.
10. NEWKITS Seed Starter Tray, 60-Cell Self-Watering Seed Starter Kit with Grow Light and 4.07” Humidity Dome, Indoor Plant Starter Trays for Seed Germination & Gardening Supplies

Overview: NEWKITS positions itself as the premium automated solution for time-constrained gardeners seeking hands-off seed starting. This $33.89 kit combines a 60-cell tray with an innovative self-watering capillary mat system, full-spectrum LED lighting, and an industry-leading 4.07-inch humidity dome. The thickened PET construction resists cracking while providing crystal-clear visibility. Every component—from the plant stand to 20 included labels—reflects thoughtful engineering for maximum convenience and professional results.
What Makes It Stand Out: The automatic self-watering mechanism represents the kit’s crown jewel, maintaining consistent moisture through capillary action and eliminating daily watering chores. The tallest dome available (4.07 inches) provides exceptional headroom for vigorous seedling development and prevents leggy growth. Five brightness levels and three timer settings (3, 6, 12 hours) offer precise photoperiod control. The PET material surpasses standard plastics in durability and eco-friendliness, while the comprehensive accessory package leaves nothing to purchase separately.
Value for Money: While the highest-priced option reviewed, the automation justifies the premium for busy individuals. The self-watering system prevents costly seedling loss from inconsistent watering, while durable PET construction ensures years of reuse. For gardeners valuing time savings and reliability, the investment pays dividends through improved germination rates and reduced labor. The all-inclusive design eliminates hidden costs.
Strengths and Weaknesses: Pros feature revolutionary self-watering design, tallest humidity dome, premium PET material, complete accessory package, advanced lighting controls, and excellent build quality. The system minimizes maintenance requirements. Cons include the steep price point, which may deter casual users, and fewer cells (60) than some competitors. The self-watering system requires proper setup to avoid mold issues, and beginners might find initial configuration complex. The capillary mat needs periodic replacement.
Bottom Line: NEWKITS is the ultimate choice for gardeners prioritizing automation and premium materials over raw cell count. It’s ideal for those with limited time who want consistently successful germination without daily intervention.
Understanding Your $25 Seed Starting Budget
Why $25 Per Item Is the Sweet Spot
Twenty-five dollars represents a critical threshold in the gardening supply market. Below this price point, you’ll find entry-level disposable products that often fail mid-season. Above it, you hit diminishing returns where professional features matter more for commercial growers than home gardeners. The $25 range captures durable, reusable supplies with thoughtful design features that directly impact germination success rates. This budget allows for proper materials, basic safety certifications, and construction that survives multiple seasons—crucial for supplies like heat mats and grow lights where reliability affects living plants.
How to Prioritize Your Purchases
Not all seed starting supplies deliver equal value at the budget level. Focus first on items that directly control the germination environment: growing medium, temperature regulation, and moisture management. These foundational elements determine whether seeds even sprout. Secondary purchases like labeling systems and organization tools can be improvised initially while you invest in quality core supplies. Consider your specific growing goals—starting tomatoes for a large garden demands different priorities than nurturing a few herb plants for a windowsill.
The Science Behind Successful Indoor Germination
Light, Heat, and Moisture: The Germination Trinity
Seeds are biological time capsules waiting for specific environmental cues. Most vegetable and flower seeds require consistent soil temperatures between 65-75°F, moisture levels that stay evenly damp but never waterlogged, and immediate access to intense light within 24-48 hours of sprouting. Budget supplies succeed when they maintain these parameters reliably. A heat mat that fluctuates wildly or a humidity dome that traps too much moisture can be worse than no equipment at all, which is why understanding material quality and design features matters more than price alone.
How Budget Supplies Can Meet These Needs
Modern manufacturing has democratized access to effective gardening technology. LED chips that once cost dollars now cost pennies, allowing affordable grow lights that deliver adequate lumens. Thermostatic controls, while basic at this price point, have become reliable enough for home use. The trick is recognizing which specifications translate to real-world performance. A $22 heat mat might lack digital precision but can still maintain steady temperatures within the 5-10 degree range that most seeds tolerate perfectly well.
Seed Starting Trays and Cell Packs
Features to Look for in Budget-Friendly Trays
At the sub-$25 price point, tray quality varies dramatically based on plastic thickness and drainage design. Look for polypropylene plastic marked with recycling code #5—it’s more durable than polystyrene (#6) and withstands repeated washing without cracking. Drainage holes should be numerous and positioned to prevent water pooling; at least three holes per cell ensures proper drainage. Tray depth matters more than cell count—deeper cells (2.5-3 inches) promote stronger root systems and reduce transplant shock. Avoid trays where cells are so thin-walled they deform when lifted.
Reusable vs. Biodegradable Options
Plastic trays dominate the budget category, but peat, cow manure, and wood fiber pots have become increasingly affordable. Biodegradable options eliminate transplant shock but dry out faster and may develop mold if overwatered. For pure cost-effectiveness over multiple seasons, reusable plastic wins—one quality tray can last 5-7 years with proper care. However, if you grow crops that dislike root disturbance (cucumbers, squash), the extra 50-75 cents per biodegradable cell often pays for itself in healthier transplants.
Size and Cell Count Considerations
Standard 72-cell trays fit most budgets, but consider your seedling needs. Larger cells (32-50 count) produce stockier plants that hold longer if transplanting is delayed. Smaller cells (128-200 count) suit fast-growing lettuce or flowers but require precise timing. For $25, you can often find modular systems where interchangeable cell inserts fit into a standard watering tray, giving you flexibility without buying multiple complete sets.
Premium Seed Starting Mix
What Makes a Quality Mix Different from Potting Soil
Seed starting mix isn’t just fine potting soil—it’s a soilless medium engineered for delicate seedlings. Quality mixes use sphagnum peat moss or coconut coir as a base, providing moisture retention without compaction. Vermiculite and perlite create air pockets essential for root respiration. At the budget level, avoid mixes containing actual soil or compost, which can harbor damping-off diseases. A 8-quart bag typically runs $12-18, fitting comfortably under our $25 target while providing enough medium for several trays.
Key Ingredients to Look For
Check the ingredient list for wetting agents—these help the peat moss absorb water initially, preventing dry pockets that kill seedlings. Some budget mixes now include mycorrhizae or beneficial bacteria, which can justify a slightly higher price. The particle size should feel uniform and fine, like coarse coffee grounds. Avoid mixes with large wood chips or visible chunks, which create air gaps where tiny roots can’t penetrate. A quality mix should feel light when dry but hold together slightly when squeezed.
How to Stretch Your Mix Further
A single bag of premium mix can fill more cells if you pre-moisten it properly—dry mix settles and compacts, requiring more volume. Add up to 20% extra perlite to increase drainage and extend the mix, especially for plants prone to damping-off. Save leftover mix in an airtight container; properly stored, it remains viable for two years. Some gardeners successfully reuse mix from healthy seedlings by pasteurizing it in a 180°F oven for 30 minutes, though this requires careful monitoring to avoid overheating.
Seedling Heat Mats
Understanding Wattage and Size Options Under $25
Budget heat mats typically range from 10-20 watts and measure 10"x20"—perfect for a standard seed tray. This wattage efficiently raises soil temperature 10-20°F above ambient room temperature without excessive energy consumption. Look for mats with consistent heat distribution; cheaper models sometimes have hot spots that cook seeds. The $25 price cap usually limits you to mats without digital thermostats, but many include basic on/off switches and waterproof construction rated IP67, meaning they can withstand brief submersion.
Thermostat Controllers: Necessary or Nice-to-Have?
While a separate thermostat adds $15-25 beyond our budget, many seeds germinate fine without precision control. Tomatoes, peppers, and most flowers thrive with constant low-level heat. However, cool-season crops like lettuce and spinach may germinate poorly with continuous warmth. The workaround? Plug your heat mat into a simple mechanical timer, running it 12 hours on/12 hours off to moderate temperature. This hybrid approach stays under budget while providing some temperature control.
Safety Features That Matter
Even at budget prices, insist on UL or ETL certification, which verifies the mat meets basic electrical safety standards. The cord should enter the mat through a sealed, waterproof grommet. Check user reviews specifically for failure modes—quality budget mats fail by simply stopping work, while dangerous ones develop hot spots or electrical issues. Never use a heating pad designed for human use; these lack the waterproofing and temperature stability needed for horticulture.
LED Grow Light Bulbs and Strips
Decoding the Specifications: Lumens, Kelvin, and Watts
Budget LED grow lights under $25 typically deliver 1500-2500 lumens, sufficient for one standard seed tray. Color temperature (measured in Kelvin) should fall between 5000-6500K, mimicking daylight and promoting compact growth. Wattage indicates energy consumption, not light output—ignore equivalency claims like “60W equivalent” and focus on actual lumens. Look for lights specifying a Color Rendering Index (CRI) above 80, which ensures seedlings develop proper leaf color and can photosynthesize efficiently.
Clip-On vs. Hanging Systems
Clip-on fixtures dominate the sub-$25 category, offering flexibility for small spaces. Check that the clip opens wide enough for your shelving or table edge—some budget clips are frustratingly narrow. The gooseneck should hold position without sagging; metal-sheathed goosenecks perform better than all-plastic versions. Hanging systems at this price point typically include basic S-hooks and chains, which work fine but may require additional hardware for secure installation. Consider your space constraints: clip-ons adapt to anywhere with an edge, while hanging lights need overhead support.
Energy Efficiency on a Budget
Quality budget LEDs consume 15-25 watts while delivering adequate light. This efficiency means running a light 16 hours daily costs roughly $1-2 per month in electricity. Look for lights with on/off switches rather than pull chains, which tend to break. Some models now include basic timers, though these often prove unreliable. The real energy savings come from LEDs that last 25,000+ hours—over a decade of typical seed-starting use—eliminating replacement costs that quickly exceed the initial purchase price.
Humidity Domes and Covers
Material Thickness and Durability
Clear plastic domes should feel rigid enough to lift without flexing excessively—thin domes crack after one season. Look for UV-stabilized plastic if you plan to reuse the dome for multiple years; non-stabilized plastic becomes brittle and yellows. The dome height needs to accommodate your tallest seedlings, typically 4-6 inches for most vegetables. Some budget domes include adjustable vents; these are worth seeking out as they dramatically improve humidity control without added cost.
Ventilation Features to Prevent Damping Off
Damping-off disease thrives in stagnant, overly humid conditions. Adjustable vents allow you to gradually reduce humidity as seeds germinate, hardening off seedlings before transplant. Even without vents, simply propping the dome open with a pencil after 50% germination prevents disease. Some gardeners drill small holes (1/8") in the dome sides for passive ventilation. The goal is maintaining 80-90% humidity for germination, then dropping to 50-70% within days to prevent fungal issues.
DIY Alternatives That Work
In a pinch, clear plastic storage container lids, cling film with holes poked in it, or even clean glass panes can substitute for commercial domes. The key is creating a mini-greenhouse effect while allowing some air exchange. A simple frame made from wire coat hangers can support plastic wrap above seedlings. While these solutions lack the convenience of fitted domes, they cost pennies and work effectively for small batches of seeds.
Plant Labels and Waterproof Markers
Material Options: Plastic, Wood, and Metal
Plastic labels dominate the budget category, with 100-200 packs available for under $10. Look for UV-stabilized plastic that won’t become brittle; cheap labels snap when you try to insert them in soil. Wooden labels (popsicle sticks) cost even less but mold and degrade within weeks in moist conditions. Metal markers with embossed writing last indefinitely but exceed our budget. For permanent labeling, consider cutting labels from yogurt lids or plastic clamshell containers—free, durable, and perfectly functional.
What Makes a Marker Truly Waterproof
“Permanent” markers often aren’t permanent on plastic exposed to moisture and UV light. Garden markers use oil-based paint that adheres to slick surfaces and resists fading. Test any marker by writing on a label, then rubbing vigorously with a damp finger after the ink dries. Quality markers won’t smear. Some gardeners use #2 pencils on plastic labels—graphite is surprisingly durable and completely waterproof. For a $25 total budget, spend $8-12 on quality markers and the remainder on labels; one good marker can label hundreds of seeds.
Organizational Systems for Tracking Varieties
Develop a consistent labeling system before you start: include plant name, variety, and sowing date at minimum. Some gardeners add expected germination time to know when to check for problems. Use waterproof notebooks or simple spreadsheets to cross-reference label numbers with detailed notes. Color-coding labels with marker colors or tape helps quickly identify plant families. For example, use blue for brassicas, red for nightshades, and green for leafy greens.
Precision Watering Tools
Spray Bottles vs. Bottom-Watering Trays
Fine-mist spray bottles cost $8-15 and allow gentle watering that won’t dislodge seeds or compact soil. Look for bottles with adjustable nozzles that produce a true mist, not a stream. However, bottom-watering—where water is added to a tray beneath cells—promotes stronger root growth and reduces disease. Budget bottom-watering trays cost $12-18 and can be reused indefinitely. The ideal setup includes both: mist seeds until germination, then switch to bottom-watering to encourage deep roots.
Features That Prevent Overwatering
Overwatering kills more seedlings than underwatering. Watering cans with narrow spouts (rose attachments) distribute water evenly without creating craters in the soil. For bottom-watering, trays with graduated markings help you add exactly the right amount—typically 1/2 to 1 cup per standard tray. Some budget trays include raised channels that keep cells elevated above excess water, preventing waterlogging. Always empty standing water 30 minutes after bottom-watering to prevent root rot.
Multi-Use Tools Worth the Investment
A $15-20 pressure sprayer with a fine mist setting serves double-duty for watering seedlings and applying foliar feeds later in the season. These hold more water than hand sprayers and reduce hand fatigue. Look for models with adjustable pressure and a locking trigger. Some gardeners use kitchen turkey basters for precise bottom-watering, costing just a few dollars. The key is finding tools that serve multiple purposes across your gardening calendar, maximizing your $25 investment.
Gentle Seedling Fertilizers
Understanding N-P-K Ratios for Seedlings
Seedlings need minimal nutrients initially—seed starting mix typically contains enough for the first 2-3 weeks. When fertilizing, use quarter-strength solutions with balanced ratios like 5-5-5 or 10-10-10. Avoid high-nitrogen formulas that promote leggy growth. Budget liquid fertilizers cost $10-15 for a concentrate that makes gallons of solution. Look for products specifically labeled for seedlings or “starter fertilizer,” as these include micronutrients like boron and manganese that support early root development.
Liquid vs. Granular Options
Liquid fertilizers offer precise control over concentration and immediate nutrient availability—crucial for tiny seedlings. Granular slow-release fertilizers risk burning delicate roots if they release too quickly. At the budget level, liquid concentrates provide better value: a $12 bottle can fertilize hundreds of seedlings across an entire season. Some gardeners make compost tea from finished compost, costing virtually nothing, though results vary. If using granular fertilizer, choose water-soluble types and dissolve them completely before applying.
Organic vs. Synthetic at the Budget Level
Organic fertilizers like fish emulsion or seaweed extract cost $12-18 and provide gentle, complete nutrition with beneficial microbes. They smell unpleasant but rarely burn seedlings. Synthetic fertilizers offer more precise N-P-K ratios for $8-12 but lack organic matter. For seedlings, the difference matters less than for mature plants—both work effectively when used correctly. Organic options may improve soil biology when transplanted outdoors, giving them a slight edge for gardeners focused on long-term soil health.
Small-Scale Air Circulation Fans
Why Airflow Prevents Disease and Strengthens Seedlings
Stagnant air creates a microclimate where fungal spores thrive and seedlings develop weak stems. Gentle air movement evaporates excess moisture on leaf surfaces and stimulates seedlings to develop thicker cell walls, creating stockier plants. A fan running on low speed 24/7 can reduce damping-off incidence by 70%. This mechanical stimulation, called thigmomorphogenesis, mimics outdoor wind conditions and produces plants that transplant more successfully.
Size and Power Considerations for Small Spaces
Budget fans ($15-25) are typically 4-6 inch clip-on or desk models. Look for fans with at least two speed settings—low speed should be gentle enough that seedlings barely move. Oscillating fans distribute air more evenly but often cost slightly more. For a single seed tray, even a small personal fan placed 3-4 feet away provides adequate circulation. The key is consistent, gentle movement, not powerful gusts that dry out soil or damage tender leaves.
Noise Levels and Energy Consumption
Small fans typically consume 5-15 watts—running continuously costs less than $1 monthly. Noise becomes the real issue in living spaces. Brushless motor fans operate more quietly and last longer. Read reviews specifically mentioning noise; some budget fans produce irritating high-pitched whines. Placing the fan on a foam pad or hanging it with rubber bands can dampen vibrations. For apartment dwellers, consider USB-powered fans designed for laptops—they’re whisper-quiet and cost under $20.
Storage and Organization Solutions
Keeping Seeds Viable Between Seasons
Proper seed storage extends viability from 1-2 years to 5-10 years for many species. Airtight containers with desiccant packets cost $8-15 and pay for themselves by preserving seed investment. Store containers in a cool, dark place—refrigerators work perfectly. Organize seeds by plant family or sowing date using index card dividers. For a $25 budget, buy a quality container system rather than individual packets; one container can store hundreds of seed varieties.
Organizing Supplies for Efficiency
A simple plastic tote ($12-18) keeps all seed starting supplies together, preventing last-minute searches. Choose clear containers to see contents, and select sizes that fit your storage space. Some gardeners use hanging shoe organizers on closet doors—the pockets perfectly hold seed packets, markers, and small tools. Label everything clearly; in March, you won’t remember what you stashed in September. The goal is creating a mobile seed starting station you can set up in 10 minutes.
Repurposing Household Items
Yogurt cups with drainage holes make excellent free pots. Clear plastic produce containers become humidity domes. Egg cartons work for starting seeds but dry out quickly. The key is sterilizing repurposed items with a 10% bleach solution to kill pathogens. While dedicated supplies offer convenience, combining repurposed items with strategic purchases maximizes your $25 budget. Spend your money where it matters most—on heat and light—while improvising containers and labels.
Common Mistakes to Avoid with Budget Supplies
Overcrowding and Poor Spacing
Even with perfect supplies, sowing too densely creates competition for light and air circulation, resulting in weak seedlings. Follow spacing guidelines on seed packets—most seeds need 1-2 inches between them. Thin ruthlessly after germination; it feels wasteful but produces stronger survivors. One well-grown tomato seedling outperforms three spindly ones. Budget supplies work best when you respect plant biology and resist the temptation to maximize every square inch.
Inadequate Light Placement
Budget grow lights work only when positioned correctly—typically 2-4 inches above seedlings. As plants grow, raise the lights to maintain this distance. Seedlings stretching toward light become leggy and weak. If you can’t adjust light height, adjust plant height by stacking trays on books or boxes. Light intensity drops exponentially with distance; a light placed 8 inches away delivers only 25% of the intensity at 2 inches. This principle matters more than the absolute quality of your budget light.
Temperature Fluctuations
Placing seed trays on windowsills creates dramatic temperature swings—cold at night, scorching during sunny days. Heat mats help, but they can’t compensate for extreme variation. Consistent 65-75°F temperatures produce the steadiest growth. If your space fluctuates, invest in a simple min/max thermometer ($10-15) to track conditions. Sometimes moving trays just 3 feet from a drafty window stabilizes temperature enough to improve germination rates by 30-40%.
Setting Up Your Indoor Seed Starting Station
Choosing the Right Location in Your Home
The ideal location offers stable temperatures between 65-75°F, proximity to electrical outlets for lights and heat mats, and protection from pets and children. Basements stay cool but may require supplemental heat. Spare bedrooms work well but need light-blocking curtains to prevent day-length confusion. Consider water access—carrying trays long distances increases spill risk. A corner of a kitchen, laundry room, or heated garage often provides the best compromise of conditions.
Creating a Functional Layout
Arrange your station sequentially: storage area for supplies, sowing workspace with soil and seeds, germination area with heat mats and domes, then growing area under lights. This workflow minimizes mess and handling. Use shelving to maximize vertical space—standard 48-inch shop lights cover two trays per shelf. Keep a small bucket or sink nearby for cleanup. The entire setup should occupy no more than 4-6 square feet for most home gardeners, making it manageable even in apartments.
Timing Your Setup for Maximum Success
Begin assembling supplies 4-6 weeks before your last frost date. Starting too early means wrestling with large seedlings indoors; too late delays your harvest. Create a calendar working backward from transplant dates: peppers and tomatoes need 6-8 weeks indoors, lettuce only 3-4. Your $25 investments pay dividends when timed correctly—there’s no point in premium supplies if you start seeds so early they become root-bound before the weather warms.
Frequently Asked Questions
Can I really get quality seed starting supplies for under $25 each? Absolutely. The $15-25 range captures the sweet spot where manufacturing quality meets home gardener needs. These supplies lack professional-grade precision but include essential features like waterproofing, basic safety certifications, and durable materials that last multiple seasons. Focus on specifications over brand names.
What’s the single most important supply to splurge on? Invest your best $25 in a quality seed starting mix. This directly contacts your seeds and seedlings, affecting everything from germination rates to disease resistance. A premium mix provides proper drainage, aeration, and moisture retention that cheap mixes lack. Even the best lights and heat can’t compensate for poor growing medium.
Are LED grow lights under $25 actually effective? Yes, for seed starting purposes. These lights deliver 1500-2500 lumens in the correct color spectrum (5000-6500K), which is sufficient for seedlings. They won’t grow tomatoes to fruiting indoors, but they’ll produce stocky, healthy starts ready for transplant. The key is positioning them 2-4 inches from plants and running them 14-16 hours daily.
How long do budget heat mats typically last? Quality budget heat mats last 3-5 years with proper care. Unplug them when not in use, avoid sharp folds in the cord, and wipe clean with a damp cloth. The most common failure point is the power connection; mats with reinforced, sealed cord entries last longest. Even at 3 years, a $20 mat costs less than $7 annually—excellent value.
Can I reuse seed starting mix from last year? You can, but with caution. Remove all old roots and debris, then pasteurize by baking at 180°F for 30 minutes to kill pathogens. However, reused mix loses structure and may compact. Better: compost old mix in your outdoor pile and refresh with 50% new mix. Never reuse mix from diseased seedlings.
What’s the difference between a humidity dome and plastic wrap? Commercial domes provide structure, adjustable vents, and durability. Plastic wrap works in a pinch but requires support (like chopsticks) to prevent touching seedlings and must be removed daily for air exchange. Domes cost $8-18 but save frustration and provide better disease prevention through proper ventilation features.
Do I really need a fan for seedlings? A fan isn’t strictly necessary but dramatically improves seedling health. It prevents fungal diseases and produces stronger stems. For $15-20, a small clip-on fan is one of the best investments in seedling quality. If budget is truly tight, manually brush your hand over seedlings daily to provide mechanical stimulation.
How do I know if my supplies are truly waterproof? Look for IP (Ingress Protection) ratings on electrical items. IP67 means waterproof against brief submersion—standard for decent heat mats. For manual tools, check seams and joints; quality plastic trays have smooth, sealed edges. When in doubt, test non-electrical items by filling with water and watching for leaks before using with seedlings.
Can I start seeds successfully without a heat mat? Yes, but germination will be slower and less uniform. Many seeds sprout at room temperature (65-70°F), but heat mats increase speed by 30-50% and improve germination rates, especially for warmth-lovers like tomatoes and peppers. Place trays on top of the refrigerator or near a heat vent as a free alternative, though temperature control will be less precise.
What’s the best way to organize seeds and supplies on a budget? Use a clear plastic tote ($12-18) to store all supplies together. Inside, organize seeds in airtight containers with desiccant packets. Repurpose small boxes or containers for markers, labels, and small tools. The key is keeping everything in one location, protected from moisture, and clearly labeled. This prevents duplicate purchases and makes setup quick each season.