Tired of staring at that patchy, weed-infested lawn and dreaming of a lush, green carpet? You’re not alone. Every year, millions of homeowners grapple with the daunting task of lawn renovation, often underestimating the sheer physical toll of removing old sod by hand. The backbreaking labor of shoveling and prying can turn an exciting makeover project into a week-long nightmare. Enter the sod lifter—a game-changing tool that transforms what was once a brutal excavation into a precise, efficient, and surprisingly satisfying process. Whether you’re planning a complete sod replacement, creating new garden beds, or salvaging healthy grass for transplanting, understanding how to choose and use the right sod lifter is the difference between a frustrating ordeal and an instant lawn transformation.
Top 10 Sod Lifters for Lawn Makeovers
Detailed Product Reviews
1. Bully Tools Heavy Duty Sod Lifter - 12-Gauge Sod Lifter with Fiberglass D-Grip Handle, Steel Shaft, Flat Head, Spade Shovel for Gardening, Digging, Edging and Lawn Maintenance - 100% Made in The USA
Overview: The Bully Tools Sod Lifter represents American manufacturing excellence in landscaping equipment. This professional-grade tool features a 12-gauge steel head married to a reinforced fiberglass D-grip handle, creating a robust implement designed for intensive sod removal, precise edging, and heavy digging. The 9-inch flat blade cuts cleanly through dense turf while maintaining the structural integrity needed for repeated professional use.
What Makes It Stand Out: Authentic 100% USA construction distinguishes this tool from imported competitors. The 12-gauge steel specification isn’t marketing fluff—it provides measurable resistance to bending and deformation that thinner materials can’t match. The fiberglass handle delivers superior weather resistance and strength-to-weight ratio compared to traditional wood, eliminating splintering and rot concerns. Its versatile flat-head profile performs equally well slicing sod, creating crisp bed edges, or moving soil.
Value for Money: At $57.74, this sod lifter commands a premium price that pays dividends through exceptional longevity. Budget alternatives typically feature 14-gauge or thinner steel with wooden handles that fail within 1-2 seasons of heavy use. This single investment eliminates replacement cycles, making it more economical for frequent users. The made-in-USA quality control and lifetime durability justify the upfront cost for professionals and serious homeowners who view tools as long-term assets rather than disposable purchases.
Strengths and Weaknesses: Pros: Genuine American craftsmanship; robust 12-gauge steel resists deformation; weatherproof fiberglass handle; versatile multi-task design; maintains sharp edge exceptionally well. Cons: Heavier than consumer-grade tools; higher initial investment; may require initial sharpening; limited retail availability compared to mass-market brands.
Bottom Line: For users demanding professional durability and willing to invest in quality, the Bully Tools Sod Lifter delivers unmatched performance. Its superior construction and domestic manufacturing make it the definitive choice for frequent, heavy-duty landscaping work.
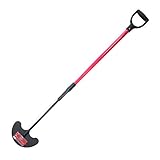
2. Leriton 52" Heavy Duty Sod Lifter with D Grip Handle and Steel Shaft Manual Sod Cutter Hand Tool with Gloves for Gardening, Digging, Edging and Lawn Maintenance

Overview: The Leriton 52" Sod Lifter prioritizes user ergonomics through its innovative bent-shaft design, enabling more upright operation that significantly reduces back strain during extended use. This comprehensive package includes a steel-handled cutter with comfortable D-grip and protective gloves, providing homeowners with everything needed for sod removal, garden bed preparation, and precise edging tasks. The 52-inch length delivers excellent leverage for cutting through established root systems.
What Makes It Stand Out: The distinctive bending angle is the defining feature, allowing users to maintain a higher working position that minimizes physical fatigue—a crucial benefit for DIY enthusiasts without professional conditioning. The included gloves add immediate practical value, while the sharpenable steel blade ensures the tool remains effective through multiple seasons. This design specifically addresses accessibility, making challenging sod work manageable for occasional users who might otherwise avoid manual methods.
Value for Money: Priced at $64.99, this sod lifter positions itself in the premium segment while offering unique ergonomic advantages that justify the cost. The strain-reducing design translates to real value by enabling longer work sessions with less recovery time. For homeowners undertaking periodic but substantial projects, the physical comfort factor outweighs the slightly higher price compared to basic straight-shaft models. The accessory inclusion further sweetens the proposition for budget-conscious buyers seeking complete solutions.
Strengths and Weaknesses: Pros: Ergonomic bent design reduces back strain; optimal length for maximum leverage; protective gloves included; user-sharpenable blade extends service life; comfortable D-grip handle. Cons: Imported construction quality may vary; complex shaft design potential weak point under extreme loads; higher cost than fundamental models; bending angle requires adaptation period for some users.
Bottom Line: The Leriton Sod Lifter excels for homeowners prioritizing comfort and accessibility. Its thoughtful ergonomic design makes demanding sod work more approachable, though landscaping professionals might prefer the simplicity and proven durability of traditional straight-shaft heavy-duty construction.
Why a Sod Lifter is Your Secret Weapon for Lawn Transformation
Let’s be honest: your lawn is the canvas of your home’s exterior. A flawless, verdant carpet instantly elevates curb appeal and creates an inviting outdoor living space. But beneath every stunning lawn makeover lies one critical step—removing the old, tired grass. A sod lifter doesn’t just make this possible; it makes it professional-grade. Unlike generic shovels or makeshift tools, a purpose-built sod lifter slices through root systems with surgical precision, preserving soil structure and saving your lower back in the process. The right tool turns a multi-day project into a single afternoon’s work, delivering clean, rollable strips of sod that can be repurposed, composted, or disposed of efficiently.
Understanding the Different Types of Sod Lifters
Before diving into features, you need to understand the three primary categories of sod lifters. Each type serves different property sizes, soil conditions, and user capabilities. Your choice here sets the foundation for your entire project.
Manual Sod Lifters: The Classic Choice
Manual sod lifters represent the traditional, human-powered approach that has served landscapers for decades. These tools typically feature a sharp, flat blade mounted on a long handle, requiring you to use body weight and leverage to cut through sod. They’re lightweight, affordable, and offer maximum control for intricate work around curves, flower beds, and tight spaces. The best manual options include kick-style cutters that you drive into the ground with your foot and slicing models that you push like a mower. While they demand physical effort, modern ergonomic designs have dramatically reduced the strain compared to old-fashioned spades.
Powered Sod Lifters: Efficiency Meets Power
When you’re facing a large property or compacted clay soil, powered sod lifters become your best friend. These gas or electric machines operate similarly to a power edger but with a wider, horizontally-oriented blade that vibrates or rotates to slice beneath grass roots. They can cut strips up to 18 inches wide and several inches deep in a single pass, turning hours of manual labor into minutes. The learning curve is steeper, and the investment is higher, but for properties over 2,000 square feet or for frequent use, the time savings and physical relief are undeniable.
Semi-Automated Options: The Best of Both Worlds
The newest category blends manual control with powered assistance. These innovative tools feature battery-powered motors that assist the cutting action while still requiring you to guide and push the unit. They weigh less than full-powered models but cut more efficiently than pure manual tools. Semi-automated sod lifters are perfect for medium-sized suburban lots where you want speed without the noise, fumes, or storage bulk of gas-powered equipment. They also tend to be more maneuverable on uneven terrain where heavy machines struggle.
Key Features to Evaluate Before You Buy
Not all sod lifters are created equal, even within the same category. The difference between a tool that becomes a trusted ally and one that gathers dust in your garage often comes down to these critical features.
Build Quality and Material Durability
Your sod lifter will battle rocks, compacted soil, and dense root networks. Look for hardened steel blades that resist bending and chipping. For manual tools, forged steel outperforms stamped steel every time. In powered models, check the housing material—heavy-duty polymer or steel construction withstands vibration and impact better than lightweight plastics. Welded joints should be clean and reinforced, not spot-welded. A powder-coated or galvanized finish prevents rust, which is crucial for a tool that constantly contacts moist soil.
Cutting Width and Depth Adjustability
Standard cutting widths range from 12 to 18 inches. Wider cuts mean fewer passes but heavier strips to handle. The sweet spot for most homeowners is 14-16 inches. More important is depth adjustability—quality sod lifters let you modify cutting depth from 1 to 3 inches. This flexibility is vital because different grass species have varying root depths, and your project type (transplanting vs. disposal) may require shallower or deeper cuts. Tool-free adjustment mechanisms save time and frustration on the job.
Handle Design and Ergonomic Comfort
If you’re using a manual sod lifter, the handle is where you’ll feel the difference. Look for padded, non-slip grips that absorb vibration. Adjustable handle heights accommodate different user statures, preventing back strain. Some premium models feature angled handles that keep your wrists in a neutral position. For powered units, vibration-dampening systems and ergonomic throttle controls reduce fatigue during extended use. Don’t underestimate the value of comfort—your body will thank you after the first hundred feet.
Weight and Maneuverability Factors
A 40-pound manual sod lifter might seem sturdy, but you’ll struggle to push it through dense turf. Conversely, an ultra-lightweight model may lack the heft needed for clean cuts. The ideal manual tool weighs between 12-18 pounds—heavy enough to do the work but light enough to control. Powered models typically range from 80-150 pounds. Check the wheel configuration: large rear wheels and pivoting front casters make turning and steering infinitely easier, especially when navigating around obstacles or working on slopes.
Blade Sharpness and Edge Retention
The blade’s edge geometry determines cutting efficiency. A beveled edge that tapers to a fine point slices through roots cleanly rather than tearing them. Some advanced models feature serrated edges that saw through particularly tough rhizomes. Consider how easy the blade is to sharpen—replaceable blade inserts are convenient, while solid blades require professional sharpening. Blade guards that protect the edge during storage extend sharpness and prevent accidents.
Matching the Tool to Your Lawn’s Specific Needs
Your property’s unique characteristics should drive your sod lifter selection. A tool perfect for your neighbor’s yard might fail miserably on your terrain.
Small Urban Yards vs. Expansive Properties
For compact urban or suburban lots under 1,000 square feet, a high-quality manual sod lifter offers precision without the storage hassle of powered equipment. You can maneuver around tight corners, follow curved bed lines, and store it on a garage wall. Large estates or commercial properties demand powered solutions—cutting 5,000+ square feet manually would take days and risk repetitive strain injuries. For medium properties (1,000-3,000 square feet), consider a semi-automated model or renting a powered unit for the day.
Rocky or Compacted Soil Considerations
If your soil is heavy clay or peppered with small stones, manual sod lifters become exponentially harder to use. The constant jarring when hitting obstacles will rattle your joints and dull blades quickly. In these conditions, a powered sod lifter with a reinforced blade and vibration-dampening system is worth every penny. Some models include retractable blades that kick back when encountering large rocks, preventing damage. For rocky soil, prioritize tools with replaceable blade sections rather than single-piece blades.
Slope and Terrain Challenges
Working on hillsides introduces safety and control issues. Heavy powered sod lifters can become dangerous on slopes steeper than 15 degrees, potentially sliding downhill or tipping. Manual tools give you better control but require more physical effort to maintain a straight cut. For sloped terrain, look for sod lifters with aggressive tread wheels that grip the ground and prevent sliding. Some powered models feature hill-hold brakes or self-propulsion systems that maintain steady speed uphill and controlled descent downhill.
The Role of Sod Lifters in Instant Lawn Makeovers
Understanding the full potential of your sod lifter helps justify the investment. These tools do far more than simply remove grass—they enable precision landscaping that creates magazine-worthy results.
Preparing for New Sod Installation
The key to new sod taking root quickly is a smooth, debris-free soil bed. A sod lifter removes the existing turf in uniform strips, leaving behind a level surface that requires minimal additional grading. The clean cuts prevent soil compaction that often results from manual digging, ensuring your new sod’s roots can penetrate easily. By cutting to the proper depth, you remove competing weeds and their root systems, dramatically reducing the chance of weed breakthrough in your new lawn.
Transplanting Existing Grass Sections
Not all grass needs to go to waste. Healthy sections of your existing lawn can be lifted intact and relocated to bare patches elsewhere on your property. This is particularly valuable for spreading drought-tolerant varieties or repairing damage from construction. A sod lifter preserves the critical root-soil structure that hand-digging destroys, giving transplanted sections a 90% better survival rate. The uniform strips fit together seamlessly, creating an instant patch that looks natural rather than obvious.
Creating Garden Beds and Pathways
Sod lifters excel at creating crisp edges and defined borders. Use them to cut perfect rectangles for raised garden beds, ensuring clean lines that keep grass from creeping into your vegetable patch. For pathways, the tool removes grass in precise sections that can be replaced with gravel, pavers, or mulch. The depth control prevents you from removing excessive topsoil, preserving valuable nutrients for your new plantings while creating a stable base for hardscaping materials.
Professional vs. DIY: When to Invest in Premium Equipment
The rental counter versus the purchase decision often comes down to frequency of use, but there’s a deeper consideration. Professional landscapers invest in premium sod lifters because downtime costs money. These commercial-grade units feature reinforced components, easier maintenance access, and better warranties. For the DIY homeowner, a mid-range tool that balances quality with cost often makes more sense. However, if you’re planning multiple projects over several years—renovating sections of lawn, expanding garden beds, or helping neighbors—a premium model’s durability pays dividends. The cutting precision of professional-grade tools also reduces waste and rework, saving material costs on sod and soil amendments.
Essential Maintenance Tips for Longevity
A sod lifter is an investment that should last decades with proper care. Neglect maintenance, and even the most expensive tool will fail prematurely.
Cleaning and Storage Best Practices
Always clean your sod lifter immediately after use. Dried soil acts like abrasive paste, accelerating wear on moving parts. Use a stiff brush and garden hose to remove all soil, paying special attention to blade edges and wheel axles. For powered models, blow out air intakes with compressed air to prevent overheating. Store tools in a dry, covered area—hanging manual sod lifters on wall hooks prevents blade damage and saves floor space. Apply a light coat of vegetable oil to the blade before long-term storage; it’s safer around plants than petroleum-based oils.
Blade Sharpening and Replacement
A dull blade tears rather than cuts, making your job harder and stressing grass plants if you’re transplanting. Sharpen manual sod lifter blades after every 4-6 hours of use with a mill file or bench grinder, maintaining the original bevel angle. Powered sod lifters typically have reversible blades—when one edge dulls, flip it for a fresh cutting surface. Keep spare blades on hand; nothing halts a project faster than a chipped blade and no replacement. Mark your calendar for seasonal sharpening to ensure the tool is ready when you are.
Rust Prevention and Seasonal Care
Moisture is your sod lifter’s mortal enemy. After cleaning, thoroughly dry the tool with a towel, especially in crevices where water pools. Apply a silicone-based spray lubricant to all metal surfaces—it displaces moisture and leaves a protective film. For winter storage in humid climates, place moisture-absorbing silica gel packs in storage bags with smaller components. Check for rust spots monthly during the off-season; catching corrosion early lets you sand and treat it before it spreads. For powered models, run the engine dry of fuel or add fuel stabilizer to prevent carburetor issues.
Critical Safety Considerations
Sod lifters are deceptively dangerous. The sharp blade that easily cuts through roots can sever a foot or hand just as quickly. Always wear steel-toed boots with aggressive tread—slipping while pushing a sod lifter can result in the blade sliding into your leg. Heavy leather gloves protect hands when handling the blade for cleaning or adjustment. For powered models, eye protection is non-negotiable; the blade can throw small stones with bullet-like velocity. Never bypass safety interlocks or disable blade guards. When working on slopes, always cut across the slope, not up and down, to maintain control. Keep children and pets at least 50 feet away from the work area, and never leave a powered sod lifter running unattended.
Cost vs. Value: Budgeting for Your Investment
Manual sod lifters range from $50 for basic models to $300 for professional-grade tools. Powered units start around $800 for entry-level electric models and climb to $3,500 for commercial gas-powered machines. The true cost isn’t the purchase price—it’s the value of your time and the quality of results. A $150 manual sod lifter that saves you two weekends of backbreaking labor and produces transplantable sod strips delivers exceptional ROI. When budgeting, factor in hidden costs: replacement blades ($20-50), sharpening tools, protective equipment, and potential rental fees for complementary equipment like a sod roller. The most expensive tool you can buy is the cheap one that fails mid-project, forcing you to rent or repurchase.
Rental vs. Purchase: Making the Smart Financial Choice
Renting a powered sod lifter costs $75-150 per day, making it attractive for one-time projects. However, rental units have seen heavy use and may have dull blades or worn components that reduce efficiency. You’re also racing the clock—returning the unit late often incurs full-day charges. Purchasing makes sense if you’ll use the tool more than three times or want the flexibility to work at your own pace. For manual tools, purchase is almost always the better choice due to low cost and minimal maintenance. Some garden centers offer rent-to-own programs, applying rental fees toward purchase—a perfect hybrid solution for homeowners tackling phased lawn renovations.
Environmental Impact and Sustainable Choices
Your sod lifter choice affects more than your lawn—it impacts the environment. Manual tools have zero emissions and minimal noise pollution, making them ideal for eco-conscious homeowners and noise-restricted communities. Electric powered models produce fewer emissions than gas units and operate more quietly, though they require consideration of electricity source. When removing sod, think beyond disposal: healthy sod strips can be donated to community gardens, used for erosion control on slopes, or composted to create rich soil amendment. Some innovative sod lifters are now made from recycled steel and packaged in biodegradable materials. Choosing a durable, repairable tool reduces landfill waste compared to replacing cheap models every few years.
Common Mistakes That Ruin Your Results
Even the best sod lifter can’t compensate for poor technique. The number one mistake is cutting sod when the soil is too wet or too dry. Wet soil compacts and sticks to the blade, while dry soil crumbles and won’t hold together in strips. Aim for soil that’s moist but not muddy—like a wrung-out sponge. Another frequent error is setting the cutting depth too shallow, which leaves behind root fragments that resprout as weeds. Conversely, cutting too deep removes valuable topsoil and makes strips too heavy to handle. Always test-cut a small section first to dial in the perfect depth. Finally, failing to mark underground utilities before cutting can turn your lawn makeover into a disaster—call 811 or your local utility marking service before the first cut.
Seasonal Timing for Optimal Success
Timing your sod lifting project dramatically affects ease of removal and project success. Early spring and fall offer ideal conditions—cool temperatures, moderate moisture, and grass that’s actively growing but not heat-stressed. The soil is typically workable without being muddy, and removed sod transplants establish quickly. Summer heat makes manual labor brutal and stresses transplanted sod, while frozen winter ground makes cutting impossible. For cool-season grasses, late August through September is prime time; the grass recovers quickly, and fall rains reduce watering needs. Warm-season grasses are best lifted in late spring as they enter active growth. Check your local frost dates and plan to complete sod lifting at least 4-6 weeks before the first hard frost to give new plantings time to establish.
Integrating Your Sod Lifter with Other Renovation Tools
A sod lifter rarely works alone in a lawn makeover. Pair it with a core aerator to relieve soil compaction after sod removal, improving root penetration for new grass. A landscape rake follows behind to level the soil and remove debris. For transplanting projects, a sod roller is essential—it presses lifted sections firmly into their new location, eliminating air pockets that cause drying. When creating garden beds, use your sod lifter to remove grass, then switch to a broadfork to loosen subsoil without disturbing soil structure. Marking paint and string lines ensure your cuts are straight and true, while a sturdy wheelbarrow with pneumatic tires transports heavy sod strips without tipping. Think of your sod lifter as the lead actor in a ensemble cast—each tool plays a supporting role in the final production.
Frequently Asked Questions
How do I know if my soil is the right moisture level for using a sod lifter?
Perform the “squeeze test.” Grab a handful of soil from 3 inches down and squeeze it firmly. If water drips out, it’s too wet—wait 2-3 days. If it crumbles apart when you open your hand, it’s too dry—water thoroughly and wait 24 hours. Perfect moisture holds its shape when squeezed but breaks apart easily when poked, resembling a moist chocolate cake. This consistency allows the blade to slice cleanly without sticking or causing the sod to fall apart.
Can I use a sod lifter to remove weeds without chemicals?
Absolutely. A sod lifter is one of the most effective organic weed control tools. By cutting 2-3 inches deep, you remove the entire root system of most perennial weeds like dandelions, plantain, and thistle. This prevents regrowth and eliminates the need for herbicides. For weed-infested areas, cut the sod into smaller sections (12x12 inches) to make handling easier, then compost the material in a hot compost pile to kill any remaining seeds. The key is thorough depth control to ensure you capture the entire taproot.
What’s the difference between a sod lifter and a sod cutter?
The terms are often used interchangeably, but traditionally, a sod lifter emphasizes removing intact strips for transplanting, while a sod cutter focuses on destruction and removal. Modern tools blur this line. For practical purposes, look at the blade design: lifters typically have thinner, sharper blades that slide under roots cleanly, while cutters may have thicker blades built for durability over finesse. If your goal is transplanting, prioritize tools marketed as lifters; for disposal-focused projects, either type works.
How wide should I cut my sod strips for easiest handling?
For manual lifting and carrying, 12-inch-wide strips are manageable for most homeowners, weighing 15-25 pounds depending on soil moisture and depth. If you’re using a powered sod lifter and have help, 16-18 inch widths reduce the total number of strips. Always cut strips 2-3 feet long—longer strips become unwieldy and tear under their own weight. For transplanting, slightly narrower strips (10-12 inches) establish faster because the edges root more quickly. Pro tip: cut a test strip first and lift it to gauge weight before committing to a full yard width.
Can I rent a sod lifter for just a few hours, or is it a full-day rental?
Most equipment rental centers rent sod lifters by the day, but many offer half-day rates (4 hours) for morning or afternoon slots. The challenge is estimating your time accurately. A 1,000 square foot lawn takes 2-3 hours with a powered sod lifter for an experienced user, but first-timers should budget 4-5 hours. Manual tools have no rental option, so purchase is your only path. Some landscape supply companies offer hourly rates with delivery and pickup, which can be cost-effective for small urban yards. Always reserve in advance during peak seasons (spring and fall) when demand spikes.
How do I prevent the sod strips from drying out while I work?
Time is your enemy once sod is lifted. Work in sections, lifting only what you can transplant or process within 30 minutes. Keep a spray bottle or hose with a misting nozzle handy to dampen lifted strips. If transplanting, prepare the new area first so sod can be laid immediately. For disposal, stack strips in a shady spot and cover with a damp tarp. In hot weather, consider laying strips root-side-up to prevent the grass from transpiring moisture. Never leave sod strips stacked grass-to-grass for more than a few hours—this creates heat and smothers the turf.
Is it possible to lift sod from a lawn with an irrigation system?
Yes, but preparation is critical. Mark all sprinkler heads with flags and locate the main lines using your system’s diagram or a wire tracer. Set your sod lifter to a shallow depth (1-1.5 inches) when crossing known pipe routes—most residential lines are buried 6-12 inches deep, but shallow feeder lines can be closer to the surface. Hand-dig carefully in these areas. For drip irrigation zones, the lines are typically shallow enough that manual removal with a spade is safer. Always turn off and depressurize the system before starting to avoid accidental line cuts that could cause expensive water damage.
What’s the best way to dispose of removed sod if I can’t transplant it?
Check local regulations first—some municipalities accept sod in green waste bins, while others consider it too heavy. If composting, break sod strips into 6-inch pieces and layer them grass-side-down in your pile with equal parts brown material. This can take 6-12 months to decompose fully. For faster disposal, rent a chipper/shredder to process sod into mulch, then use it to smother weeds in non-lawn areas. Some landscape companies offer pickup services for a fee. Creative homeowners use removed sod to fill low spots, build berms, or create sod walls for raised beds—turning waste into landscape features.
How long should I wait before laying new sod after removing the old turf?
You can lay new sod immediately after removal if you’ve addressed underlying soil issues. However, most experts recommend waiting 2-3 days to allow the soil to settle and breathe. This brief period lets you amend the soil with compost, adjust pH if needed, and ensure the grade is perfectly level. If you’ve discovered grubs or soil-borne diseases, treat these issues before replanting. For instant makeovers, same-day replacement works—just roll the new sod firmly, water deeply, and avoid foot traffic for two weeks. The key is keeping the prepared soil moist but not waterlogged during the waiting period.
Can a sod lifter help me convert my lawn to a no-grass landscape?
Absolutely. A sod lifter is the first tool in any lawn-to-garden conversion. Use it to remove grass for planting beds, hardscaping, or native plant meadows. The precision cuts prevent grass from invading your new landscape. For meadow conversions, some eco-conscious gardeners use the sod lifter to remove only the top growth, then sheet mulch the area with cardboard and wood chips to smother remaining roots. This reduces soil disturbance and preserves soil biology. The removed sod becomes the base for raised beds or hugelkultur mounds, ensuring no organic matter goes to waste in your sustainable landscape transformation.