You’ve spent weeks poring over seed catalogs, plotted your garden layout with military precision, and maybe even talked to your tomato seeds for motivation (we’ve all been there). But here’s the cold, hard truth: none of that matters if you’re planting into soil that’s secretly sabotaging your efforts. While most gardeners obsess over air temperatures and frost dates, the real MVP of early-season success lies six inches beneath the surface.
Soil temperature is the invisible gatekeeper of germination, determining whether your seeds burst forth with vigorous life or rot quietly in cold, indifferent earth. A digital soil thermometer isn’t just another gadget to clutter your potting bench—it’s your backstage pass to understanding what your seeds are actually experiencing. Unlike the old analog probes that took forever to register and seemed to fog up at the mere mention of humidity, today’s digital models deliver laboratory-grade accuracy in a tool that fits in your apron pocket. Let’s dig into everything you need to know about selecting and using these game-changing devices for your earliest plantings.
Top 10 Digital Soil Thermometers for Early-Season Seed Starting
Detailed Product Reviews
1. Reotemp K83B1 12 Inch Soil & Compost Thermometer with Digital Composting Guide, 32-178 Fahrenheit and Celsius
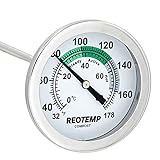
Overview: The Reotemp K83B1 is a beginner-friendly compost thermometer designed for small to medium-sized compost bins and soil temperature monitoring. Featuring a 12-inch stainless steel stem and a clear analog dial displaying both Fahrenheit and Celsius scales from 32-178°F, this tool helps composters monitor the critical temperature ranges needed for efficient decomposition. The package includes a free digital composting guide, making it an excellent entry point for those new to composting.
What Makes It Stand Out: This thermometer distinguishes itself through its comprehensive approach to beginner education. The included digital composting guide provides expert instructions on building and managing compost piles for optimal production. Its 304 stainless steel construction ensures corrosion resistance, while the waterproof and dust-proof design with a quality glass lens guarantees durability in harsh compost environments. The dual-scale temperature reading adds versatility for users comfortable with either measurement system.
Value for Money: At $12.99, the K83B1 offers solid value considering its quality materials and educational component. Competing basic thermometers without guides often cost $10-15, making the included digital guide a meaningful bonus. The robust stainless steel construction suggests longevity that justifies the modest investment for serious composters.
Strengths and Weaknesses: Strengths include excellent build quality with medical-grade stainless steel, beginner-friendly educational resources, versatile 12-inch length for most home bins, and reliable waterproofing. Weaknesses are the relatively short stem for large outdoor piles, lack of color-coded optimal zones on the dial, and the analog display which some may find less precise than digital alternatives.
Bottom Line: The Reotemp K83B1 is an ideal choice for novice composters working with smaller bins who value educational support. Its durable construction and included guide provide confidence-building tools for mastering compost management.
2. REOTEMP K83W Worm Therm Soil Thermometer with Worm Composting Digital Guide for Red Wiggler Compost Bins

Overview: The REOTEMP K83W Worm Therm is a specialized thermometer engineered specifically for vermicomposting systems. With a 7.5-inch stem and a 2-inch easy-to-read dial, this tool monitors temperatures crucial for Red Wiggler worm health and productivity. The package includes a dedicated digital worm composting guide, making it perfect for school projects and gardeners embracing this eco-friendly composting method.
What Makes It Stand Out: The standout feature is the dial’s green-highlighted optimal temperature range specifically calibrated for Red Wiggler worms, eliminating guesswork for vermicomposters. The included protective sheath with pocket clip adds portability and protection, while the specialized digital guide offers expert instructions on building and maintaining worm bins. Its waterproof construction with a glass lens that won’t yellow ensures long-term readability.
Value for Money: At just $9.99, this specialized tool delivers exceptional value. Vermicomposting-specific equipment often carries premium pricing, but this thermometer makes the practice accessible. The combination of specialized features, protective accessories, and educational content at this price point is impressive.
Strengths and Weaknesses: Strengths include worm-specific optimal zone highlighting, comprehensive digital guide, protective sheath for storage, corrosion-resistant stainless steel construction, and excellent readability. Weaknesses are the short 7.5-inch stem limiting depth measurement, narrow specialization unsuitable for hot composting, and potentially limited temperature range for thermophilic processes.
Bottom Line: The K83W is an essential, affordable tool for anyone serious about vermicomposting. Its worm-specific design and educational resources make it invaluable for maintaining healthy, productive worm bins.
3. Compost Thermometer Stainless Steel Dial - Ideal Composting Soil Thermometer with 50MM Diameter C and F Dial and 295MM Compost Temperature Gauge Probe

Overview: This stainless steel compost thermometer features an extra-long 295mm (11.6-inch) probe and large 50mm diameter dial designed for serious composters managing substantial piles. The analog display shows both Celsius and Fahrenheit with recommended temperature zones clearly marked, helping users maintain optimal conditions for efficient decomposition. Marketed as a professional-grade tool, it promises accuracy and durability for dedicated composting enthusiasts.
What Makes It Stand Out: The generous probe length reaches deep into large compost piles where core temperatures matter most, while the oversized 50mm dial ensures easy reading without bending down. The clearly marked recommended temperature zones provide quick visual guidance for maintaining thermophilic conditions. Its all-stainless steel construction projects durability for years of outdoor use.
Value for Money: Priced at $12.99, this thermometer competes directly with entry-level models while offering a longer probe and larger dial. However, the lack of included educational materials makes the value proposition less compelling compared to similarly priced alternatives that bundle digital guides. The “fantastic value” claim relies entirely on build quality rather than features.
Strengths and Weaknesses: Strengths include excellent reach for deep piles, large easy-to-read dial, robust stainless steel construction, and clear temperature zone markings. Weaknesses are the absence of educational resources, vague brand positioning, no waterproofing claims, and lack of protective accessories.
Bottom Line: This thermometer suits experienced composters with large piles who prioritize probe length and readability over instructional support. Beginners should look elsewhere for guided learning.
4. Digital Max Min Thermometer - Monitor Max and Min Temperatures with This Handy Greenhouse Thermometer Garden Accessories Easily Wall Mounted Maximum Minimum

Overview: This digital max/min thermometer is designed for greenhouse and garden monitoring, displaying current, maximum, and minimum temperatures. Wall-mountable with an integrated protective roof, it includes a AAA battery and works for both indoor and outdoor applications. Unlike probe-style compost thermometers, this unit measures ambient air temperature, making it ideal for tracking environmental conditions affecting plant growth and seedling development.
What Makes It Stand Out: The digital memory function automatically records temperature extremes, providing valuable data for greenhouse management without constant manual monitoring. The protective roof design shields the unit from direct rain and sun, enhancing durability in harsh garden conditions. The included battery and ready-to-mount design offer immediate out-of-box functionality for gardeners seeking hassle-free setup.
Value for Money: At $9.95 with battery included, this digital thermometer represents exceptional value. Comparable digital thermometers with max/min functions typically cost $15-20, making this an affordable entry into environmental monitoring. The accuracy claims and included power source strengthen its budget-friendly appeal for both novice and experienced gardeners.
Strengths and Weaknesses: Strengths include digital accuracy, automatic max/min tracking, battery included, protective housing for outdoor durability, and versatile mounting options for various locations. Weaknesses are its unsuitability for compost pile insertion, reliance on batteries that will need periodic replacement, and potential digital component failure in extreme weather conditions over time.
Bottom Line: This is an excellent ambient thermometer for greenhouse and garden monitoring but should not be confused with compost pile thermometers. Purchase this for environmental tracking, not compost management.
5. iPower Durable Seedling Heat Mat Warm 48" x 20" - 2 Pack Hydroponic Heating Pad Waterproof and A Digital Thermometer for Seed Starting Greenhouse and Germination

Overview: The iPower heat mat two-pack provides professional-grade seedling warming solutions for serious gardeners and propagators. Each 48" x 20" mat delivers 100W of power, warming 10-20°F above ambient temperature with internal insulated wiring for safety. The package includes an LCD digital thermometer, making it a complete germination system for starting vegetables, herbs, and flowers.
What Makes It Stand Out: The two-pack configuration offers exceptional coverage for multiple trays or large propagation setups. The thickened heat-conducting wires ensure uniform temperature distribution across the entire mat surface, preventing hot spots that can damage delicate seedlings. Beyond horticulture, the waterproof construction enables diverse applications including home-brewing and reptile enclosures.
Value for Money: At $28.99 for two mats plus a thermometer, this package delivers outstanding value. Individual heat mats of this quality typically retail for $20-25 each, making the bundle effectively half-price. The included thermometer, while ambient-measuring, adds further value to this professional-grade offering.
Strengths and Weaknesses: Strengths include professional reliability, uniform heat distribution, waterproof and cleanable construction, versatile multi-purpose applications, and excellent bundle pricing. Weaknesses are the ambient thermometer’s limitation for soil temperature verification, large size requiring substantial space, and 100W power consumption adding to electricity costs.
Bottom Line: This iPower two-pack is an unbeatable value for anyone serious about seed starting or needing reliable heating for multiple applications. The quality and quantity make it a smart investment for dedicated gardeners.
6. Luster Leaf 1625 Digital Soil Thermometer

Overview: The Luster Leaf 1625 Digital Soil Thermometer from the trusted Rapitest line gives gardeners precise soil temperature readings crucial for successful early-season planting and transplanting. This handheld tool eliminates guesswork by delivering accurate measurements that determine optimal timing for seed germination and seedling establishment.
What Makes It Stand Out: Unlike traditional analog models, this digital thermometer provides quick, easy-to-read results on a clear LCD display. The stainless steel probe penetrates soil efficiently, offering readings within seconds rather than minutes. It specifically addresses the critical 40-80°F range where most cool-season and warm-season crops germinate, helping prevent costly seed rot and transplant shock.
Value for Money: At $15.50, this thermometer strikes an excellent balance between affordability and functionality. Basic analog versions cost $8-12 but lack precision and readability. Professional-grade alternatives run $30-50, offering features most home gardeners don’t need. The Luster Leaf model’s accuracy pays for itself by preventing a single failed planting of vegetable starts or premium seeds.
Strengths and Weaknesses: Strengths include rapid digital readings, clear display, ergonomic design, and the reputable Rapitest brand backing. It empowers data-driven planting decisions that significantly improve germination rates. Weaknesses involve potential durability concerns with the digital unit exposed to garden moisture, occasional battery replacement needs, and a probe length that may be insufficient for deeper-rooted transplants. The plastic housing feels somewhat lightweight for heavy-duty use.
Bottom Line: This digital soil thermometer is an essential tool for serious vegetable gardeners and anyone planting in unpredictable spring weather. While casual gardeners might manage without it, the $15.50 investment delivers measurable returns through healthier plants and improved timing. Choose it for accuracy and convenience, but store it properly to maximize longevity.
Why Soil Temperature is the Unsung Hero of Seed Starting
Every seed carries a memory of its ancestral homeland, encoded with specific temperature triggers that say “it’s safe to grow now.” Tomato seeds won’t even think about germinating below 50°F, while your pepper seeds are holding out for a balmy 65°F. Spinach, that cool-season champion, actually struggles when soil exceeds 70°F. These aren’t suggestions—they’re biological non-negotiators.
Air temperature is a fickle friend. A sunny spring day might hit 75°F, but the soil two inches down could still be a frigid 45°F from that cold snap three nights ago. This disconnect explains why seeds started “on time” according to the calendar often fail to thrive. The soil is the environment your seeds actually inhabit. It’s where moisture, oxygen, and warmth converge to work their magic—or their misery. A digital soil thermometer removes all guesswork, giving you the confidence to plant with precision rather than hope.
The Digital Advantage: Precision in the Palm of Your Hand
The leap from analog to digital represents more than just a modern convenience—it’s a fundamental shift in how we interact with garden data. Traditional mercury or dial thermometers rely on thermal expansion, a slow process that can take several minutes to stabilize. By the time you get a reading, the act of inserting the cold probe has already altered the soil conditions you’re trying to measure.
Digital thermometers operate using thermistors—tiny temperature-sensitive resistors that change electrical resistance with temperature fluctuations. This technology delivers readings in seconds, not minutes, with accuracy within 0.1°F in premium models. For the seed starter, this means you can quickly check multiple beds, trays, or containers without losing precious morning light. The digital display eliminates interpretation errors; there’s no squinting at a dial or wondering if you’re viewing it at the right angle. You get a definitive number, and that number becomes the foundation of your planting decisions.
Core Features That Separate Good from Great
Not all digital soil thermometers are created equal. The market ranges from $12 budget sticks to professional-grade instruments topping $100. Understanding which features genuinely impact performance helps you invest wisely without paying for gimmicks you’ll never use.
Probe Length and Material: Getting to the Root Zone
The ideal probe length depends entirely on your growing setup. For seed starting trays and small containers, a 4-5 inch probe reaches the root zone without bottoming out. For direct sowing in raised beds or ground soil, you’ll want 7-9 inches to measure where seeds actually sit.
Stainless steel is the gold standard for probe material. It resists corrosion from soil moisture and fertilizers while conducting heat efficiently. Avoid models with plastic probe shafts near the tip—plastic insulates and slows response time. The taper matters too; a gradually tapered tip displaces less soil, minimizing disturbance that could affect your reading. Some premium designs feature a stepped profile that maintains rigidity while reducing soil compression.
Accuracy Ratings: Decoding the Specs
You’ll see accuracy listed as something like “±0.5°F” or “±1°C.” This spec tells you how far the reading might deviate from the true temperature. For seed starting, aim for ±0.5°F or better. That level of precision matters when you’re trying to maintain 68°F for peppers and 65°F for eggplants—those three degrees can be the difference between vigorous germination and sluggish, spotty results.
Calibration is another critical factor. High-quality units allow for user calibration using ice water (32°F) and boiling water (212°F) tests. This feature extends the tool’s lifespan and ensures year-over-year consistency. Some models drift over time, especially after exposure to extreme temperatures or moisture. The ability to recalibrate means your five-year-old thermometer is just as trustworthy as the day you bought it.
Response Time: From Insertion to Reading
Response time is where digital thermometers truly shine—or fail. Premium models stabilize within 3-5 seconds, while budget options might take 15-30 seconds. When you’re checking a dozen trays before your morning coffee, those seconds add up.
Fast response time also improves accuracy. The longer a probe sits in soil, the more it alters the immediate micro-environment through conduction. A quick-reading thermometer captures a snapshot before heat transfer skews the results. Look for specifications that list “time to 90% stabilization” rather than full stabilization, as this gives a more realistic measure of practical speed.
Build Quality Considerations for Seasonal Gardeners
Your soil thermometer lives a hard life. It gets jabbed into dense clay, dropped on concrete floors, left in humid greenhouses, and occasionally buried in compost by accident. Build quality determines whether it survives five seasons or five weeks.
Water Resistance: Understanding IP Ratings
That IP67 rating isn’t marketing jargon—it’s your thermometer’s survival rating. IP (Ingress Protection) codes have two numbers: the first for dust protection, the second for water. The “6” means complete dust-tight protection. The “7” indicates it can survive immersion in 1 meter of water for 30 minutes. For gardeners, this means accidental drops into watering cans or mud puddles won’t kill your investment.
IP65 offers protection against water jets—fine for rain but risky around irrigation. IP68 provides continuous submersion protection, overkill for most but peace of mind for the accident-prone. The display housing should have a rubber gasket seal, and the battery compartment needs an O-ring. Even with high IP ratings, always dry your thermometer after use; water resistance is emergency protection, not a license to leave it outside.
Display Technology: LCD vs. LED
Most digital soil thermometers use LCD (Liquid Crystal Display) screens because they’re energy-efficient and work well in bright sunlight. However, cheap LCDs become sluggish in cold temperatures, ironically when you need them most. Look for “extended temperature range” displays rated down to at least 14°F.
Backlighting is a game-changer for early morning greenhouse checks. LED backlighting illuminates the display without draining batteries like old electroluminescent backlights did. Auto-off features prevent you from accidentally leaving the light on and killing your battery. Some models feature “hold” buttons that freeze the reading, letting you pull the probe out and read the display in better light—a thoughtful touch when you’re contorted over a low tunnel.
Power and Battery Life: Staying Charged Through Spring
The best thermometer in the world is worthless with a dead battery. Most digital soil thermometers use button cell batteries (LR44 or CR2032), which last 1-2 years with moderate use. Some models use AAA batteries, easier to replace but bulkier.
Battery life indicators are surprisingly rare but invaluable. A low-battery warning prevents that moment of frustration when you desperately need a reading and get a blank screen. Auto-shutoff features, typically after 10 minutes of inactivity, extend battery life significantly. For the eco-conscious gardener, some manufacturers now offer solar-assisted models that supplement battery power—handy if you store your thermometer in a sunny greenhouse.
Advanced Features Worth the Investment
Once you’ve covered the basics, several premium features can elevate your seed starting from good to exceptional. These aren’t essential for beginners but become invaluable as your operation scales up.
Data Logging: Tracking Temperature Trends
Data logging thermometers record readings at set intervals, storing them for later download to your phone or computer. This reveals patterns invisible to spot-checking: how quickly your soil warms after sunrise, whether your heat mats are cycling properly, or if that cold frame is maintaining overnight temperatures above 45°F.
Some models store 30 days of hourly readings; others hold just 24 hours. Bluetooth connectivity lets you monitor trays from your kitchen, receiving alerts if temperatures drift outside your set range. For the serious seed starter managing hundreds of cells, this remote monitoring saves countless trips to the greenhouse and catches problems before they kill seedlings.
Backlighting and Auto-Hold Functions
We’ve touched on backlighting, but it’s worth emphasizing for early-season use. March mornings are dark, and greenhouse lighting is often minimal. A bright, even backlight that activates with a button press (not automatically, which drains battery) is worth a $10-15 premium.
Auto-hold functions detect when the reading has stabilized and beep, freezing the display. This eliminates guesswork about whether the number is still climbing. Some models even display a trend arrow, showing if temperature is rising or falling—useful for predicting when your soil will hit the sweet spot for planting.
Analog vs. Digital: The Clear Winner for Modern Gardeners
The analog-digital debate isn’t really a debate anymore. Analog thermometers suffer from parallax errors (reading from the side gives a different number), slow response times, and lack of precision. A dial thermometer might show 65°F when it’s actually 63°F or 67°F—that four-degree swing covers the entire optimal range for many vegetables.
Digital units offer consistency. The same probe in the same soil will give the same reading ten times in a row. They’re easier to read for aging eyes, more durable (no glass vials to break), and many include min/max memory that shows the temperature range since you last checked. The only advantage analog holds is not needing batteries, but swapping a button cell every 18 months is a small price for accuracy.
Proper Technique: How to Get Reliable Readings
Even the best thermometer delivers garbage data if used poorly. Technique matters as much as technology when you’re making planting decisions based on a single degree.
Depth Guidelines for Different Seed Types
Measure at seed depth, not deeper. For lettuce sown at 1/4 inch, a reading at 4 inches tells you nothing about the germination environment. Insert the probe vertically for direct-sown seeds, angling slightly for trays to avoid hitting the bottom. For tiny seeds like celery or snapdragon, measure at 1/8 inch depth by inserting the probe almost horizontally just below the surface.
In containers, take readings at multiple points—edges cool faster than centers, and corners can be several degrees different. For heat mats, slip the probe between the mat and tray bottom to monitor the heat source, then verify soil temperature separately. The difference between these two readings tells you if your media is insulating too much or conducting heat effectively.
Timing: When to Measure for Best Results
Soil temperature lags behind air temperature by 2-4 hours. The warmest reading typically occurs between 2-4 PM, while the coolest comes just before sunrise. For seed starting, morning readings matter most—they represent the baseline your seeds experience overnight.
Check temperatures at the same time daily to track trends consistently. Avoid measuring immediately after watering; the influx of cold water can drop readings by 5-10°F temporarily. Wait at least two hours after irrigation for the soil to re-equilibrate. Similarly, don’t measure right after removing row covers or opening the greenhouse—the sudden air exposure creates a temporary surface chill.
Common Pitfalls That Skew Your Readings
The most frequent mistake is measuring too close to the surface. The top half-inch of soil can swing 15°F in a single day, while the zone at seed depth remains relatively stable. Always insert the probe to the full recommended depth for your seed type.
Contamination is another silent killer. Organic matter stuck to the probe insulates it, slowing response and creating false lows. Wipe the probe clean with rubbing alcohol between uses, especially when moving from compost-rich beds to sterile seed mix. Never store your thermometer with the probe inserted into anything—dirt in the housing can break the seal and compromise water resistance.
Thermal shock damages accuracy. Taking a thermometer from your warm kitchen to a 40°F garden and immediately jamming it into cold soil stresses the thermistor. Let the unit acclimate to ambient temperature for 5 minutes first. Conversely, don’t leave your thermometer in direct sunlight; the display housing can heat up and radiate warmth to the probe, giving falsely high readings.
Creating Your Temperature-Based Planting Calendar
Once you understand your soil’s thermal personality, you can create a planting schedule that works with reality, not against it. Start by logging temperatures daily for two weeks before your “traditional” planting date. You’ll likely discover your soil reaches tomato-friendly 60°F a full week earlier—or later—than the calendar suggests.
Map temperature isotherms in your garden. South-facing slopes might hit target temps 5-7 days before low spots. Record these microclimates and adjust your planting dates accordingly. Your digital thermometer becomes a landscape analysis tool, revealing where to plant peppers (warmest spots) versus lettuce (cooler areas that won’t bolt).
Use temperature data to time succession plantings. When soil climbs above 70°F, it’s time for the final spinach sowing before summer heat makes germination impossible. That same reading signals perfect conditions for squash and melons. By tracking daily highs and lows, you can predict when beds will warm sufficiently for heat-lovers, maximizing your growing season without gambling on calendar dates.
Care and Maintenance: Protecting Your Investment
A quality digital soil thermometer should last a decade with proper care. After each use, wipe the probe with a damp cloth to remove soil particles. For salt buildup from fertilizers, use a cloth dampened with distilled water. Never submerge the entire unit; even water-resistant models shouldn’t be soaked.
Store your thermometer in a protective case in a climate-controlled space. Extreme heat (like a greenhouse in summer) and freezing temperatures degrade battery life and LCD performance. Remove the battery if storing for more than a month—leaked battery acid is the number one killer of otherwise functional units.
Annually check calibration using the ice water method. Fill a glass with ice, add cold water, and let it sit for 3 minutes. Insert the probe; it should read 32°F. If it’s off by more than 0.5°F and your model allows calibration, follow the manufacturer’s procedure. If not, label it with the known offset or replace it. For a tool that controls your entire planting schedule, accuracy isn’t optional.
Frequently Asked Questions
How deep should I insert my digital soil thermometer for accurate seed starting readings?
Insert the probe to the exact depth you’ll be planting your seeds. For most vegetables started in trays, this is 1/4 to 1/2 inch deep. For direct-sown crops like beans or corn, measure at 1-2 inches. The key is measuring the environment your seeds will actually experience, not the soil six inches down where mature roots will eventually reach.
Can I leave my digital soil thermometer in the soil overnight for continuous monitoring?
While technically possible with water-resistant models, it’s not recommended. Soil moisture will eventually corrode even stainless steel probes, and the housing can trap humidity against the sensor. For continuous monitoring, use a dedicated data logger designed for long-term burial, or check temperatures manually at consistent times each day.
Why does my thermometer give different readings when I check the same spot multiple times?
This usually indicates insufficient stabilization time or soil disturbance. Insert the probe, wait the full recommended time (5-10 seconds for quality units), then read. If you immediately re-insert, you’ve compressed and heated the soil slightly, altering the micro-environment. For consistent readings, wait 30 seconds between checks and insert the probe 2 inches away from the previous spot.
What’s the minimum accuracy I should accept for seed starting purposes?
Look for ±0.5°F (±0.3°C) accuracy or better. Seeds have narrow germination windows—tomatoes need 60-85°F, with optimal around 75°F. A thermometer with ±2°F accuracy could read 73°F when it’s actually 71°F, putting you below the ideal range and potentially adding days to germination time. Precision matters when you’re racing the calendar.
How do I know if my thermometer needs recalibration?
Test it in ice water (should read 32°F) and boiling water (212°F at sea level). If readings are off by more than 1°F, recalibrate if your model allows, or replace it. Also watch for erratic readings, failure to stabilize, or readings that seem stuck at a particular number. These indicate sensor drift or damage, common after dropping the unit or exposing it to extreme temperatures.
Will a regular kitchen thermometer work for checking soil temperature?
Only if it has a sharp, sturdy probe that can penetrate soil without bending. Kitchen thermometers are designed for soft foods and liquids, not compacted earth. More importantly, most aren’t water-resistant and lack the durability for garden use. The accuracy might be fine, but the build quality means a short lifespan. Invest in a tool designed for the job.
How often should I check soil temperature during the seed starting season?
Daily checks are ideal for the two weeks leading up to planting, then every 2-3 days once conditions are stable. Check more frequently during weather swings—after cold fronts, heavy rains, or unseasonable warm spells. For heat mats, check twice daily until you understand how your setup maintains temperature overnight versus during the day.
What’s the difference between soil temperature and soilless mix temperature in seed trays?
Soilless mixes (peat, coir, perlite) warm and cool faster than mineral soil due to lower thermal mass. They also dry out quicker, and dry mix insulates poorly, leading to temperature swings. Measure in the center of the tray, not against the edges, and expect to see more variability than in ground soil. This is actually an advantage—warm-season crops get the heat they need faster.
Can I use my soil thermometer to check compost temperature?
Only if the probe is rated for it. Compost can reach 150-160°F, beyond the range of some garden thermometers. Verify your unit’s maximum temperature rating (usually listed as 200°F or higher for quality models). Compost also contains highly corrosive compounds; clean the probe immediately after use and consider dedicating a separate, heavy-duty thermometer for compost monitoring.
Why do professional gardeners recommend digital over analog for seed starting?
Digital thermometers eliminate human error and provide repeatable accuracy. Analog dials can be misread from an angle, stick slightly, and drift out of calibration without obvious signs. Digital units give the same reading to multiple people, essential for garden operations where staff share tools. The speed advantage—seconds versus minutes—means you can check more trays before conditions change, making digital the clear professional choice.