Imagine stepping into your garden in late November to harvest crisp spinach, tender carrots, and spicy arugula—months after your neighbors have hung up their trowels. This isn’t gardening magic; it’s the transformative power of pairing hoop houses with raised beds. These elegant, curved structures create a microclimate that can extend your growing season by 8-12 weeks, protect delicate crops from unpredictable weather, and dramatically increase your overall harvest yield without the complexity or expense of a full greenhouse.
Whether you’re a seasoned market gardener looking to maximize production or a home grower tired of losing crops to late frosts, understanding how to select and implement the right hoop house system for your raised beds will fundamentally change your relationship with the growing calendar. The synergy between contained soil and protective covering creates opportunities that neither element could achieve alone—faster germination, reduced pest pressure, and the ability to grow varieties typically unsuited to your climate zone.
Top 10 Hoop Houses for Raised-Bed Harvest
Detailed Product Reviews
1. RIFNY 24 PCS Garden Hoops for Raised Beds, Greenhouse Hoops Kit Long Grow Tunnel for Row Cover, Rust-Free Fiberglass Garden Support Poles for Insect Mesh Netting Freeze Plant Cover (Green)
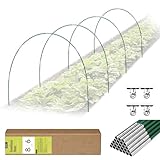
Overview: The RIFNY 24-piece garden hoop kit offers an affordable entry point for gardeners seeking seasonal plant protection. This set includes 17-inch fiberglass rods, aluminum connectors, and 12 stainless steel clips, designed for raised beds ranging from 2 to 4 feet wide. The kit enables creation of grow tunnels measuring 1.9-3 feet in height, making it suitable for low to medium-height crops.
What Makes It Stand Out: The double-layer fiberglass construction (inner fiberglass, outer plastic) provides excellent resilience and durability while remaining completely rust-free. The inclusion of aluminum connectors and stainless steel clips ensures all components resist oxidation across seasons. Its DIY flexibility allows gardeners to customize tunnel dimensions by connecting 4-6 rods, adapting to various bed widths without purchasing multiple specialized kits.
Value for Money: At $9.99, this kit delivers exceptional affordability, costing less than $0.42 per hoop. Comparable metal hoops often rust within a season, requiring replacement, while these fiberglass rods promise multi-year use. The integrated connector and clip system eliminates separate purchases, offering genuine budget-friendly value for small to medium garden plots.
Strengths and Weaknesses: Strengths include unbeatable price, rust-proof materials, flexible sizing, and straightforward assembly. The double-layer design enhances durability without adding significant weight. Weaknesses involve the limited clip count (only 12 for 24 hoops), which may constrain cover securing options. The 0.28-inch diameter rods, while flexible, may lack sturdiness in high winds compared to thicker alternatives. Some users might find fiberglass bending requires more effort than expected.
Bottom Line: This RIFNY kit is an outstanding value proposition for budget-conscious gardeners needing reliable, rust-free plant protection. While clip quantity and rod thickness present minor limitations, the overall package delivers functional versatility at an unbeatable price point.
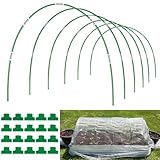
2. WYRJXYB 60Pcs Greenhouse Hoops Grow Tunnel Wide, 8FT Rust-Free Fiberglass Support Garden Hoops Kit for Raised Beds Plant Cloth Row Cover Netting-DIY Plant Support Garden Hoop for Netting-40Pcs Clips

Overview: The WYRJXYB 60-piece kit caters to serious gardeners managing larger plots. Designed for beds 2.8 feet or wider, this comprehensive set includes 60 fiberglass hoops, 60 connectors, and 40 clips, enabling construction of substantial tunnels up to 2.8 feet wide and 3.8 feet high. The 17-inch rods connect to form an 8-foot framework, providing extensive coverage for multiple beds.
What Makes It Stand Out: This kit’s sheer quantity distinguishes it from competitors, offering enough components for ambitious projects. The heavy-duty fiberglass construction withstands repeated bending and seasonal exposure without degradation. With 40 clips included, securing covers becomes more versatile than kits providing fewer fasteners. The ability to combine 5-6 hoops creates stable, tall tunnels ideal for protecting mature plants or creating mini-greenhouses.
Value for Money: Priced at $29.99, the per-unit cost drops to approximately $0.50 per hoop, delivering bulk savings for large-scale applications. While the initial investment exceeds smaller kits, the extensive component count eliminates repeat purchases. For gardeners requiring multiple tunnels, this represents significant long-term value compared to buying several smaller sets.
Strengths and Weaknesses: Strengths include abundant components, sturdy construction, generous clip allocation, and suitability for wide beds. The kit scales efficiently for expansive gardens. Weaknesses involve higher upfront cost and potential storage challenges with numerous loose parts. The quantity may overwhelm casual gardeners with modest needs, making it impractical for small spaces.
Bottom Line: The WYRJXYB kit is a powerhouse solution for dedicated gardeners needing extensive, customizable plant protection. Its bulk quantity and robust materials justify the investment for large gardens, though it may be excessive for casual users.
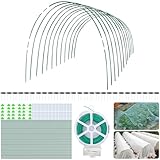
3. Garden Hoops for Raised Beds, 36pcs Greenhouse Hoops Grow Tunnel, 8ft Rust-Proof Fiberglass Frame for Garden Netting, Row Cover, Protecting Outdoor Plants
Overview: This 36-piece greenhouse hoop kit occupies the middle ground between budget and premium options, offering a balanced component count for medium-sized gardens. The set includes 17-inch fiberglass rods, 30 connectors, and 20 clips, enabling construction of tunnels up to 8 feet long. The manufacturer emphasizes eco-friendly materials and provides explicit guidance on proper bending technique for optimal results.
What Makes It Stand Out: The kit’s environmental focus stands out, featuring rust-proof fiberglass that won’t contaminate soil or affect plant health. The explicit warning about avoiding excessive bending angles demonstrates thoughtful user guidance, helping prevent installation failures. This educational approach, combined with quality materials, positions it as a conscientious choice for sustainable gardening practices.
Value for Money: At $17.99, this kit offers reasonable middle-tier pricing. The 36 hoops provide adequate coverage for several medium raised beds without the excess of larger kits. While clip quantity (20) lags behind hoop count (36), requiring potential supplemental purchases, the overall quality justifies the moderate investment for gardeners seeking reliable, eco-conscious protection.
Strengths and Weaknesses: Strengths include eco-friendly construction, clear usage instructions, versatile application with various covers, and appropriate quantity for medium gardens. The rust-proof material ensures longevity. Weaknesses involve insufficient clips for all hoops and the need for careful bending technique, which may challenge beginners. The single-length rods limit height customization compared to multi-length kits.
Bottom Line: This is a solid, environmentally responsible choice for moderate-scale gardening. While clip shortage and bending requirements demand consideration, the quality materials and thoughtful design make it a dependable mid-range option.
4. Greenhouse Hoops for Raised beds ,8 Sets Garden Hoops of 41.3’’ x 31.5’’ Detachable Rust-Free Garden Tunnel for Garden Fabric,Garden Hoops Grow Tunnel, DIY Plant Support Garden Stakes

Overview: This innovative kit diverges from traditional rod-based systems by providing eight complete, pre-formed hoop sets measuring 41.3 inches wide by 31.5 inches high. Each set includes curved tubes, straight sections, and connectors, creating ready-to-assemble tunnels without bending. The package contains 16 curved tubes, 24 straight hoops, 32 connecting pipes, and 24 clips, enabling four distinct configuration types.
What Makes It Stand Out: The pre-formed design eliminates the most challenging aspect of hoop installation—bending rods uniformly. With sharpened points on both ends, insertion requires minimal effort. The system assembles in under five minutes, offering unprecedented convenience. The ability to create four different tunnel types from standardized parts provides surprising versatility despite fixed dimensions.
Value for Money: At $25.98 for eight complete tunnels, each unit costs approximately $3.25. While pricier per-tunnel than DIY rod kits, the time saved and frustration avoided justify the premium. For gardeners prioritizing convenience over customization, this represents excellent value, particularly those who struggle with manual rod bending.
Strengths and Weaknesses: Strengths include tool-free, rapid assembly, consistent tunnel dimensions, sharpened insertion points, and stable pre-formed arches. The fixed sizing ensures reliable performance. Weaknesses involve limited dimensional flexibility—beds must accommodate the 41.3-inch width. The many small parts increase loss risk, and storage requires more space than simple rods. Fixed height may not suit all crops.
Bottom Line: This kit excels for gardeners valuing speed and simplicity over DIY flexibility. Its pre-formed design removes installation guesswork, making it ideal for quick seasonal deployment, though dimensional constraints limit universal application.
5. PirateAnt Greenhouse Hoops Set for DIY Grow Tunnel,Metal Connectors Thickened High Tenacity PP Dark Green Garden Hoops for Row Cover,Raised beds,DIY Plant Support Garden Stakes, 25pcs

Overview: PirateAnt’s 25-piece kit introduces a unique polypropylene (PP) construction, addressing common fiberglass splintering concerns. The set includes 17-inch dark green hoops, 20 upgraded metal double connectors with protective covers, and 16 premium ABS clips featuring 304 stainless steel springs. This design prioritizes user safety and component durability in extreme weather conditions.
What Makes It Stand Out: The thickened PP material (double wall thickness) eliminates fiberglass splinters, protecting hands and preventing cover snags. The upgraded metal connectors feature an internal double-layer design with external protective covers, solving common plastic connector breakage issues. High-quality ABS clips with stainless steel springs outperform fragile plastic alternatives, ensuring long-term reliability.
Value for Money: At $16.99, this kit offers mid-range pricing with premium features. The metal connectors and splinter-free design justify the slight premium over basic fiberglass kits. While containing fewer hoops (25) than some competitors, the superior connector and clip quality reduce replacement costs, delivering better long-term value for safety-conscious buyers.
Strengths and Weaknesses: Strengths include splinter-free safe handling, durable metal connectors, high-quality ABS clips, thickened material for extreme weather resistance, and smooth surface preserving cover integrity. Weaknesses involve PP’s potentially lower flexibility versus fiberglass, limited hoop count (25), and insufficient clips (16) for maximum versatility. The dark green color may absorb more heat than lighter options.
Bottom Line: PirateAnt’s kit is the top choice for gardeners prioritizing safety and durability. The splinter-free design and robust metal connectors make it worth the modest premium, particularly for families or those handling covers frequently.
6. 60pcs Garden Hoops for Raised Beds Wide, 8ft Greenhouse Hoops Grow Tunnel for Row Cover Netting, Adjustable Fiberglass Rust-Free Garden Bed Plant Hoops Support DIY Frame Stake for Outdoor, 40pcs Clips

Overview:
This comprehensive kit delivers sixty 17-inch fiberglass hoops designed to construct expansive 8-foot grow tunnels for serious gardeners. The heavy-duty double-layer fiberglass construction resists rust and oxidation while maintaining flexibility across seasons. With sixty connectors and forty clips included, the package supports multiple raised beds or one extensive continuous structure. The manufacturer explicitly targets winter protection and pest defense, positioning this as a year-round harvest improvement solution.
What Makes It Stand Out:
The sheer quantity distinguishes this kit—sixty hoops enable large-scale garden coverage rarely found in single packages. The one-year warranty against manufacturer defects provides unusual confidence for basic garden hardware. The 17-inch segment length offers versatility for both low-profile crop protection and taller plant support when combined. Clear assembly instructions and the emphasis on seasonal extension demonstrate a product built by gardeners for gardeners.
Value for Money:
At $29.99, the cost per hoop is approximately $0.50, which is competitive given the extensive connector and clip inclusion. Bulk purchasing makes economic sense for gardeners managing multiple beds, as comparable smaller kits often cost 30-40% more per unit. The warranty adds intangible value, protecting your investment against premature failure.
Strengths and Weaknesses:
Strengths: High hoop count for large gardens; robust double-layer fiberglass; comprehensive connector/clip package; warranty coverage; clear instructions
Weaknesses: No actual netting included; 17-inch segments require many connections for height; storage bulk when disassembled; may be overkill for small gardens
Bottom Line:
Ideal for dedicated gardeners with multiple raised beds needing reliable, extensive coverage. The quantity and quality justify the price, though you’ll need to budget separately for covering material. A solid seasonal extension solution that eliminates multiple purchases.
7. 161 PCS Greenhouse Hoops for DIY Grow Tunnel, 12 Sets of 7 FT Long Garden Hoops Kit, Support Hoops Frame for Garden Netting Raised Bed Plant Row Cover, DIY Plant Support Garden Stakes
Overview:
This massive 161-piece kit creates twelve 7-foot tunnels using sixty 16.5-inch fiberglass rods, fifty connectors, thirty clips, twenty ground staples, and a 50-meter twist tie roll. The versatile design supports indoor seed starting and outdoor mature plant protection. The rust-proof fiberglass construction ensures longevity while the extensive accessory package addresses multiple gardening needs beyond basic tunnel creation.
What Makes It Stand Out:
The component count and bonus accessories make this a multi-functional gardening system. The included ground staples and twist tie eliminate separate purchases for securing both tunnels and individual plants. The kit adapts to various applications—from mini greenhouses to vineyard supports—making it a true all-in-one solution. The twist tie is particularly valuable for training climbing plants directly to support structures.
Value for Money:
At $25.99, the price per component is roughly $0.16—exceptional value that undercuts most competitors by significant margins. The staples and twist tie, typically $5-10 if purchased separately, effectively reduce the hoop cost further. This budget-friendly package suits both novices building their first system and experienced gardeners expanding existing setups.
Strengths and Weaknesses:
Strengths: Unbeatable component quantity; bonus staples and twist tie; versatile indoor/outdoor use; rust-proof fiberglass; excellent price-per-piece ratio
Weaknesses: No gloves or storage bag; connectors may be insufficient for complex layouts; twist tie quality unspecified; no warranty mentioned
Bottom Line:
The ultimate value proposition for cost-conscious gardeners wanting maximum flexibility. The extensive accessory package eliminates multiple store trips. Highly recommended for those building their first complete garden protection system or expanding existing infrastructure without breaking the bank.
8. 70 PCS Garden Hoops for Raised Beds 14 Sets Garden Tunnel Hoops Greenhouse Hoops Grow Tunnel, Rust-Free Fiberglass Garden Hoops Frame for Netting Shade Cloth Cover, DIY Plant Support Garden Stakes

Overview:
This 70-piece kit focuses on fourteen complete tunnel sets for standard 3-4 foot wide raised beds. The package includes seventy 15.7-inch fiberglass rods, sixty connectors, forty-two clips, and a practical pair of gardening gloves. The upgraded solid fiberglass material offers enhanced flexibility and weather resistance. The anti-oxidation properties ensure reliable performance across all seasons, from frost protection to sun shading.
What Makes It Stand Out:
The included gardening gloves demonstrate thoughtful packaging, acknowledging that assembly involves handling fiberglass and soil. The kit is specifically optimized for common raised bed widths, making it immediately practical without complex measurements. The generous clip count (forty-two) ensures secure covering even in windy conditions. The all-season protection focus addresses real gardener needs throughout the year.
Value for Money:
Priced at $23.99, the cost per hoop is about $0.34, with connectors and clips adding significant value. The glove inclusion, typically $3-5 separately, enhances the overall package. While not the cheapest option, the quality-focused materials and thoughtful accessories justify the modest premium over bare-bones alternatives. The targeted design saves time and frustration.
Strengths and Weaknesses:
Strengths: Gloves included for convenience; optimized for standard raised beds; robust fiberglass material; generous clip count; clear seasonal protection focus
Weaknesses: Fewer total hoops than bulk competitors; no ground staples or twist tie; glove size/fit not specified; 15.7" segments may limit height options
Bottom Line:
A well-rounded, user-friendly kit perfect for typical raised bed gardeners. The glove inclusion shows attention to detail that beginners appreciate. Recommended for those prioritizing quality and convenience over maximum quantity, and wanting a ready-to-use solution straight out of the box.
9. Garden Hoops for Raised Beds, 25pcs Greenhouse Hoops,Fiberglass 2- 8ft, Garden Tunnel with 15 Clips, Detachable Hoop House Frame for Row Cover,Garden Netting, Plant Covers

Overview:
This streamlined 25-piece hoop kit provides an affordable entry point for gardeners testing tunnel concepts. The package includes twenty-five fiberglass rods with protective PVC coating, twenty connectors, and fifteen clips. The detachable design allows customizing tunnel lengths from 2 to 8 feet, providing flexibility for various bed sizes and plant heights. The lightweight construction makes storage simple when not in use.
What Makes It Stand Out:
The PVC coating offers superior UV and moisture protection compared to raw fiberglass, potentially extending lifespan significantly. The customizable length configuration lets gardeners adapt precisely to their garden layout rather than fixed dimensions. At under $12, it’s the most accessible price point for experimenting with row covers without committing to large-scale purchases. The minimalist approach reduces waste for small gardens.
Value for Money:
At $11.99, this represents exceptional value for small gardens or trial use—approximately $0.48 per hoop with accessories included. While component count is limited, the quality coating and adaptability make it smarter than buying individual rods from hardware stores. It’s perfect for gardeners needing one or two small tunnels without over-investing in unused capacity.
Strengths and Weaknesses:
Strengths: PVC coating for enhanced durability; highly affordable entry price; flexible length configuration; lightweight and easy to store; ideal for small-scale testing
Weaknesses: Limited quantity (only 25 hoops); fewer clips than competitors; no bonus accessories; coating may crack with extreme bending; unclear warranty terms
Bottom Line:
An excellent starter kit for beginners or those with minimal space. The PVC coating adds durability uncommon at this price point. Best for small gardens or as a supplemental set to existing systems. Don’t expect to cover large areas, but for targeted protection of specific crops, it delivers unbeatable value and adaptability.
10. Greenhouse Hoops Grow Tunnel, 5 Sets of 7FT Garden Hoops for Raised Beds, Rust-Proof Fiberglass Frame for Garden Netting, Greenhouse Kit, Plant Shade Cloth, Plant Row Cover, 25 pcs

Overview:
This 25-piece kit provides five 7-foot tunnel sets using eco-friendly fiberglass construction. The package includes twenty-five 16-inch rods, twenty connectors, and fifteen clips. The manufacturer emphasizes using four or more rods per tunnel for structural integrity, specifically targeting small greenhouse and shade cloth applications. The rust-proof design ensures longevity without soil contamination concerns.
What Makes It Stand Out:
The explicit environmental focus on eco-friendly materials appeals to sustainability-conscious gardeners. The detailed assembly warning about bending angles demonstrates safety consciousness and product education, preventing common user errors. This kit simplifies purchasing decisions by focusing on core components without overwhelming beginners with excessive parts or confusing options.
Value for Money:
At $13.99, it’s competitively priced for a 25-hoop set—about $0.56 per unit. While slightly higher per-hoop than bulk options, the quality assurance and clear instructions add value for novices. The minimal packaging reduces waste, aligning with the eco-friendly messaging. The price reflects material quality rather than quantity.
Strengths and Weaknesses:
Strengths: Eco-friendly material focus; clear assembly guidance; rust-proof guarantee; compact package for easy storage; good for small-scale applications
Weaknesses: Limited component count; no ground staples or accessories; requires minimum 4 rods per tunnel (reduces effective count); warning suggests fragility if mishandled; no warranty mentioned
Bottom Line:
A straightforward, environmentally conscious choice for small gardens or beginners wanting simplicity. The clear warnings prevent costly misuse. Recommended for those prioritizing sustainability and ease of use over maximum coverage. Carefully assess your space needs—25 hoops build fewer tunnels than the number suggests, but what you get is reliable and responsibly made.
Understanding Hoop Houses and Raised Bed Synergy
The marriage of hoop houses and raised beds represents one of the most efficient season-extension strategies available to modern gardeners. Unlike standalone structures, this combination leverages the thermal mass of contained soil while providing overhead protection that responds dynamically to environmental changes. The elevation of raised beds improves drainage and warms soil faster in spring, while the hoop house captures solar energy and shields plants from desiccating winds.
What Makes a Hoop House Different from Cold Frames?
While both structures extend the season, hoop houses offer distinct advantages for raised bed applications. Cold frames are rigid, box-like structures typically built with wooden sides and glass or polycarbonate lids that open on hinges. They excel at protecting individual small beds but limit plant height and require manual ventilation. Hoop houses, conversely, feature flexible or semi-rigid arched frames covered with polyethylene film, creating a tunnel that spans the entire bed length. This design allows taller crops like kale, Brussels sprouts, and even indeterminate tomatoes to reach maturity under protection. The curved shape also sheds snow and rain more effectively and provides more uniform light distribution compared to angled cold frame lids.
The Science Behind Microclimate Creation
The physics at play within a hoop house over raised beds is fascinating. During daylight hours, solar radiation passes through the transparent covering and heats the soil, containers, and plants inside. These elements then radiate infrared heat, which the covering traps, creating a greenhouse effect. Raised beds amplify this effect because the contained soil mass warms more uniformly than ground soil, and the wooden or stone sides provide additional thermal mass. At night, this stored heat slowly releases, moderating temperature swings by 10-15°F compared to outside conditions. The enclosed space also reduces wind speed to near zero, decreasing transpiration and allowing plants to channel energy into growth rather than stress response.
Key Design Configurations for Maximum Impact
Not all hoop houses serve the same purpose, and selecting the right configuration determines whether you’ll achieve modest season extension or true four-season harvests. The arch height, width, and covering material must align with your specific crops, climate challenges, and physical accessibility needs.
Low-Profile Tunnel Designs
Low tunnels, typically 18-24 inches tall at their peak, sit just inches above your crops. These minimalist structures use ½-inch PVC or galvanized wire hoops spaced every 2-3 feet, covered with lightweight row cover or 4-6 mil greenhouse plastic. They’re ideal for winter-hardy greens like mâche, minutina, and claytonia that don’t require much headroom. The low profile withstands wind exceptionally well and requires minimal materials, making them cost-effective for covering multiple beds. However, they demand precise planning since you can’t easily access plants without removing the cover, making them best for “plant-and-harvest-once” crops rather than continuous harvest vegetables.
Walk-In High Tunnel Adaptations
For gardeners seeking maximum versatility, walk-in designs reaching 5-7 feet tall transform the growing experience. These structures use 1-inch or larger diameter metal conduit or galvanized steel hoops, creating enough headroom to work comfortably inside. The increased air volume provides better temperature buffering—taking longer to heat up but also cooling more slowly at night. This design accommodates trellised peas, tall brassicas, and even container fruit trees. The trade-off is higher material cost and greater vulnerability to wind, requiring robust anchoring systems and potentially diagonal bracing. For raised beds wider than 4 feet, consider center walkways or removable side panels to access plants without compacting soil.
Modular and Expandable Systems
Forward-thinking gardeners should evaluate modular designs that grow with their ambitions. These systems feature standardized connectors and hoop spacing that allow you to add length, connect multiple beds under one structure, or even stack additional layers of protection. Some configurations use base rails that accept different hoop sizes, enabling you to switch from low-tunnel to high-tunnel mode by simply changing the arch components. This adaptability proves invaluable when experimenting with new crops or responding to changing climate patterns. Look for systems with universal clamps and connectors rather than fixed-width designs that lock you into one configuration.
Material Selection: The Foundation of Performance
The longevity and effectiveness of your hoop house hinge entirely on material choices. Skimping on quality here leads to premature failure, torn covers, and collapsed frames after the first heavy snow or windstorm.
Frame Materials: PVC vs. Metal vs. Composite
PVC pipe offers affordability and flexibility, bending easily into smooth arches without specialized tools. Schedule 40 PVC withstands moderate snow loads but becomes brittle in extreme cold and degrades under UV exposure within 3-5 years. Metal options—typically galvanized electrical conduit or chain-link fence top rail—provide superior strength and 10+ year lifespans but require bending tools and cost more upfront. Composite materials like fiberglass rods combine flexibility with weather resistance, though they lack the rigidity for large spans. For raised beds in windy locations, metal frames with PVC sleeves for clip attachment offer the best hybrid solution.
Covering Options: Polyethylene, Polycarbonate, and Beyond
Greenhouse-grade polyethylene film (6 mil UV-stabilized) remains the standard for hoop houses, offering 3-5 years of service life with 85-90% light transmission. Avoid construction-grade plastic that yellows and disintegrates within months. For winter growing in zones 6 and colder, consider double-wall inflated systems that create an insulating air pocket, though this requires a small blower. Polycarbonate panels provide superior insulation and 10+ year lifespans but cost significantly more and work best with rigid frame systems. Woven polypropylene row covers (1-3 oz weight) serve as secondary layers for frost protection while allowing rain penetration and better airflow.
Ground Anchor Systems for Stability
The connection between hoop house and raised bed determines survival in storms. For wooden raised beds, bolt ground posts directly to the exterior frame using galvanized lag screws and washers. This transfers wind loads to the bed structure itself, which should be built with 4x4 corner posts for adequate strength. For metal or stone raised beds, drive 24-inch rebar stakes 18 inches into the ground beside each hoop, securing them with UV-resistant zip ties or pipe clamps. In extreme wind zones, bury a ground cable or chain along each side and attach hoops with turnbuckles, creating a tensioned system that resists uplift.
Critical Sizing and Compatibility Considerations
A hoop house that doesn’t properly fit your raised bed creates endless frustration—gaps that let in pests, inadequate coverage, or awkward access that makes you dread using it. Precision in planning prevents these headaches.
Matching Hoop House Dimensions to Standard Raised Bed Sizes
Most raised beds measure 4x8 feet, making them perfectly suited for 10-foot wide greenhouse plastic that provides 1-foot overhang on each side. For 3x6 foot beds, 8-foot wide plastic works ideally. When calculating hoop spacing, place them every 2 feet for metal frames and every 3 feet for PVC to prevent sagging. The arch width should exceed the bed width by 6-12 inches on each side, creating a rain shadow that protects bed edges while allowing you to reach plants from outside. For L-shaped or irregular beds, consider multiple small hoop houses rather than one complex covering that compromises structural integrity.
Height Clearance for Mature Plants
Underestimating mature plant height is the most common sizing error. Kale and collards reach 2-3 feet, Brussels sprouts can top 4 feet, and trellised peas exceed 6 feet. Add 12-18 inches of working clearance above the plant canopy for air circulation and ease of harvest. For beds dedicated to salad greens, 24-inch peak height suffices. For mixed vegetable production, 48-60 inches provides versatility. Remember that snow load compresses flexible covers, so a 60-inch peak may reduce to 48 inches under heavy accumulation—plan accordingly in snowy climates.
Access and Working Space Requirements
Consider how you’ll interact with plants daily. Can you reach the bed center from outside, or must you enter? For 4-foot wide beds, external access works if the hoop house side walls reach at least 30 inches high. Wider beds require internal pathways, reducing growing space but improving ergonomics. Some designs feature roll-up or removable side panels that provide temporary access without compromising overall protection. For wheelchair accessibility, ensure a 36-inch clear width and 60-inch peak height, with side panels that open completely to allow approach from either side.
Climate Control and Ventilation Strategies
Without proper ventilation, hoop houses become solar ovens that cook plants on sunny spring days. Effective climate management separates successful installations from disappointing ones.
Passive Ventilation Techniques
The simplest ventilation method involves leaving the ends open or covering them with screen mesh to block insects while allowing airflow. For more control, gather and clip the plastic at each end, creating a doorway you can adjust. Side ventilation—rolling up the plastic along the edges and securing it with clips—provides superior cross-ventilation. In moderate climates, leaving sides rolled up 6-12 inches continuously from March through October prevents overheating while still providing wind protection. For maximum effectiveness, orient your raised bed hoop house so prevailing winds flow through the length, not across the width.
Automated Vent Opener Integration
Solar-powered vent openers, originally designed for cold frames, adapt beautifully to hoop houses. These wax-filled cylinders expand when warm, pushing open a hinged panel at the peak or end. Install them to automatically crack vents when temperatures exceed 75°F, then close as it cools. While they add $30-50 per opener, they prevent catastrophic crop loss when you’re away during an unexpected warm day. For larger high-tunnel designs, consider adding a small solar exhaust fan that activates at a set temperature, actively pulling hot air out even when outside winds are calm.
Manual Ventilation Best Practices
Develop a daily routine: close all vents by 4 PM to trap daytime heat, then open them by 9 AM on sunny days to prevent rapid temperature spikes. Keep a minimum-maximum thermometer inside to track conditions—aim to keep temperatures between 40-80°F for cool-season crops. On cloudy winter days, keep vents closed to conserve every degree of heat. Learn to read cloud patterns: if morning sun gives way to afternoon clouds, vent early and close before the temperature drops. This intuitive management becomes second nature after one full season.
Season Extension Capabilities by Climate Zone
Your location’s temperature extremes and sunlight patterns dictate which hoop house design will transform your harvest versus merely protecting it from light frosts.
Zone 3-5: Winter Harvest Potential
In these challenging northern climates, hoop houses enable survival gardening rather than active winter growth. The goal shifts from continuous harvest to maintaining dormant, semi-hardy crops that resume growth in February. Use double-layer inflated systems or add an interior low tunnel (hoop house within a hoop house) for insulation. Focus on crops that survive at 15-20°F inside the structure: mâche, spinach, tatsoi, and leeks. Plant these in September for harvest in November, then let them coast through December-January. The key is massive thermal mass—line bed edges with water-filled jugs that freeze slowly, releasing heat overnight. Expect 4-6 weeks of extended harvest in fall and 3-4 weeks earlier spring start.
Zone 6-8: Four-Season Growing Reality
This is where hoop houses truly shine, enabling genuine year-round production. A single-layer 6 mil house with roll-up sides allows summer use for heat-loving crops, while winter management focuses on maintaining 25-35°F minimums for continuous harvest. You can grow spinach, arugula, carrots, beets, and scallions through winter, with new plantings every 3 weeks from September through March. The shoulder seasons (March-May and September-November) become your most productive periods, with explosive growth rates as plants experience warm days and cool nights. In these zones, invest in sturdy metal frames and UV-stabilized covers—the extended use justifies higher upfront costs.
Zone 9-11: Managing Heat and Humidity
Warm-climate gardeners face opposite challenges: preventing hoop houses from becoming too hot. Here, shade cloth (30-50% density) replaces plastic from May through September, converting the structure into a pest exclusion zone rather than a heat trap. Use white or reflective plastic instead of clear to reduce solar gain. Focus on extending the growing season into summer for cool-season crops that would normally bolt—lettuce, cilantro, and broccoli thrive under shade cloth protection when outside temperatures exceed 90°F. In winter, the same structure captures enough warmth to grow tomatoes and peppers through what others would consider “cool” weather. Ventilation becomes paramount: plan for fully removable sides and ends.
Protection Beyond Temperature: Pests, Wind, and Precipitation
While season extension gets the headlines, hoop houses provide equally valuable protection from other garden threats that devastate raised bed harvests.
Insect Barrier Strategies
Row covers inside hoop houses create a double layer of defense. Cover newly seeded beds with floating row cover (Pro 19 weight) immediately after planting, sealing edges with soil. This prevents flea beetles, cabbage moths, and aphids from ever reaching plants. Once crops are established, remove the inner cover to allow pollinator access for flowering vegetables. For persistent pests like whiteflies, install insect screening (400-600 micron mesh) over all vent openings. The confined space of a hoop house also makes biological controls like ladybugs and parasitic wasps more effective—they can’t disperse and will concentrate their efforts on your crops.
Wind Load Resistance
Raised beds in exposed locations suffer from wind desiccation and physical damage. A hoop house reduces wind speed inside to less than 3 mph, even when outside gusts exceed 40 mph. The key is aerodynamic shape—rounded hoops shed wind better than angular structures. For extreme exposure, reduce hoop spacing to 18 inches and use cross-bracing cables over the top, anchored to ground posts on each side. In coastal areas, choose perforated plastic film that allows 15% airflow, preventing the structure from acting like a sail while still providing 80% of the thermal benefit. Always orient the length parallel to prevailing winds to minimize cross-load stress.
Rain and Snow Management
Excessive rain causes raised bed soil compaction and nutrient leaching. A hoop house roof deflects heavy downpours, allowing you to control moisture precisely through irrigation. In winter, snow load becomes the primary concern. Metal frames with 1-inch diameter hoops on 2-foot centers handle up to 30 pounds per square foot of snow load—roughly 2 feet of wet snow. For areas receiving heavier snowfall, install a steep peak (greater than 45 degrees) or use a Gothic arch design that sheds snow more effectively than semicircular shapes. Keep a soft broom inside to gently push up on the cover and slide snow off before accumulation reaches critical levels.
Installation Fundamentals for Long-Term Success
Proper installation determines whether your hoop house becomes a permanent asset or a seasonal frustration. The process begins long before you slip the first hoop into place.
Site Preparation and Orientation
Position raised beds with hoop houses to maximize winter sun exposure—within 15 degrees of true south in the Northern Hemisphere. Ensure the site has 6-8 hours of direct sunlight even in December. Slope the bed slightly (1 inch per 4 feet) to prevent water pooling inside the hoop house, which can cause root rot and fungal issues. Before installation, lay down landscape fabric or hardware cloth beneath the raised bed to block burrowing rodents that love the protected environment. If your bed is already built, trench around the perimeter 6 inches deep and install metal flashing to deter diggers.
Assembly Sequence Best Practices
Assemble the entire frame loosely first, then tighten connections once all hoops are in place—this allows for minor adjustments. Install ground posts before attaching hoops, using a level to ensure each post is perfectly vertical. When stretching the plastic cover, do so on a warm, sunny day when the material is pliable. Pull lengthwise first, securing one end completely before stretching to the opposite end. This prevents wrinkles that collect water and debris. Use batten tape or poly locking channels rather than staples, which tear the plastic. Leave 12-18 inches of extra plastic at each end to create secure closure flaps.
Securing Against Extreme Weather
Beyond standard anchoring, add insurance for severe weather. Install hurricane clips connecting each hoop to the ground posts, preventing uplift. For end walls, build a wooden frame that attaches securely to the last hoop and bury the bottom 6 inches underground. In tornado or hurricane zones, install removable panels—you’re better off taking the plastic off before the storm than risking total destruction. Keep a “storm kit” nearby: extra clips, duct tape for emergency repairs, and a battery-powered light for nighttime adjustments.
Maintenance and Longevity Optimization
A well-maintained hoop house delivers 5-7 years of service from the cover and 10+ years from the frame. Neglect reduces these lifespans by half.
Cover Tension and Replacement Timing
Check cover tension monthly—loose plastic flaps in wind and abrades itself on the frame. Retighten by adjusting end attachments or adding spring-loaded clips along the sides. Replace covers when light transmission drops below 70% (they’ll appear visibly cloudy) or when you notice numerous small tears that can’t be effectively patched. In snowy climates, covers last 3-4 years; in milder regions, expect 5-6 years. Always keep a replacement cover on hand in late fall so you can swap it quickly if failure occurs before winter.
Frame Inspection and Corrosion Prevention
Twice yearly, inspect all metal components for rust, especially at ground level where moisture accumulates. Sand and repaint rust spots immediately with rust-inhibiting paint. For PVC frames, check for UV degradation (whitening and brittleness) and cracks at stress points. Tighten all bolts and connections annually—thermal cycling loosens hardware over time. Lubricate any moving parts like vent hinges with silicone spray to prevent seizing.
Seasonal Storage vs. Year-Round Deployment
In mild climates, year-round deployment works fine if you manage ventilation actively. In regions with severe summer heat, remove and store covers from June through August to extend their life. Store covers loosely folded in a dark, rodent-free location. Never store them wet, as mildew weakens the material. For metal frames, removing the cover reduces corrosion and eliminates the need for summer ventilation management. Mark each cover’s orientation and bed location with permanent marker to simplify reinstallation.
Cost-Benefit Analysis and ROI Timeline
Understanding the true value of a hoop house requires looking beyond initial price tags to calculate returns in harvest value, time savings, and reduced crop loss.
Initial Investment Breakdown
A basic low-tunnel system for a 4x8 foot raised bed costs $50-80 in materials: PVC hoops ($15), greenhouse plastic ($25), clips and anchors ($20), and miscellany. A walk-in high tunnel with metal frame runs $200-400 for the same bed size. Pre-manufactured kits range from $150 for simple designs to $600+ for premium systems with automated vents and reinforced frames. Factor in $30-50 for tools if you’re building from scratch. While this exceeds the cost of floating row covers ($20), the durability and versatility justify the premium for serious gardeners.
Harvest Value Multiplication
Track your harvests for one season with and without protection. Most gardeners see 3-4x increase in cool-season crop productivity and 2-3x increase in warm-season crop earliness and total yield. In monetary terms, a single 4x8 bed can produce $200-400 of additional harvest value annually. Over a 5-year cover lifespan, that’s $1,000-2,000 return on a $100-300 investment—a 300-600% ROI. The value compounds when you factor in growing premium crops like early tomatoes or winter spinach that command higher prices at market or would be expensive store purchases.
Durability and Replacement Cycles
Amortize costs over the system’s lifespan. A $300 metal-frame hoop house lasting 10 years costs $30 annually. A $75 PVC system lasting 3 years costs $25 annually. The metal system proves more economical long-term while providing superior performance. Budget 15% of initial cost annually for maintenance and eventual cover replacement. This predictable expense is far less than the value of crops lost to weather events or pest damage in unprotected beds.
Crop Planning and Rotation Strategies
The protected environment of a hoop house demands different planting strategies than open-air gardening. Success comes from thinking in seasons and successions rather than single crops.
Cool-Season Crops That Thrive Under Cover
Certain crops respond dramatically to hoop house conditions. Spinach grows 50% faster and remains tender for months without bolting. Carrots and beets size up evenly without cracking from inconsistent moisture. Asian greens like mibuna, komatsuna, and tatsoi produce continuous cut-and-come-again harvests from September through May in zone 7. Plant these crops 2-4 weeks earlier than outdoor schedules in fall, and they’ll establish before temperatures drop. In spring, start them 6-8 weeks earlier for harvest while outdoor plantings are still seedlings.
Warm-Season Crop Acceleration
Hoop houses enable game-changing earliness for heat lovers. Start tomatoes and peppers inside the hoop house 4 weeks before your last frost date, using water-filled walls or cloches for extra protection on cold nights. The plants will be flowering by transplant time, giving you ripe tomatoes 3-4 weeks ahead of outdoor plantings. For melons and cucumbers, direct seed in the hoop house two weeks early—the warmer soil temperature ensures rapid germination and avoids transplant shock. The key is monitoring nighttime lows; have row covers ready to add a third layer of protection during unexpected late frosts.
Succession Planting Optimization
The protected environment allows tighter succession schedules. While outdoor beds need 7-10 days between lettuce plantings, hoop house conditions support 5-day intervals because growth is more predictable. Create a spreadsheet tracking planting dates, expected harvest, and subsequent plantings. In a 4x8 bed, you can harvest one 2x4 section while the other half continues growing, then replant immediately. This “half-bed” technique maintains continuous production without disturbing the entire planting. For root crops, interplant radishes (21 days) with carrots (60 days) to maximize space efficiency.
Common Pitfalls and How to Avoid Them
Even experienced gardeners make critical errors when first using hoop houses. Recognizing these mistakes before they happen saves crops, money, and frustration.
Overheating and Humidity Issues
A sunny 50°F day can push interior temperatures over 100°F in 30 minutes without ventilation. Install a thermometer with remote sensor that alerts your phone when temperatures exceed your set threshold. On winter days above freezing, open ends and roll up sides at least 12 inches to exchange humid air for fresh. Excess humidity causes fungal diseases like powdery mildew and botrytis. Water only when soil is dry 1 inch down, and do so in morning to allow foliage to dry before evening. Space plants slightly wider than outdoor recommendations to improve airflow around leaves.
Poor Air Circulation Consequences
Stagnant air leads to weak, spindly growth and disease. Install a small solar-powered fan (designed for RV ventilation) to create gentle air movement. This strengthens plant stems and prevents moisture from settling on leaf surfaces. Avoid planting tall crops on the south side that shade shorter plants and block airflow patterns. In walk-in designs, create a clear path for air to flow from one end to the other by keeping bed edges clear of debris and weeds.
Inadequate Watering Adjustments
Plants under cover experience different water needs—less frequent but deeper watering since rain is excluded. Install a simple drip irrigation system on a timer to maintain consistent moisture. Check soil moisture every other day with your finger; the warm, still air can dry surface soil quickly while deeper layers remain wet. Mulch heavily with straw or shredded leaves to reduce evaporation and moderate soil temperature. During prolonged cloudy periods, reduce watering frequency by half since plants transpire less and the enclosed space retains humidity.
DIY vs. Pre-Manufactured: Making the Right Choice
The decision to build from scratch or purchase a kit depends on your skills, time, and need for customization. Neither approach is universally superior.
Skill Level and Time Investment
DIY construction requires basic carpentry skills, the ability to cut and bend pipe accurately, and 4-6 hours per bed for a low tunnel, 8-12 hours for a high tunnel. You’ll need a pipe bender for metal frames or a heat gun for shaping PVC. If you enjoy fabrication and have spare weekends, DIY offers satisfaction and customization. Pre-manufactured kits assemble in 2-4 hours with basic hand tools and include pre-cut components and detailed instructions. For busy professionals or those less confident with construction, kits eliminate guesswork and ensure proper fit.
Customization vs. Convenience
DIY allows perfect adaptation to irregular bed sizes, custom heights for specific crops, and integration with existing irrigation or trellis systems. You can use locally available materials and modify the design as needs evolve. Kits offer standardized reliability but limited flexibility—most accommodate only specific bed dimensions. However, many kit manufacturers now offer expansion packs and accessory systems (ventilation kits, shade cloth attachments) that provide some customization while maintaining the convenience of engineered components.
Warranty and Support Considerations
Quality kits include 5-10 year warranties on frames and 3-5 year pro-rated warranties on covers, plus customer support for installation questions. DIY builds offer no such safety net; failures are your responsibility to diagnose and repair. That said, repairing a DIY system is straightforward—replace individual components as needed. With kits, you may need to purchase proprietary parts at premium prices. Consider whether you value the security of a warranty or the independence of sourcing your own materials.
Integrating Hoop Houses into Your Garden Ecosystem
A hoop house shouldn’t exist in isolation. Its greatest potential emerges when integrated with your broader garden infrastructure and management practices.
Irrigation System Compatibility
Design your irrigation before installing the hoop house. Run mainlines under the raised bed or along the exterior, with risers that emerge inside the structure. Drip tape or soaker hoses work exceptionally well under cover since evaporation is minimized. Install a pressure regulator (10-15 PSI) and filter to prevent clogging. For winter operations, use self-draining timers or manually disconnect hoses before freezing weather—trapped water expands and cracks components. Consider a rainwater collection system feeding into the hoop house; the roof area can capture significant precipitation for storage in a barrel at the bed end.
Companion Planting Under Cover
The stable environment intensifies companion planting benefits. Interplant carrots with chives to deter carrot flies—the physical barrier keeps the beneficial insects inside. Grow nasturtiums at the ends to trap aphids away from main crops. The contained space makes trap cropping highly effective: a few radishes draw flea beetles from nearby brassicas. However, avoid aggressive companions like mint that can overrun the confined space. Instead, plant mint in containers outside the hoop house where it can deter pests without competing.
Pollinator Access Management
While excluding pests, you may accidentally exclude pollinators. For crops requiring pollination (tomatoes, cucumbers, strawberries), open ends during morning hours (8-11 AM) when pollinators are active and flowers are receptive. For winter-grown self-pollinating crops like lettuce and peas, this isn’t an issue. Alternatively, hand-pollinate using a small paintbrush, or install a “pollinator door”—a 6-inch screened opening that bees can navigate but larger pests cannot. Some gardeners place a small bumblebee hive inside larger high tunnels for consistent pollination.
Frequently Asked Questions
How do I prevent my hoop house from blowing away in strong winds?
Anchor each hoop to ground posts driven 18-24 inches deep, using pipe clamps or UV-resistant zip ties. For added security, bury a cable along each side and tension it with turnbuckles. In extreme zones, remove the cover during forecasted high winds or build wooden end walls that anchor the entire structure.
Can I use a hoop house for heat-loving summer crops?
Yes, but you must manage heat actively. Remove the cover or replace it with 50% shade cloth when outside temperatures exceed 80°F. Install maximum ventilation—fully open ends and rolled-up sides. Alternatively, use the hoop house structure to support shade cloth, creating a pest-free zone that stays cooler than outside temperatures due to reduced solar gain.
What’s the lifespan of a typical hoop house cover?
Greenhouse-grade 6 mil UV-stabilized polyethylene lasts 3-5 years in snowy climates and 5-6 years in milder regions. Light transmission decreases over time, reducing plant growth rates. Inspect annually for brittleness and tears. Premium covers with anti-condensate and infrared retention additives may last 6-8 years but cost 50% more.
Do hoop houses increase pest problems by creating a sheltered environment?
Paradoxically, they reduce most pest pressure when managed correctly. The barrier excludes flying insects like cabbage moths and cucumber beetles. However, aphids and spider mites can become problematic if you accidentally introduce them on transplants. Inspect all plants before installing them, and maintain vigorous air circulation to discourage mite outbreaks.
How much warmer does a hoop house keep plants?
Expect 5-15°F temperature elevation over outside conditions, depending on sunlight and wind. On sunny days, the difference can exceed 30°F without ventilation. At night, the temperature inside typically stays within 5°F of outside lows unless you add thermal mass like water barrels. Double-layer inflated systems improve this to 20-25°F of frost protection.
Can I build a hoop house over existing raised beds?
Absolutely. The easiest approach uses ground posts driven beside the bed, leaving the bed structure untouched. For wooden beds, you can bolt ground posts directly to the exterior for maximum stability. Measure carefully to ensure adequate clearance on all sides, and consider how you’ll access the bed interior without stepping on soil.
What’s the difference between a hoop house and a polytunnel?
The terms are often used interchangeably, but polytunnels typically refer to larger, walk-in structures spanning multiple rows in ground soil, while hoop houses more commonly describe smaller systems covering individual raised beds. Polytunnels usually have more robust frames and professional installation, while hoop houses are generally DIY-friendly.
How do I water plants inside a hoop house during winter?
Water deeply but infrequently—every 10-14 days in most cases, since evaporation is minimal. Use a watering can or hose with the nozzle removed to apply water directly to soil without wetting foliage. Morning watering is best, allowing any splashed leaves to dry before evening. Install a drip system on a timer for consistency, but disconnect and drain it before hard freezes.
Will snow collapse my hoop house?
Metal frames on 2-foot centers with 1-inch diameter pipe handle up to 2 feet of snow if the plastic remains taut. PVC frames are more vulnerable—brush snow off when accumulation exceeds 6 inches. Gothic arch shapes shed snow better than semicircles. For insurance, install a support cable over the peak attached to ground anchors on each side.
Can I use a hoop house to start seeds earlier?
Yes, but with caution. The temperature swings can be too extreme for delicate seedlings. Use the hoop house to warm soil, then bring seedling trays inside at night or during cold snaps. Alternatively, erect a small low tunnel within the hoop house over your seedling area, creating a triple-layer system that moderates temperature fluctuations while still benefiting from solar gain.