There’s something almost magical about pulling a rack of perfectly smoked ribs from your cooker—bark glistening, meat tender enough to pull clean from the bone with just the right amount of resistance, and that intoxicating aroma that makes neighbors peek over the fence. While traditional pitmasters have sworn by offset smokers for decades, electric smokers have revolutionized the game, bringing competition-quality results to backyard cooks without the steep learning curve or constant fire-tending. This year, the technology has matured even further, offering features that give you unprecedented control over your smoke sessions while letting you actually enjoy the party instead of babysitting the pit.
Whether you’re a weekend warrior looking to upgrade from your basic grill or a serious rib enthusiast ready to dive into the deep end of low-and-slow cooking, understanding what separates an adequate electric smoker from a true game-changer is crucial. This comprehensive guide walks you through everything you need to know about selecting and mastering an electric smoker specifically for ribs—covering the essential features, advanced techniques, and insider knowledge that will elevate your barbecue from good to legendary.
Top 10 Electric Smokers for Ribs
Detailed Product Reviews
1. EAST OAK 30" Electric Smoker for Outdoors | Built-in Meat Probe & Up to 6× Longer Smokes on a Single Load | Side Chip Loader for Uninterrupted Smoking | Bigger Batches with 725 sq in Cooking Area
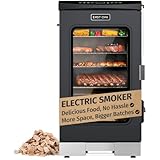
Overview: The EAST OAK 30" Electric Smoker positions itself as a premium outdoor cooking solution for serious barbecue enthusiasts who demand convenience without sacrificing flavor. With 725 square inches of cooking space and a suite of intelligent features, this smoker aims to eliminate the constant monitoring traditionally associated with smoking meat.
What Makes It Stand Out: The standout feature is undoubtedly the 6× longer smoke duration per wood chip load, which translates to truly uninterrupted cooking sessions. The built-in meat probe with automatic keep-warm functionality is a game-changer—once your brisket hits the target temperature, the unit switches modes to prevent overcooking. The side chip loader maintains stable internal temperatures by eliminating the need to open the main chamber.
Value for Money: At $299.99, this is the premium option in our comparison. You’re paying approximately $25-50 more than comparable Masterbuilt digital models, but the intelligent probe system and extended smoke capacity justify the premium. For frequent smokers, the time savings and precision alone recoup the difference within several uses.
Strengths and Weaknesses: Strengths include exceptional capacity, smart temperature monitoring, heat-retaining side loader, and true set-it-and-forget-it operation. The digital interface is intuitive and reliable. Weaknesses are the highest price point in its class and potentially excessive features for casual weekend users who smoke infrequently.
Bottom Line: Perfect for dedicated pitmasters who value automation and precision. The EAST OAK delivers professional-grade results with minimal effort. Occasional users may find better value in simpler models, but for regular smoking, this investment pays dividends in consistency and convenience.
2. Masterbuilt® 30-inch Digital Electric Vertical BBQ Smoker with Leg Kit, Side Wood Chip Loader and 710 Cooking Square Inches in Black, Model MB20070421
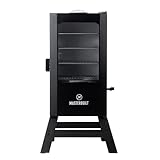
Overview: This Masterbuilt model represents the sweet spot for enthusiasts seeking digital convenience without premium pricing. Offering 710 square inches across four chrome-coated racks, this vertical smoker handles serious quantities while maintaining the user-friendly operation the brand is known for.
What Makes It Stand Out: The patented side wood chip loader is Masterbuilt’s signature innovation, allowing continuous smoke infusion without heat loss. The included leg kit elevates the unit to comfortable working height—a practical addition competitors often sell separately. The vertical design efficiently accommodates up to seven chickens or four pork butts simultaneously.
Value for Money: At $275.99, it undercuts the EAST OAK by $24 while delivering comparable capacity and core digital functionality. You sacrifice the intelligent meat probe and extended smoke duration, but gain proven brand reliability. For the price difference, you could purchase a quality wireless thermometer and still save money.
Strengths and Weaknesses: Strengths include robust construction, convenient side loader, spacious cooking area, and the practical leg kit. The digital controls are straightforward and reliable. Weaknesses include the lack of a built-in meat probe (requiring separate purchase) and standard chip consumption rates that demand periodic refilling during long cooks.
Bottom Line: An excellent choice for intermediate smokers who prioritize capacity and convenience over cutting-edge automation. The Masterbuilt delivers consistent results with minimal fuss, making it ideal for regular backyard use without breaking the bank.
3. Cuisinart 30" Electric Smoker, 3 Adjustable Racks, Large Capacity BBQ Meat Smoker, Water & Wood Trays for Smoked Meat, Brisket, Salmon & Jerky, Adjustable Temperature Control

Overview: The Cuisinart 30" Electric Smoker offers an accessible entry point into the smoking world, combining kitchen-appliance reliability with straightforward operation. With 548 square inches of cooking space and three adjustable racks, it serves couples and small families without demanding premium investment.
What Makes It Stand Out: The impressive 100°F to 400°F temperature range surpasses most competitors, enabling both low-and-slow smoking and hotter cooking applications. Dishwasher-safe chrome-steel racks simplify cleanup—a thoughtful touch rarely seen in this category. The stainless steel wood chip and water trays provide durability and easy maintenance.
Value for Money: At $203.99, this represents significant savings of $60-90 compared to digital alternatives. While you sacrifice automated controls, you gain substantial cooking versatility. For beginners testing the waters or those who enjoy hands-on cooking, the price-to-performance ratio is compelling.
Strengths and Weaknesses: Strengths include exceptional temperature range, easy-clean racks, compact footprint, and trusted brand heritage. The analog dial control is intuitive and reliable. Weaknesses include smaller capacity, no side chip loader (heat loss during refills), and the need for manual temperature monitoring without digital precision.
Bottom Line: Ideal for newcomers and budget-conscious buyers who don’t mind active participation. The Cuisinart delivers authentic smoked flavor with simple, robust mechanics. If you value simplicity over automation and have modest capacity needs, this smoker punches well above its weight class.
4. Masterbuilt® 30-inch Electric Vertical BBQ Smoker with Analog Temperature Control, Chrome Smoking Racks and 535 Cooking Square Inches in Black, Model MB20070210
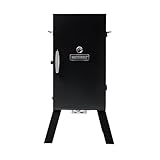
Overview: This analog Masterbuilt strips smoking down to its essential elements, offering the most affordable pathway into the brand’s ecosystem. With 535 square inches across three chrome racks, it handles basic smoking tasks for individuals or small gatherings without digital complexity.
What Makes It Stand Out: The sub-$165 price point makes this the most accessible quality smoker from a reputable manufacturer. The analog dial eliminates electronic components that could fail, potentially extending lifespan. Its straightforward design means fewer things can go wrong, making it approachable for technophobic users.
Value for Money: At $163.01, it undercuts even budget competitors by $40. While you sacrifice convenience features, you retain core smoking capability. This represents exceptional value for occasional users or those wanting to experiment before upgrading. The money saved could purchase premium meat for your first several cooks.
Strengths and Weaknesses: Strengths include unbeatable price, durable simplicity, reliable analog thermostat, and Masterbuilt’s proven vertical design. The removable water bowl and chip tray function effectively. Weaknesses include no side loader (heat loss when adding chips), limited capacity, and manual temperature monitoring requiring frequent attention.
Bottom Line: The perfect starter smoker for absolute beginners or budget-restricted buyers. It requires hands-on management but produces authentic results. If you’re uncertain about smoking or cook infrequently, this minimal investment lets you test the waters without financial commitment.
5. Masterbuilt® 30-inch Digital Electric Vertical BBQ Smoker with Side Wood Chip Loader, Chrome Racks and 710 Cooking Square Inches in Black, Model MB20071117
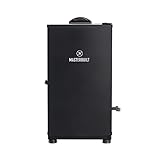
Overview: This digital Masterbuilt hits the sweet spot between automation and affordability, offering core electronic controls without premium pricing. With 711 square inches and four racks, it serves families and regular entertainers who want set-it-and-forget-it convenience.
What Makes It Stand Out: You get the coveted side wood chip loader and digital precision at a mid-tier price point. The 711-square-inch capacity handles substantial cooks—up to six chickens or four pork butts—while the digital panel maintains consistent temperatures without manual adjustment. It’s the most affordable way to access Masterbuilt’s signature side-loading technology.
Value for Money: At $228.99, this represents the best digital value in the lineup. It’s $47 less than the leg kit version and $71 cheaper than the EAST OAK, while delivering 95% of the real-world functionality. The savings could fund a wireless thermometer and cover accessory. For digital convenience on a budget, it’s unmatched.
Strengths and Weaknesses: Strengths include the heat-preserving side loader, generous capacity, reliable digital thermostat, and four adjustable racks. The removable water bowl adds moisture flexibility. Weaknesses include the lack of a built-in meat probe and absence of extended smoke duration claims. The unit sits directly on the ground without included legs.
Bottom Line: The smart choice for buyers wanting digital automation without premium cost. It delivers consistent, flavorful results with minimal effort. If you can live without a meat probe and leg kit, this offers the best feature-to-price ratio for regular backyard smoking enthusiasts.
6. Traeger Grills Pro 22 Wood Pellet Grill & Smoker, Electric Pellet Smoker Grill Combo, 6-in-1 BBQ Versatility, 572 sq. in. Grilling Capacity, Meat Probe, 450 Degree Max Temperature, 18LB Hopper, Bronze

Overview: The Traeger Pro 22 represents the gold standard of pellet grilling, offering six cooking functions in one robust unit. This bronze-finished powerhouse delivers 572 square inches of cooking space, accommodating up to 24 burgers or 4 whole chickens. With its 18-pound pellet hopper and integrated meat probe, it promises authentic wood-fired flavor with set-it-and-forget-it convenience.
What Makes It Stand Out: Traeger’s Digital Pro Controller maintains temperatures within ±15°F from 180°F to 450°F, ensuring consistent results whether smoking brisket low-and-slow or searing burgers. The powder-coated steel construction and porcelain-coated grates provide durability, while the sawhorse chassis and large wheels offer mobility. The 6-in-1 versatility lets you grill, smoke, bake, roast, braise, and BBQ with genuine hardwood flavor.
Value for Money: At $497.49, the Pro 22 sits at the premium end of the pellet grill spectrum. While pricier than generic brands, you’re investing in Traeger’s decades of engineering, reliable customer support, and proven temperature control technology. Comparable pellet grills with similar build quality typically cost $50-100 more, making this a solid mid-range value for serious enthusiasts.
Strengths and Weaknesses: Strengths include legendary brand reliability, precise temperature control, versatile cooking options, sturdy construction, and the convenient meat probe. The 18-pound hopper supports long cooks without refilling. Weaknesses include a 450°F maximum temperature that limits high-heat searing compared to gas or charcoal grills, and the 572 sq. in. capacity may feel cramped for large gatherings versus vertical smokers.
Bottom Line: The Traeger Pro 22 is an excellent choice for backyard cooks seeking authentic wood flavor with minimal fuss. Its build quality and brand reputation justify the investment for those serious about pellet grilling.
7. Vertical Pellet Smoker with Cover & Meat Probe, 4-Rack Electric BBQ Smoker Grill, 616 sq in Cooking Space, Digital LED Temperature Control for Outdoor Smoking Ribs, Brisket, Chicken & Sausage
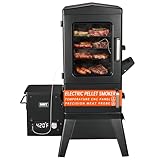
Overview: This vertical pellet smoker delivers serious smoking capacity in a space-saving design. With 616 square inches across four chrome-coated racks, it handles multiple briskets, racks of ribs, or whole chickens simultaneously. The included waterproof cover and built-in meat probe add convenience for year-round outdoor cooking.
What Makes It Stand Out: The vertical orientation maximizes cooking area while minimizing footprint, perfect for compact patios. LED digital temperature control maintains consistent heat automatically, while the wood pellet system infuses authentic smoky flavor without constant monitoring. The four-rack configuration offers flexibility for different meat sizes and types.
Value for Money: Priced at $339.95, this smoker offers exceptional capacity-per-dollar value. Competing vertical pellet smokers with similar features typically run $400-500. The included cover—a $30-50 value—sweetens the deal further. For dedicated smoking enthusiasts who don’t need grilling capabilities, this represents significant savings over combo units.
Strengths and Weaknesses: Strengths include generous 616 sq. in. capacity, space-efficient vertical design, precise digital controls, included protective cover, and integrated meat probe. The pellet system delivers superior flavor to electric element smokers. Weaknesses include limited versatility—it’s a smoker, not a grill—and the unknown brand may lack long-term reliability data. The vertical design can make accessing lower racks challenging.
Bottom Line: This vertical pellet smoker is a smart buy for dedicated smoking fans seeking maximum capacity and authentic wood flavor without premium brand pricing. The included accessories and solid feature set make it a compelling value proposition.
8. Vertical Electric Pellet Smoker with Cover & Meat Probe, 4-Rack Digital BBQ Electric Smokers, 616 Sq.in, LED Temperature Control, Ribs, Brisket, Chicken

Overview: This feature-packed vertical pellet smoker combines intelligent design with professional-grade performance. Offering 616 square inches across four movable racks plus eight meat hooks, it provides versatile cooking configurations for serious smoking sessions. The 3-liter pellet hopper enables up to 20 hours of uninterrupted cooking.
What Makes It Stand Out: The massive 20-hour hopper capacity sets this unit apart, allowing overnight brisket smokes without refilling. Eight integrated hooks expand cooking options for sausages and hanging meats. The vertical chamber engineered for optimal smoke circulation eliminates hot spots, while automatic ignition and the digital control panel simplify operation. The built-in meat probe with auto-alert ensures perfect doneness.
Value for Money: At $369.99, this smoker costs only $30 more than similar vertical models but adds significant upgrades. The extended hopper capacity alone justifies the premium, while the hooks and intelligent features deliver added convenience. Comparable units with 20-hour capacity typically exceed $450, making this a strong value for extended smoking sessions.
Strengths and Weaknesses: Strengths include exceptional 20-hour pellet capacity, versatile rack and hook system, intelligent temperature alerts, rust-resistant steel construction, and included weatherproof cover. The vertical design ensures even heat distribution. Weaknesses include the lesser-known brand reputation and limited temperature range information. Like all vertical smokers, it lacks grilling versatility and lower rack access requires bending.
Bottom Line: Perfect for pitmasters who prioritize long, unattended smoking sessions, this unit’s hopper capacity and smart features make it ideal for overnight cooks. The thoughtful design touches and competitive pricing create excellent value.
9. Electric Smoker with Cover, LED Display Build in Meat Probe Large Capacity BBQ Smokers, 4 Racks Smoke More with 633 sq in Cooking Area, Black

Overview: This electric smoker maximizes capacity and convenience at an aggressive price point. With 633 square inches across four removable chrome racks, it accommodates large quantities of ribs, brisket, poultry, and fish. The black powder-coated finish and included cover ensure durability, while advanced digital features simplify the smoking process.
What Makes It Stand Out: The smart timer function allows programmed cooking durations with automatic alerts, freeing you from constant monitoring. The side-pull grease tray revolutionizes cleanup—no more tipping or lifting the unit. The integrated meat probe features beep notifications when reaching target temperature, preventing overcooking. The 100°F to 400°F temperature range supports both cold and hot smoking applications.
Value for Money: At $279.99, this smoker undercuts most competitors by $50-100 while offering superior features. The smart timer, beep alerts, and innovative grease tray are typically found on $350+ units. With 633 sq. in. of space and included cover, it delivers exceptional value for budget-conscious buyers seeking modern conveniences.
Strengths and Weaknesses: Strengths include outstanding capacity, intelligent timer and alert system, easy-clean grease tray, wide temperature range, real-time meat probe monitoring, and protective cover. The electric element provides consistent heat. Weaknesses include using wood chips rather than pellets may require more frequent refilling, and electric smokers generally produce milder smoke flavor than pellet or charcoal units. Brand reliability is unproven.
Bottom Line: This smoker is the budget champion for tech-savvy cooks wanting maximum space and modern features without breaking the bank. The innovative cleanup design and smart functions make it ideal for beginners and busy pitmasters alike.
10. Royal Gourmet SE2805 28-Inch Analog Electric Smoker with 3 Cooking Grates, Outdoor Smoker with Adjustable Temperature Control & 454 Sq. In. Cooking Area for Outdoor Backyard BBQ, Black

Overview: Royal Gourmet’s SE2805 offers straightforward smoking performance for beginners and casual users. This 28-inch analog electric smoker provides 454 square inches of cooking space across three chrome-plated steel racks. The 1350-watt heating element and insulated chamber deliver consistent heat, while the removable water pan and chip box infuse smoky flavor.
What Makes It Stand Out: The analog controller and built-in thermometer provide simple, reliable operation without digital complexity. Royal Gourmet’s established brand offers better support than unknown manufacturers. The removable stainless steel water pan and chip box make adding moisture and wood chips straightforward. The insulated chamber ensures efficient heat retention and even cooking.
Value for Money: At $199.99, this is the most affordable option in the lineup, perfect for entry-level smoking. While lacking digital features, it costs half as much as comparable electric smokers from premium brands. For occasional use and learning fundamentals, it delivers essential functionality without unnecessary expense. The Royal Gourmet name provides peace of mind at this price point.
Strengths and Weaknesses: Strengths include budget-friendly pricing, reputable brand, simple operation, adequate 454 sq. in. capacity for small families, and effective insulated design. The analog controls eliminate electronic failure points. Weaknesses include imprecise temperature adjustment versus digital models, smaller capacity than competitors, only three racks, and no included cover. The 28-inch height may limit large briskets.
Bottom Line: The Royal Gourmet SE2805 is an ideal starter smoker for budget-conscious buyers wanting reliable brand backing. It’s perfect for learning smoking basics before investing in advanced features, though serious enthusiasts will quickly outgrow its limitations.
Why Electric Smokers Are a Game-Changer for Rib Enthusiasts
The Set-and-Forget Convenience Factor
Electric smokers eliminate the most challenging aspect of traditional barbecue: maintaining consistent temperature for 5-6 hours. Unlike charcoal or wood-fired pits that demand constant vent adjustments and fuel replenishment, electric models use a heating element and thermostat to maintain your target temperature within a few degrees. This stability is crucial for ribs, which need steady heat to properly render collagen into gelatin without drying out the meat. You can load your racks, set your temperature, add wood chips, and walk away—freeing you to prep sides, entertain guests, or simply relax with a cold beverage while your smoker does the work.
Precision Temperature Control: Your Secret Weapon
The best electric smokers offer digital controls with accuracy within 5-10 degrees of your setpoint. This precision matters enormously for ribs, which thrive in the 225-250°F sweet spot. Too low, and you’re looking at an all-day cook with tough results. Too high, and the fat renders too quickly, leaving you with dry, chewy meat. Modern controllers use PID (Proportional-Integral-Derivative) algorithms that learn your smoker’s behavior, anticipating temperature drops before they happen and preventing the overshooting that plagues cheaper models. This means more consistent results batch after batch, whether you’re cooking two racks or twelve.
Wood Chip Versatility: Flavor Profiles That Impress
While electric smokers don’t produce the same combustion flavors as charcoal rigs, their wood chip trays allow for remarkable flavor experimentation. You can blend hickory with apple for classic sweetness, or get adventurous with cherry and pecan for complex, nuanced profiles. The key is understanding chip loading intervals—most electric models need fresh chips every 45-60 minutes to maintain clean smoke. Advanced designs feature larger chip chambers or automated feeding systems that extend this interval, letting you achieve that coveted thin blue smoke for hours without interruption.
Understanding Electric Smoker Types and Configurations
Vertical Water Smokers: Classic Design, Modern Performance
Vertical water smokers represent the traditional electric smoker silhouette—a tall cylinder with a heating element at the bottom, water pan above it, and multiple racks ascending toward the lid. This design excels at rib smoking because the water pan creates a moist environment that prevents the meat’s surface from drying out during long cooks. The vertical orientation also means heat and smoke rise naturally through the chamber, enveloping each rack evenly. Look for models with adjustable rack positions, as this flexibility lets you accommodate full spare ribs or beef plate ribs without cutting them down.
Cabinet-Style Smokers: Maximum Capacity for Serious Cooks
Resembling a mini refrigerator, cabinet-style smokers offer front-loading convenience and significantly more cooking real estate. These units typically feature 4-6 racks and can handle 8-10 racks of ribs simultaneously, making them ideal for large families, parties, or competition prep. The horizontal layout does create slight temperature variations between racks, but thoughtful design with heat diffusers and circulation fans minimizes hot spots. The front-door access is a major ergonomic win—you can check bottom racks without removing everything above them, and the wider interior makes wrapping ribs in foil during the crutch phase much easier.
Digital vs. Analog Controls: Making the Right Choice
Analog smokers use a simple dial thermostat similar to an oven—reliable but imprecise, with temperature swings of 15-25 degrees. While adequate for beginners, these fluctuations can impact rib quality, especially during colder months. Digital controls offer LED displays, precise temperature setting in 5-degree increments, and often include timers and meat probes. Some advanced units pair digital controls with Wi-Fi, letting you monitor and adjust your cook from anywhere. For rib perfectionists, digital is non-negotiable—the ability to hold exactly 237°F for six hours translates directly to better bark formation and more tender meat.
Key Features That Separate Good from Great
Temperature Range and Stability
A quality electric smoker should reliably maintain temperatures from 100°F (for cold smoking cheese or nuts) up to at least 275°F. For ribs, the critical range is 200-275°F, but higher maximum temperatures give you more versatility for finishing ribs with a glaze or cooking other proteins. Stability matters more than maximum heat—look for double-walled construction and tight door seals that prevent heat loss. Models with poor insulation struggle in windy or cold conditions, causing the heating element to cycle excessively and creating temperature spikes that can toughen rib meat.
Cooking Capacity: Matching Size to Your Needs
Electric smokers range from compact 30-inch models holding 3-4 rib racks to 40-inch giants accommodating 10+ racks. Be realistic about your typical cook—buying a massive smoker for occasional two-rack dinners wastes electricity and space. However, if you regularly host gatherings or want to batch-cook for meal prep, the extra capacity pays dividends. Consider rib rack accessories that let you stand ribs on edge, effectively doubling your cooking surface. Remember that ribs cook best with some air space between them, so crowding reduces smoke penetration and extends cook times.
Insulation and Build Quality
Thin-gauge steel smokers bleed heat and struggle in adverse weather, forcing the heating element to work overtime and shortening its lifespan. Quality units feature double-wall construction with insulation sandwiched between layers, maintaining stable interior temperatures even when it’s 40°F outside. The door seal is equally critical—look for silicone or fiberglass gaskets that create an airtight closure. A well-insulated smoker uses less electricity, produces more consistent results, and lasts years longer than budget models that rust from the inside out due to condensation from temperature fluctuations.
Wood Chip Tray Design and Accessibility
The chip tray’s location and capacity dramatically impact your smoking experience. Front-access trays let you add chips without opening the main door, preserving heat and smoke. Larger trays hold more chips, extending refill intervals to 90+ minutes. Some premium models feature side-mounted tubes that accept wood chunks rather than chips, providing cleaner, longer-lasting smoke. Avoid smokers requiring you to remove racks to access the chip tray—this design flaw forces heat loss and extends your cook time. The best designs position the tray close enough to the element for reliable ignition but far enough that chips smolder rather than flare.
Grease Management Systems
Ribs render significant fat during long cooks, and poor grease management creates flare-ups, off-flavors, and dangerous grease fires. Quality smokers channel drippings away from the heating element into a dedicated collection cup or tray. Look for sloped designs that prevent grease pooling and make cleanup easier. Some models include disposable aluminum liners for the grease tray, saving you scrubbing time. Proper grease management also reduces smoke residue on your patio or deck, keeping your cooking area cleaner and safer.
Advanced Features Worth Considering
Bluetooth and Wi-Fi Connectivity
Smart connectivity transforms the rib-smoking experience, letting you monitor internal meat temperature, cabinet temperature, and even receive alerts when it’s time to add chips—all from your smartphone. This freedom means you can run errands, watch the game, or socialize without hovering near the smoker. Look for apps that offer graphing capabilities, letting you review temperature trends from previous cooks to refine your technique. Be wary of gimmicky features—focus on reliable connectivity and intuitive interfaces rather than recipe libraries you’ll never use.
Meat Probe Integration
Built-in meat probes eliminate guesswork, alerting you when ribs hit the perfect internal temperature (typically 195-203°F for ideal tenderness). Dual-probe capability lets you monitor two racks simultaneously, crucial since meat thickness varies. The best systems integrate probe data into the controller, automatically adjusting smoker temperature or triggering hold modes when meat approaches target temp. Wireless probes that connect to your phone offer even more flexibility, letting you track progress without opening the door.
Programmable Cooking Cycles
Advanced smokers allow you to program multi-stage cooks—starting at 225°F for three hours, automatically bumping to 250°F for the wrapped phase, then finishing at 275°F to set sauce. This “set it and forget it” automation ensures consistency across cooks and eliminates the need to manually adjust settings. For ribs, programmable cycles let you execute the 3-2-1 method with precision timing, ensuring you never forget to wrap or unwrap because you’re distracted.
Windowed Doors vs. Solid Construction
Glass windows seem appealing—who doesn’t want to watch their ribs develop bark? In reality, windows fog with smoke and grease within minutes, requiring constant cleaning to remain useful. They also create a heat leak point and can shatter from thermal stress. Solid doors with excellent seals consistently outperform windowed models in temperature stability and efficiency. If you must have a window, look for tempered glass with proper gasketing and accept that you’ll need to clean it after every cook to maintain visibility.
The Science Behind Perfect Smoked Ribs
The Low-and-Slow Principle
Ribs are packed with connective tissue (collagen) that must break down into silky gelatin to achieve that fall-off-the-bone texture. This transformation happens slowly between 160-180°F internal meat temperature, requiring hours of gentle heat. Electric smokers excel here because they maintain the precise low temperatures that render fat and collagen without drying the meat. The key is patience—rushing the process with higher heat yields tough, chewy ribs. Your smoker’s ability to hold steady at 225°F for six hours is more important than any fancy feature.
Smoke Ring Formation in Electric Smokers
The coveted pink smoke ring forms when nitrogen dioxide from burning wood interacts with myoglobin in the meat. Electric smokers produce less combustion gas than charcoal rigs, making smoke rings harder to achieve. You can enhance ring formation by starting with cold ribs straight from the fridge (the longer they stay below 140°F, the more time smoke has to penetrate) and using wood varieties high in nitrogen like hickory or oak. Some competition cooks add a small charcoal briquette to the chip tray for extra combustion gases, though this is controversial in pure electric smoking circles.
Managing Moisture and the Stall
The “stall” occurs when evaporative cooling from the meat’s surface balances heat input, causing internal temperature to plateau around 160-170°F for hours. Electric smokers combat this naturally through their water pans, which maintain ambient humidity and reduce surface evaporation. During the stall, resist the urge to crank the heat—this just dries the meat. Instead, trust the process or employ the Texas Crutch (wrapping in foil with liquid) to power through. Quality electric smokers with tight seals minimize moisture loss, shortening stall duration and preserving juiciness.
Essential Accessories for Rib Perfection
Water Pans and Drip Trays
While most smokers include basic water pans, upgrading to larger stainless steel versions increases thermal mass and humidity stability. Some pitmasters add sand to pans instead of water for better heat retention in cold weather, though this eliminates moisture benefits. Disposable aluminum drip trays placed below ribs catch grease and simplify cleanup. For extra flavor, fill water pans with apple juice, beer, or broth—the vapor deposits subtle flavors on the meat’s surface. Just avoid sugary liquids that can caramelize and become difficult to clean.
Rib Racks and Hanging Hooks
Rib racks are force multipliers, letting you cook up to six racks vertically in the same footprint as two laid flat. Look for V-shaped racks that hold ribs securely without cutting into the meat. Hanging hooks offer an alternative approach, suspending ribs from the top rack to maximize smoke circulation around the entire surface. This method, borrowed from traditional smokehouses, produces exceptionally even bark but requires removing the middle racks and may not fit all smoker configurations.
Quality Thermometers: Don’t Trust Built-ins Alone
Never rely solely on your smoker’s factory thermometer—they’re often inaccurate by 10-25 degrees and measure air temperature at the wall, not at the cooking grate. Invest in a dual-probe digital thermometer with one probe monitoring grate temp and another in the meat. Calibrate it regularly using boiling water (212°F at sea level). For serious rib cooks, a multi-probe system tracking temperatures at different grate levels reveals your smoker’s hot and cool zones, letting you rotate ribs strategically for perfect consistency.
Protective Covers and Storage Solutions
A quality cover extends your smoker’s lifespan by protecting electronics and preventing rust. Look for water-resistant, breathable fabrics that won’t trap moisture underneath. For winter storage in harsh climates, consider moving your smoker indoors or to a covered area—repeated freeze-thaw cycles crack plastic components and corrode heating elements. During cooking season, a simple welder’s blanket draped over the smoker improves insulation and reduces electricity consumption, especially valuable for overnight cooks.
Mastering the 3-2-1 Method in Electric Smokers
Phase One: The Smoke
The first three hours build your bark—the flavorful, crusty exterior that defines great ribs. Run your smoker at 225°F with steady smoke from hickory or fruit woods. Keep the water pan full and resist opening the door. This phase is about smoke adhesion and initial collagen breakdown. You’ll know it’s working when the rib surface darkens to a deep mahogany and the meat starts pulling back from the bone ends. Electric smokers shine here because their consistent heat prevents the temperature dips that can soften bark formation.
Phase Two: The Wrap
After three hours, remove ribs and wrap them tightly in heavy-duty aluminum foil with a splash of apple juice, butter, and brown sugar. This braising phase powers through the stall, tenderizing meat while preserving moisture. Return to the smoker at 250°F for two hours. The wrap creates a steamed environment that breaks down stubborn connective tissue. Some electric smokers struggle to recover temperature after opening the door for wrapping—minimize heat loss by working quickly and preheating your foil-wrapped ribs on the counter for a few minutes before returning them to the smoker.
Phase Three: The Finish
Unwrap the ribs (careful—hot steam!) and place them back on the smoker racks for the final hour. This phase sets the glaze and firms up the bark. Brush with your favorite barbecue sauce during the last 30 minutes, applying multiple thin layers rather than one heavy coat. Bump temperature to 250-275°F to caramelize the sauce without burning. The electric smoker’s precise control prevents sauce scorching, a common problem with charcoal rigs where temperature spikes can ruin a perfect rack in minutes. Test for doneness using the bend test—pick up ribs with tongs; if they bend nearly 90 degrees and the bark cracks slightly, they’re ready.
Temperature Zones and Hot Spots: What to Know
Understanding Your Smoker’s Personality
Every smoker has personality quirks—hot spots near the heating element, cool zones near the door, temperature stratification between racks. Spend a day mapping your smoker using an oven thermometer on each rack position. Most electric smokers run 10-15 degrees hotter at the top, making it ideal for finishing ribs with sauce while keeping unwrapped racks below. Document these variations in a smoking journal; over time, you’ll develop an intuitive sense of where to place ribs based on their size and your desired timeline.
Rotating Racks for Even Results
For consistent results across multiple racks, rotate positions halfway through the cook. Move top racks to the bottom, bottom to the top, and front to back. This ensures all ribs experience the same heat exposure over the full cook. In cabinet smokers with significant hot spots, rotate every 90 minutes. Mark rib orientation with small skewers or colored toothpicks to track which direction faces the heating element. This attention to detail separates competition-quality results from uneven, inconsistent batches.
Upper vs. Lower Rack Performance
Lower racks sit closer to the water pan and heating element, experiencing higher humidity and more direct radiant heat. This position excels for the initial smoking phase, keeping ribs moist while building bark. Upper racks receive gentler, more convective heat—perfect for the final glazing stage where you want to set sauce without burning. Some pitmasters intentionally use this temperature gradient, starting ribs low and moving them high for the finish. Understanding your smoker’s vertical temperature profile lets you orchestrate complex multi-stage cooks without unwrapping and rewrapping repeatedly.
Wood Chip Selection for Rib Mastery
Hickory: The Classic Choice
Hickory delivers the quintessential barbecue flavor—strong, bacon-like, and assertive without being overpowering. It’s the go-to for competition ribs because judges expect that classic profile. Use hickory chips for the first 3-4 hours, then switch to a milder wood or let the residual smoke finish the cook. Too much hickory creates bitter, acrid flavors, especially in electric smokers where combustion is cooler. Soak chips for 30 minutes before loading to extend smolder time and prevent flare-ups when the element cycles on.
Apple and Cherry: Fruity Sweetness
Fruit woods produce lighter, sweeter smoke that complements pork’s natural flavors. Apple wood imparts a subtle, mellow sweetness that won’t overpower delicate rubs, while cherry adds a gorgeous mahogany color to your bark. These woods are ideal for beginners because they’re forgiving—it’s nearly impossible to oversmoke with apple. Blend fruit woods 50/50 with hickory for balanced complexity. In electric smokers, fruit woods burn cleaner and longer than hickory, often requiring fewer chip loads during the cook.
Mesquite: Bold but Dangerous
Mesquite burns hot and fast with an intense, earthy flavor that can dominate ribs if used improperly. In electric smokers, where temperatures are lower, mesquite’s harshness is somewhat tempered, but caution remains essential. Use mesquite sparingly—no more than 30% of your wood mix—and only for the first two hours. It’s best suited for beef ribs, where its boldness stands up to rich meat. For pork ribs, mesquite easily overwhelms, creating a bitter aftertaste that no amount of sauce can mask.
Blending Woods for Complex Flavors
Advanced pitmasters create signature profiles by blending three or more wood types. A classic competition blend is 40% hickory, 30% cherry, 20% apple, and 10% pecan—each wood contributes different compounds, creating layered flavors that evolve as you eat. Experiment with small batches, keeping detailed notes on ratios and results. Electric smokers are perfect for wood blending because their consistent heat ensures each wood type combusts at its optimal rate, something harder to achieve in variable-temperature charcoal pits.
Seasoning and Maintaining Your Electric Smoker
The Initial Burn-In Process
Before cooking your first rack, season your smoker by running it at 275°F for 2-3 hours with wood chips. This burns off manufacturing residues and deposits a protective layer of carbon and smoke polymer on interior surfaces. Coat racks lightly with cooking oil before seasoning to jumpstart non-stick properties. The initial burn-in also reveals any temperature control issues or electrical problems while still under warranty. Don’t skip this step—manufacturing oils create off-flavors and can be hazardous if not burned off.
Regular Cleaning Routines
After each cook, once the smoker cools, remove and scrub racks with a grill brush and hot soapy water. Empty the grease tray and water pan, wiping them clean to prevent rancid oil buildup. Every 3-4 cooks, vacuum ash from the chip tray area using a shop vac—ash buildup restricts airflow and reduces smoke quality. Monthly, wipe interior walls with a damp cloth to remove grease condensation, but avoid harsh chemicals that strip the seasoned patina. A clean smoker produces cleaner smoke and more consistent results.
Preventing Rust and Corrosion
Moisture is electric smoker enemy number one. Always leave the door slightly ajar after cleaning to allow complete drying. Store your smoker covered but with ventilation—trapped moisture corrodes heating elements and electrical connections. If rust appears on racks, scrub with steel wool and re-season. For interior surface rust, sand lightly and coat with high-heat cooking oil, then run a seasoning cycle. In coastal areas, wipe exterior surfaces monthly with an oily rag to prevent salt air corrosion.
When to Replace Heating Elements
Heating elements typically last 3-5 years with regular use, but lifespan varies dramatically based on element quality and how often you run high-temperature cooks. Signs of failure include inability to reach set temperature, frequent tripping of GFCI outlets, or visible corrosion on the element itself. Replacement is usually straightforward—unplug, remove a few screws, and swap in a new element. Keep your model number handy; elements are specific to each smoker. Proactive replacement before complete failure prevents ruining an expensive cook.
Troubleshooting Common Electric Smoker Issues
Temperature Swings and Fluctuations
If your smoker oscillates more than 15 degrees from setpoint, first check the door seal—worn gaskets leak heat. Next, verify it’s plugged directly into a wall outlet, not an extension cord, which causes voltage drop. In cold weather, wrap the smoker in a welding blanket for insulation. If swings persist, the thermostat may be failing. Advanced PID controllers can be retrofitted to analog smokers, providing digital precision for a fraction of a new smoker’s cost.
Insufficient Smoke Production
Weak smoke often stems from wet chips that won’t ignite or an element not reaching high enough temperature to smolder wood. Use chips dried for 24 hours after soaking, or don’t soak at all—dry chips produce better smoke in electric smokers. Ensure the chip tray sits properly on the element; poor contact prevents heating. If your smoker consistently under-smokes, consider adding a pellet tube smoker—an accessory that burns wood pellets independently, supplementing your chip tray’s output.
Electrical Problems and Safety
Electric smokers draw significant power—typically 10-15 amps. Always use a GFCI-protected outlet to prevent shock hazards. If the smoker trips breakers, check for damaged power cords and ensure the outlet isn’t overloaded with other appliances. Never use an extension cord; if you must, use a 12-gauge outdoor-rated cord no longer than 25 feet. Annual inspection of internal wiring for rodent damage or corrosion prevents dangerous failures. Unplug when not in use—power surges can damage digital controllers.
Dealing with Excessive Ash
Ash buildup chokes airflow and insulates the heating element, reducing efficiency. If you notice gray, dusty smoke or temperature struggles, it’s time to clean. After the smoker cools completely, remove the chip tray and vacuum ash with a shop vac fitted with a dust filter. Avoid compressed air, which spreads fine ash into electrical components. Some pitmasters line the chip tray area with heavy-duty foil for easy ash removal, but ensure this doesn’t block ventilation holes.
Electric vs. Other Smoker Types for Ribs
Charcoal: Flavor vs. Convenience
Charcoal smokers produce superior smoke rings and a slightly richer flavor due to combustion gases from burning fuel. However, they demand constant attention—adjusting vents, adding coals, managing flare-ups. For ribs, this means checking every 30-45 minutes versus the hands-off nature of electric. Charcoal also requires skill to maintain steady temperatures; a moment’s inattention can spike heat and ruin a cook. Electric smokers trade a small flavor edge for massive convenience gains, making them better for busy cooks who value consistency over tradition.
Pellet: Precision at a Price
Pellet smokers offer set-and-forget convenience like electrics but burn wood pellets for more authentic flavor. They excel at temperature control and produce excellent smoke rings. However, they’re significantly more expensive—often 2-3x the cost of comparable electric models. Pellet smokers also require proprietary pellets and have more complex mechanical parts (auger, fan) that can fail. For pure rib smoking, electric smokers match pellet performance at a fraction of the price, though pellet enthusiasts argue the flavor difference justifies the premium.
Gas: Simplicity with Trade-offs
Gas smokers heat quickly and are inexpensive to operate, but they struggle with temperature stability in wind and cold. Their venturi burners can blow out, and gas flames produce moisture that interferes with bark formation. Most seriously, gas smokers can’t operate below 200°F reliably, limiting low-and-slow flexibility. For ribs, electric smokers provide better temperature precision and more consistent smoke production. Gas makes sense only if you already have a large propane tank infrastructure and prioritize fuel cost over control.
Safety Considerations for Home Use
Electrical Requirements and GFCI Protection
Most electric smokers require a dedicated 15-amp circuit. Sharing a circuit with other appliances causes voltage drops that affect temperature control. Outdoor outlets must be GFCI-protected—this isn’t optional, it’s electrical code and common sense. Test your GFCI monthly by pressing the test button. If your smoker repeatedly trips the GFCI, inspect for damaged cords or moisture in connections. Never bypass GFCI protection; it’s protecting you from potentially lethal shock.
Outdoor Placement and Clearances
Position your smoker on a level, non-combustible surface at least 10 feet from structures. Maintain 3 feet of clearance on all sides for ventilation and heat dissipation. Avoid operating under covered porches unless there’s at least 8 feet of overhead clearance—smoke and heat can damage ceilings and create fire hazards. Never use electric smokers indoors or in garages; carbon monoxide from smoldering wood can reach dangerous levels even with ventilation.
Fire Safety with Wood Chips
While electric smokers have no open flame, wood chips can combust if the element runs too hot. Never overload the chip tray—excess chips can ignite when the element cycles on high. Keep a fire extinguisher rated for Class B (flammable liquids) and Class C (electrical) fires nearby. If chips ignite, close the smoker door to starve oxygen and unplug the unit. Let it cool completely before investigating. Regular grease tray cleaning prevents the most common smoker fire cause: grease ignition from dripping onto hot elements.
Food Safety Temperature Guidelines
Ribs must reach 145°F minimum to be safe, but true tenderness requires 195-203°F. Use a calibrated thermometer inserted between bones, avoiding contact with bone which reads hotter. Never partially cook ribs and finish later—this invites bacterial growth. If you must hold cooked ribs, wrap them tightly and hold in a 140+°F warmer or oven. Refrigerate leftovers within two hours, and reheat to 165°F before serving. Electric smokers’ precise temperature control makes hitting these targets reliably easy, reducing food safety risks.
Maximizing Flavor in Electric Smokers
Enhancing Smoke Production
Electric smokers can produce wispy, insufficient smoke compared to charcoal rigs. Boost smoke density by using a pellet tube smoker filled with wood pellets, lit separately and placed on the bottom rack. This provides 4-6 hours of continuous supplemental smoke. Another trick: place a small cast iron skillet of wood chips directly on the heating element (if design permits) for more intense smoldering. Avoid the “more smoke is better” trap—thin, blue, almost invisible smoke produces the best flavor. Thick white smoke tastes acrid and bitter.
Using Water, Juice, or Beer in Pans
The water pan is your secret weapon for moist, tender ribs. While plain water works fine, substituting apple juice adds subtle sweetness, beer contributes malty complexity, and broth adds savory depth. Change liquids halfway through the cook to prevent scorching. Some competition cooks add aromatics to the water pan—onion halves, garlic cloves, herbs—that vaporize and deposit flavor compounds on the meat. The key is maintaining at least 1 inch of liquid throughout the cook; a dry water pan leads to tough, dry ribs.
The Texas Crutch Technique
The crutch—wrapping ribs in foil with liquid—accelerates cooking and ensures tenderness. In electric smokers, the crutch is especially valuable because their gentle heat can extend stall duration. Add 2-3 tablespoons of liquid per rack: apple juice, cider vinegar, or a 50/50 mix. Wrap tightly to prevent steam escape. Some purists skip the crutch for firmer bark, but for competition-style fall-off-the-bone ribs, it’s essential. Electric smokers’ moisture retention makes the crutch phase highly effective, often reducing cook time by 30-45 minutes.
Sauce Application Timing
Apply sauce too early, and it burns; too late, and it doesn’t set properly. The sweet spot is the final 30-45 minutes at 250-275°F. Brush thin layers every 10 minutes, letting each coat tack up before adding the next. This builds a lacquered glaze rather than a gloppy mess. Electric smokers’ stable temperatures prevent sauce burning, allowing you to apply multiple layers without fear. For extra stickiness, lightly dust sauced ribs with brown sugar during the last 10 minutes—it melts into a caramelized coating that judges love.
Cost vs. Value: Making a Smart Investment
Entry-Level Options: What to Expect
Sub-$200 electric smokers offer basic functionality but sacrifice insulation, capacity, and durability. They’ll produce decent ribs in mild weather but struggle in cold or wind. Thermostats are less accurate, and thin metal rusts within 1-2 seasons. Consider these “training wheels”—great for learning if you’re unsure about commitment, but plan to upgrade within a year if you get serious. Operating costs are higher due to heat loss, and replacement parts may be unavailable.
Mid-Range Sweet Spot
The $300-500 range hits the sweet spot for most rib enthusiasts. These smokers feature double-wall insulation, digital controls, adequate capacity for 4-6 racks, and durable construction lasting 5+ years. Temperature stability is excellent, and most include meat probes and front-access chip trays. This tier offers 90% of premium features at half the cost. Look for models with readily available replacement parts and strong warranties. The investment pays for itself after a dozen cooks versus buying ribs at a restaurant.
Premium Features Worth Paying For
Above $500, you gain Wi-Fi connectivity, PID temperature control, stainless steel construction, and massive capacity. These features matter for serious competitors or those cooking huge quantities regularly. Bluetooth alerting prevents overcooks when you’re away from the pit. Stainless steel resists corrosion in harsh climates. However, the law of diminishing returns applies—a $700 smoker doesn’t produce twice-as-good ribs as a $350 model. Pay for premium only if you’ll use the advanced features weekly.
Long-Term Operating Costs
Electric smokers cost roughly $0.15-0.30 per hour in electricity, depending on local rates and outdoor temperature. Wood chips run $1-2 per cook. Compare this to charcoal at $5-8 per cook or pellets at $3-5. Over five years, a $400 electric smoker used weekly costs about $1,100 total (purchase + operation). A comparable charcoal setup costs $1,600+ when you factor in fuel and time. The math favors electric for high-frequency cooks, while occasional users might not recoup the initial investment versus a basic charcoal kettle.
Frequently Asked Questions
1. How long does it take to smoke ribs in an electric smoker?
Most ribs follow the 3-2-1 method: 3 hours unwrapped, 2 hours wrapped in foil, and 1 hour sauced. Total cook time is typically 5.5-6 hours at 225-250°F. Spare ribs may need an extra 30-60 minutes, while baby backs often finish 30 minutes sooner. Always cook to tenderness (195-203°F internal) rather than strict time.
2. Do I need to soak wood chips before using them in an electric smoker?
Soaking is optional and often counterproductive. Dry chips produce cleaner smoke and reach smoldering temperature faster. If you soak, limit it to 30 minutes and drain thoroughly—waterlogged chips steam before smoking, creating off-flavors. Many electric smoker experts use dry chips exclusively for better temperature recovery after reloading.
3. Can I smoke ribs year-round in cold weather with an electric smoker?
Yes, but insulation matters. Quality double-wall smokers maintain temperature down to freezing. Below 40°F, wrap the smoker in a welding blanket to reduce heat loss and electricity consumption. Avoid opening the door frequently, as recovery time extends significantly in cold weather. Some models struggle below 25°F, requiring external insulation or a sheltered location.
4. Why don’t my ribs have a smoke ring when using an electric smoker?
Electric smokers produce less nitrogen dioxide than combustion smokers, making smoke rings harder to achieve. You can enhance ring formation by starting with cold ribs, using hickory or oak wood, and adding a small piece of charcoal to the chip tray. However, smoke ring is purely aesthetic—judges score it in competitions, but it doesn’t affect flavor or tenderness.
5. How often should I add wood chips when smoking ribs?
Add chips every 45-60 minutes during the first 3-4 hours. After wrapping ribs in foil, smoke can’t penetrate anyway, so you can stop adding chips. Over-smoking creates bitter flavors. A handful of chips (about 1/4 cup) is sufficient per load—more just creates ash without improving flavor.
6. What’s the best temperature for smoking ribs in an electric smoker?
225°F is the gold standard for most of the cook. This temperature renders fat and collagen slowly without drying the meat. During the final saucing phase, bump to 250-275°F to set the glaze. Some cooks run the wrapped phase at 250°F to shorten cook time slightly. Avoid exceeding 275°F, as this toughens the meat’s exterior before the interior tenderizes.
7. Can I fit a full rack of spare ribs in a 30-inch electric smoker?
It depends on the smoker’s interior width. Many 30-inch models require trimming spare ribs or placing them diagonally. Measure your smoker’s rack width before buying ribs. Baby back ribs typically fit easily. If you regularly cook untrimmed spare ribs or beef plate ribs, consider a 40-inch model or look for smokers with removable racks that allow diagonal placement.
8. How do I prevent my ribs from drying out in an electric smoker?
Maintain a full water pan throughout the cook, spritz ribs with apple juice every hour during the unwrapped phase, and don’t skip the foil wrap. Avoid overcooking—use a thermometer and the bend test. Quality insulation prevents temperature fluctuations that dry meat. Some cooks place a pan of water directly on the bottom rack for extra humidity.
9. Is it safe to leave an electric smoker unattended?
Electric smokers are designed for unattended operation, but basic precautions apply. Place on a non-combustible surface, ensure adequate clearance, and keep a fire extinguisher nearby. Don’t leave it completely unattended for more than an hour—check periodically for unusual smoke or smells. Smart smokers with app alerts provide peace of mind by notifying you of temperature issues.
10. How do I clean the heating element in my electric smoker?
Never submerge or spray the heating element. Once completely cool, gently brush off ash and debris with a soft brush. For stubborn residue, use a damp cloth while the element is unplugged, then let it dry thoroughly before next use. Avoid harsh chemicals or abrasive scrubbers that damage the protective coating. Annual inspection for corrosion prevents unexpected failures.