That satisfying click-whoosh of a gas grill firing up instantly is one of summer’s simplest pleasures—yet if you’re still fumbling with matches or a stick lighter every time you fire up your vintage Weber or Char-Broil, you’re not just living in the past; you’re missing out on a game-changing upgrade. Electric igniter kits have evolved from flimsy aftermarket add-ons to sophisticated systems that can breathe new life into a decades-old grill, often for less than the cost of a single replacement burner assembly.
The beauty of modern electric ignition lies in its elegant simplicity: a battery-powered module sends a high-voltage pulse through shielded wires to ceramic electrodes positioned at each burner, creating a consistent spark that ignites gas on command. But not all kits are created equal, and choosing the right one requires understanding compatibility nuances, power requirements, and installation realities that manufacturers rarely advertise. Whether you’re restoring a garage-sale find or simply tired of singed knuckles, this guide will walk you through everything that matters when upgrading your old gas grill with electric ignition.
Top 10 Electric Igniter Kits for Old Gas Grills
Detailed Product Reviews
1. Aupoko Double Ignition Kit Electronic Igniter, Propane Gas Grill Igniters with Double Ignition Electrode, 450 mm High Spark Plug Wire, Fits for Gas Fireplace & Oven & Heater & Kitchen lgniter

Overview:
The Aupoko Double Ignition Kit positions itself as a versatile solution for various gas appliances beyond just grills. This universal electronic igniter features a dual-electrode design with a generous 450mm high-temperature wire rated to 200°C. Built with piezoelectric technology housed in PP plastic, it promises reliable sparking across a 2-4mm gap for fireplaces, ovens, heaters, and outdoor cookers.
What Makes It Stand Out:
The dual-outlet configuration distinguishes this kit, allowing simultaneous ignition of two burners from a single unit—a feature rarely found in generic igniters. The 450mm wire length provides exceptional reach for unconventional installations, while the piezo design eliminates battery dependency. The manufacturer backs this with a one-year limited warranty, uncommon for aftermarket parts.
Value for Money:
At $14.24, this kit occupies the middle ground between budget piezo igniters and brand-specific replacements. For users maintaining multiple gas appliances, this universal approach eliminates purchasing separate igniters. Compared to OEM parts costing $25-40, the Aupoko offers substantial savings, though trade-offs in precision fit exist.
Strengths and Weaknesses:
Strengths include broad compatibility, dual ignition capability, no battery requirement, and warranty protection. The generous wire length accommodates tricky installations. Weaknesses involve the PP plastic construction, which may degrade faster than metal housings in extreme heat, and the generic fit might require creative mounting. Performance depends heavily on proper grounding and electrode positioning.
Bottom Line:
This kit excels for DIY enthusiasts managing several gas appliances. While not a plug-and-play solution for every grill, its versatility and dual-output design make it an excellent value for those comfortable with minor modifications.
2. 4 Outlet Grill Igniter Kit for Blackstone Grill Igniter Blackstone Starter Replacement 36 Inch Griddle Accessories, Ignitor & Ignition Wires Kit for Black Stone Igniter Replacement,AA Battery Required

Overview:
Engineered exclusively for Blackstone 36-inch griddles, this four-outlet igniter kit delivers a precise OEM-quality replacement experience. The package includes a battery-powered ignition module and four electrode assemblies designed for seamless integration with Blackstone’s specific burner configuration. Operating from -4°F to 185°F, it’s built to withstand diverse outdoor conditions across 30,000 ignition cycles.
What Makes It Stand Out:
The kit’s brand-specific engineering ensures perfect electrode placement without modification—a critical advantage over universal kits. The four-outlet design matches Blackstone’s burner layout exactly, while the tool-free installation requires only a single AA battery (not included). The robust construction promises longevity exceeding most aftermarket alternatives.
Value for Money:
Priced at $20.89, this kit represents solid value for Blackstone owners. Considering OEM replacements cost $30-45, this specialized alternative saves money while maintaining quality. The inclusion of four electrodes and pre-configured wiring eliminates guesswork, justifying the premium over $10-15 universal options that require adaptation.
Strengths and Weaknesses:
Strengths include perfect fitment, straightforward installation, impressive durability rating, and comprehensive four-burner coverage. The wide temperature operational range ensures reliability year-round. Weaknesses are the battery requirement (not included), single-model compatibility, and plastic components that may eventually crack. Users must verify their specific Blackstone model before purchase.
Bottom Line:
For Blackstone 36" griddle owners seeking hassle-free restoration, this kit is the ideal choice. It balances cost savings with exact-fit convenience, making it superior to generic alternatives for this specific application.
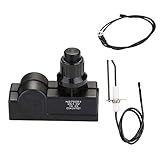
3. only fire Igniter Kit for Weber Spirit Genesis, Platinum, Silver and Gold Gas Grills

Overview:
This Weber-specific igniter kit targets pre-2002 Spirit and Genesis series grills, offering genuine replacement parts for vintage models. The package includes a push-button igniter with lock-nut mounting, gas-catcher ignition chamber, white and black wires, and detailed instructions. Designed for Weber part number 7509, it addresses the unique ignition system of older Weber models that newer generic kits cannot properly service.
What Makes It Stand Out:
The gas-catcher ignition chamber is a proprietary Weber feature that improves cold-start reliability by concentrating gas near the electrode—something universal igniters lack. As a genuine replacement part, it maintains original equipment performance and safety standards. The kit covers both main and side burners, providing complete system restoration.
Value for Money:
At $9.99, this is exceptionally priced for an authentic OEM-style kit. Original Weber igniter assemblies often retail for $25-35, making this a budget-friendly option for restoring classic grills. For owners of pre-2002 models, it’s a fraction of new grill cost while preserving a quality cooking platform.
Strengths and Weaknesses:
Strengths include authentic Weber design, gas-catcher technology, comprehensive kit contents, and outstanding price. It preserves the original grill’s integrity and safety features. The primary weakness is limited compatibility—only fitting specific pre-2002 models. The piezo design may feel dated compared to modern battery-powered igniters, and installation requires some mechanical skill.
Bottom Line:
Perfect for Weber purists maintaining vintage Genesis or Spirit grills. This affordably priced genuine kit delivers factory-correct performance that universal alternatives cannot match, making it essential for proper restoration.
4. SISABAMA 2 Pairs Piezo Grill Igniter Replacement Spark Ignition Kit BBQ Electrode Metal Threaded Ceramic Push Button for Gas Grill Range Heater Stove Fireplace Oven

Overview:
The SISABAMA kit provides two complete piezo igniter assemblies at a budget price point, offering universal compatibility for gas grills, stoves, heaters, and fireplaces. Each unit combines a ceramic-threaded push button with a 96cm wire and mounting hardware. Rated for over 35,000 uses and temperatures up to 200°C, this value pack delivers basic ignition functionality for multiple appliances or backup purposes.
What Makes It Stand Out:
The two-pair packaging at under $8 creates the lowest cost-per-unit in this category. The ceramic and metal construction exceeds typical plastic housing durability, while the 96cm wire length accommodates most installation scenarios. With >18kV output, it generates strong sparks for reliable ignition across various gas pressures.
Value for Money:
At $7.69 for two complete kits, this represents unmatched economy. Costing less than $4 per igniter, it’s ideal for budget-conscious buyers or those wanting spares. While lacking brand-specific engineering, the price allows purchasing multiple sets for different appliances, outperforming single $15-20 OEM replacements in overall value.
Strengths and Weaknesses:
Strengths include exceptional affordability, durable ceramic construction, generous wire length, high voltage output, and redundancy from two units. The simple piezo mechanism eliminates batteries and electronics. Weaknesses involve universal fit requiring adaptation, no manufacturer warranty mentioned, basic design without advanced features, and potential quality variance between units.
Bottom Line:
An unbeatable choice for DIYers seeking economical ignition solutions. While requiring some installation ingenuity, the dual-kit value and durable materials make it perfect for backups, repairs, or custom projects where brand-specific fit isn’t critical.
5. RCK Sales Holland Gas Grill Igniter Kit Rotary Igniter Ceramic Probe with Wire

Overview:
This premium igniter kit serves as an OEM-equivalent replacement for Holland gas grills, featuring a rotary spark generator with integrated knob and dual 4-inch ceramic probes. Designed specifically for Holland’s unique grill design, the kit includes all components necessary to restore the original ignition system. The rotary mechanism provides a different user experience than push-button igniters, matching Holland’s factory specifications.
What Makes It Stand Out:
The rotary ignition system with integrated control knob reflects Holland’s distinctive engineering approach, offering seamless aesthetic and functional integration. Dual 4-inch probes accommodate Holland’s burner configuration, while the OEM-equivalent designation ensures performance matching original equipment. This is the only kit replicating Holland’s specific rotary design.
Value for Money:
At $44.99, this is the premium option in this comparison. While expensive compared to universal kits, it’s competitively priced against Holland’s OEM parts that often exceed $60. For Holland grill owners, the exact fit and authentic operation justify the cost over adapting $15 generic kits that may compromise performance.
Strengths and Weaknesses:
Strengths include precise Holland compatibility, robust rotary mechanism, dual-probe coverage, and OEM-equivalent quality. The integrated knob maintains original grill aesthetics. Weaknesses are the high price, extremely limited brand compatibility, and potential difficulty sourcing if Holland-specific parts become scarce. The rotary design may be unfamiliar to those accustomed to push-button igniters.
Bottom Line:
Essential for Holland grill owners prioritizing authenticity and perfect fit. Though costly, it preserves the unique character and reliable performance of these distinctive grills, making it worth the investment over makeshift universal adaptations.
6. Hicello Igniter Push Button Ignition Kit for Fire Pit Gas Burner Grill Igniter Replacement with 11.8inch(300mm) Electrode Ignition Cable Wire for Outdoor BBQ Gas Patio Heater AA Electronic Battery

Overview: The Hicello Igniter Kit offers a straightforward solution for rejuvenating gas fire pits, grills, and patio heaters. This single-outlet push-button ignition system operates on a single AA battery and includes an 11.8-inch ceramic electrode wire designed for reliable spark generation across various outdoor gas appliances.
What Makes It Stand Out: The kit’s premium construction features rugged materials paired with a ceramic ignition pin that ensures quick, effective ignition. Its universal design accommodates fire pits, fireplaces, gas burners, and patio heaters, making it a versatile replacement option. The push-button operation provides simple, intuitive functionality—press to generate sparks, release to stop.
Value for Money: At $13.99, this igniter sits in the mid-range for universal ignition kits. The price is justified by the quality ceramic electrode and robust construction. However, the single-outlet design limits its application to single-burner systems, and the required AA battery isn’t included, adding minor additional cost.
Strengths and Weaknesses: Strengths include excellent material quality, easy installation, wide compatibility, and stable performance. The ceramic electrode offers superior durability compared to standard metal probes. Weaknesses are the single outlet limitation, relatively short 11.8-inch cable that may not reach all configurations, and lack of included battery. The basic design lacks advanced features like multiple outputs or ground wires.
Bottom Line: The Hicello kit delivers reliable, no-frills ignition for single-burner gas appliances. It’s an excellent choice for DIYers needing a durable universal replacement, though those with multi-burner systems should look elsewhere.
7. WADEO Fire Pit Grill Igniter Kit, Grill Igniter Replacement with 2 Outlets and Ground Wire for Fire Pit Gas Burner System, Push Button Spark Generator
Overview: WADEO’s Fire Pit Grill Igniter Kit upgrades your ignition system with a modern pop-up switch design and dual-outlet capability. This AAA battery-powered unit features a 60cm spark wire and 50cm ground wire, both rated for 200°C, making it suitable for fire pits and multi-burner gas grill systems.
What Makes It Stand Out: The innovative pop-up button mechanism significantly reduces spark generation time compared to conventional push-buttons, enhancing user experience. The dual outlets allow simultaneous connection to two burners, while extensive compatibility covers major brands like Charbroil, Weber, Brinkmann, and many others. The included ground wire improves safety and reliability.
Value for Money: Priced at $17.99, this kit commands a premium over single-outlet alternatives. The cost is justified by the dual-output design, upgraded button technology, and comprehensive brand compatibility. For multi-burner grill owners, it’s substantially cheaper than OEM replacements while offering improved functionality.
Strengths and Weaknesses: Strengths include the responsive pop-up switch, dual burner support, adequate wire lengths, high-temperature resistance, and broad brand compatibility. The ground wire inclusion enhances safety. Weaknesses are the higher price point, requirement for AAA batteries (not included), and potential overkill for simple single-burner applications. Installation may require more planning with two outputs.
Bottom Line: This is an excellent upgrade for multi-burner gas grills and fire pits. The innovative button design and dual outlets make it worth the modest premium for those needing expanded ignition capabilities.
8. X Home 1836-32 Grill Igniter Kit Replacement for Weber Spirit 200 & 300 Series with Side Control (2012 and Older), Spirit E-210, E-310, Replacement for Weber Parts 91360

Overview: The X Home 1836-32 Grill Igniter Kit provides a precise replacement for Weber Spirit 200 and 300 series grills manufactured between 2007-2012 with side control panels. This kit includes the electronic module, collector box, push button, and wires needed to restore reliable ignition to your Weber grill.
What Makes It Stand Out: Unlike universal kits, this module is engineered specifically for older Weber Spirit models, ensuring perfect fit and function without modification. It matches the original green starter button design and electrical specifications exactly. The plug-and-play installation can be completed in minutes with basic tools, and numerous YouTube tutorials provide visual guidance.
Value for Money: At $13.99, this kit offers exceptional value compared to OEM Weber parts that typically cost twice as much. The targeted design eliminates guesswork and potential returns associated with universal fit products. For compatible Weber owners, it’s the most cost-effective repair solution available.
Strengths and Weaknesses: Strengths include exact fitment for specified Weber models, high-quality construction matching original specifications, straightforward installation, and significant cost savings over OEM parts. Weaknesses are extremely limited compatibility—it’s not suitable for 2013+ front-control Spirit models or other brands. The AAA battery requirement adds minor expense.
Bottom Line: If you own a 2007-2012 Weber Spirit with side controls, this is your best replacement option. The perfect fit, easy installation, and substantial savings make it an essential purchase for reviving your aging Weber grill.
9. G511-0055-W1 Grill Igniter Kit for Charbroil Grill Replacement Parts, Charbroil Ignition Switch 80018343, 4-Outlets Electronic Ignition Module w/ Wires & 1 Push Button for Charbroil Surefire Ignitor

Overview: The G511-0055-W1 Grill Igniter Kit serves as a comprehensive replacement for Charbroil’s Surefire ignition systems. This four-outlet electronic module includes a push button, wires, and battery cap, designed to restore reliable sparking across multiple burners in compatible Charbroil gas grills.
What Makes It Stand Out: The four-outlet design sets this apart from standard single or dual-outlet kits, enabling ignition of up to four burners simultaneously. It matches numerous Charbroil part numbers and supports an extensive list of specific models, from the 415 series to various 463 and 466 models. The module replicates the original “AA” electronic ignition system precisely.
Value for Money: At $14.87, this kit delivers remarkable value for a four-outlet system. Comparable OEM Charbroil modules cost significantly more, and universal alternatives rarely offer four outputs. For owners of compatible multi-burner Charbroil grills, it represents substantial savings while maintaining factory specifications.
Strengths and Weaknesses: Strengths include the four-burner capacity, extensive model compatibility list, exact OEM replication, and excellent pricing. The comprehensive documentation helps verify fitment. Weaknesses are the complexity of confirming compatibility across numerous model numbers, AA battery requirement (not included), and Charbroil-exclusive design that won’t work with other brands. Some users may find the model verification process tedious.
Bottom Line: Charbroil Surefire system owners with multi-burner grills should look no further. This kit provides OEM-quality performance, four-outlet convenience, and exceptional value, making it the smart choice for restoring your grill’s ignition.
10. BTFO 2 Pcs Propane Push Button Piezo Igniter Kit with Ceramic Electrode & Long Wire, Propane Spark Igniter Replacement for Oven Fireplace Gas Grill Heater Stove

Overview: BTFO’s 2-pack Piezo Igniter Kit offers a battery-free ignition solution for various gas appliances. Each unit generates ≥25KV voltage through piezoelectric technology, creating sparks suitable for propane and natural gas systems without external power. The kit includes two complete igniter sets with ceramic electrodes and long wires.
What Makes It Stand Out: The piezoelectric mechanism eliminates battery dependency entirely—simply press the button for immediate ignition. With a 30,000-press lifespan and 200°C temperature resistance, these igniters deliver exceptional durability. The two-pack configuration provides excellent value and a spare for multiple appliances or future needs.
Value for Money: At $8.49 for two complete igniter kits, this represents outstanding value. The battery-free operation saves long-term costs and maintenance hassle. Comparable single igniters often cost more, making this dual-pack an economical choice for DIY enthusiasts and professionals alike.
Strengths and Weaknesses: Strengths include no battery requirement, high voltage output, impressive durability rating, universal compatibility, and exceptional price point. The ceramic electrode handles high temperatures reliably. Weaknesses are the physical effort required for piezo operation compared to electronic systems, lack of continuous spark capability, and potentially shorter warranty support than brand-specific replacements. Installation may require more technical skill for optimal positioning.
Bottom Line: This is the best budget option for those comfortable with DIY installation. The battery-free design, dual-pack value, and robust performance make it ideal for fire pits, heaters, and grills where simplicity and reliability matter most.
Why Your Vintage Gas Grill Deserves a Modern Spark
The Frustration of Manual Lighting
We’ve all been there: wind gusts extinguishing your lighter, burned fingers from reaching through greasy grates, or that embarrassing delay when guests are waiting for the grill to heat up. Manual lighting isn’t just inconvenient—it fundamentally limits how you use your grill. Quick weeknight dinners become production numbers, and forget about precision temperature control when you’re guessing if the burner actually lit. Modern electric igniter kits eliminate this friction entirely, transforming your grilling experience from a chore into an immediate, reliable action.
Safety Benefits That Matter
Beyond convenience, electric ignition systems dramatically reduce the risk of gas accumulation and flashback fires. When you’re manually lighting, there’s always that moment of uncertainty: did the gas ignite, or is it pooling inside the firebox? Quality igniter kits create sparks simultaneously with gas flow, ensuring immediate ignition. Many also include flame-sensing technology that stops sparking once ignition occurs, preventing continuous clicking that can indicate a failed burner light—a critical safety feature for grills positioned near homes or outdoor structures.
Understanding Electric Igniter Technology
Piezo vs. Battery-Powered Systems
The term “electric igniter” actually encompasses two distinct technologies. Piezo systems generate spark through mechanical pressure on a quartz crystal—no batteries needed, but they weaken over time and deliver inconsistent voltage. Battery-powered systems, conversely, use a transformer module to convert low-voltage DC power into high-voltage pulses, producing a hotter, more reliable spark that can jump larger gaps. For older grills with slightly misaligned burners or worn components, battery-powered kits offer superior performance and longer service life.
Push-Button vs. Rotary Ignition
Control interface design impacts both aesthetics and durability. Push-button modules dominate the market for good reason: they’re simple, sealed against moisture, and require minimal control panel real estate. Rotary ignition knobs, while offering a cleaner integrated look, involve more complex mechanical linkages that can fail in dirty environments. If your grill’s control panel is cramped or exposed to weather, a discrete push-button module often proves more reliable than trying to retrofit a rotary system into an incompatible space.
Key Features to Evaluate Before Buying
Voltage and Power Requirements
Most consumer-grade igniter kits operate on 1.5V (single AA or AAA) or 3V (two batteries) configurations. Higher voltage doesn’t necessarily mean better performance—what matters is the transformer module’s output, typically measured in kilovolts (kV). Quality systems generate 15-20kV pulses, creating a robust blue spark visible even in daylight. Check the module’s specifications; underpowered systems might struggle with slightly corroded burner ports or larger ignition gaps, leading to frustrating misfires.
Electrode Material Quality
The electrode tip—the component that actually creates the spark—endures extreme thermal cycling and chemical exposure. Look for kits featuring nickel-plated or stainless steel electrodes with ceramic insulators. Cheap zinc electrodes corrode within a season, while quality ceramic can withstand temperatures exceeding 2000°F without cracking. The electrode’s mounting hardware matters too: stainless steel lock nuts and washers prevent galvanic corrosion when dissimilar metals meet at the burner connection point.
Wire Length and Gauge
Nothing derails an installation faster than wires that won’t reach. Measure from your intended module location to the farthest burner, then add 6 inches for routing flexibility. Most kits include 24-30 inch leads, but larger grills may require extensions. Wire gauge affects durability: 18-gauge stranded wire offers better flexibility and fatigue resistance than thinner 20-gauge alternatives, especially important for grills with hinged lids that flex the wire bundle repeatedly.
Compatibility: The Make-or-Break Factor
Measuring Your Grill’s Mounting Holes
Before purchasing any kit, physically inspect your grill’s control panel or firebox for mounting provisions. Many older grills have pre-drilled holes for igniters that were optional from the factory. Measure hole diameter (typically 3/8" or 1/2") and spacing between holes if multiple mounting points exist. Some kits use universal adjustable brackets, while others require precise hole alignment. Don’t assume “universal” means it fits everything—it usually means it fits most grills manufactured after 1995 with standard control panel dimensions.
Burner Configuration Considerations
Crossover tubes, angled burner tubes, and infrared searing burners all complicate igniter placement. The electrode must position within 1/8" to 1/4" of the gas port for reliable ignition. If your burners are deeply recessed or feature unusual geometries, you may need flexible electrode mounts that can bend to the correct angle. Some kits include multiple electrode styles—straight, 45-degree, and 90-degree bends—to accommodate different burner designs. Count your burners and identify which ones have accessible mounting points before committing.
Control Panel Space Requirements
The ignition module needs a home, typically mounted behind the control panel or underneath the firebox. Ensure adequate clearance for the module’s dimensions (usually 2" x 3" x 1") plus battery compartment access. Some premium kits feature remote battery boxes connected by a short lead wire, allowing you to mount the power source in a more accessible location. This proves invaluable on grills where the control panel is cramped or difficult to remove for battery changes.
Installation Complexity: What to Expect
Tools You’ll Need in Your Arsenal
Most installations require basic hand tools: Phillips and flat-head screwdrivers, adjustable wrench, wire cutters/strippers, and a drill with bits if you need to create new mounting holes. A multimeter helps verify continuity after installation, while dielectric grease ensures weatherproof connections. Some kits include mounting hardware, but stainless steel self-tapping screws often provide better corrosion resistance than the generic zinc-plated screws bundled with budget kits. Never use power drills to tighten electrode mounts—hand-tightening prevents cracking ceramic insulators.
Step-by-Step Overview Without the Overwhelm
The typical installation follows a logical sequence: mount the module, route wires away from hot surfaces, attach electrodes to burners, connect the ground wire to the firebox, install the battery, and test. The devil lives in the details—wire routing must avoid lid hinges and burner flames, while electrode gaps require precise adjustment. Plan for 45-90 minutes for a first-time installation, though complex grills with multiple burners may take longer. Patience during the planning phase prevents frustration during assembly.
When to Call a Professional
If your grill requires control panel disassembly involving gas valve linkages or if you’re uncomfortable working with gas connections, hire a certified technician. Most igniter kits are DIY-friendly, but some high-end installations integrate with existing gas manifolds in ways that demand professional expertise. The $75-150 service call costs less than replacing a gas valve you accidentally damage during installation. Additionally, if your grill is still under warranty, unauthorized modifications may void coverage—check your manual before proceeding.
Weather Resistance and Durability
IP Ratings Explained for Grill Owners
Ingress Protection (IP) ratings indicate how well electrical components resist dust and moisture. Look for modules rated IP64 or higher—the “6” indicates complete dust protection, while “4” means splash resistance from any direction. Some premium kits achieve IP67, surviving temporary immersion. While no grill igniter should be submerged, IP67-rated modules laugh off heavy rain and pressure washing overspray. Budget kits often lack formal IP ratings, relying instead on basic silicone seals that degrade under UV exposure.
Stainless Steel vs. Coated Components
The module housing material determines longevity in corrosive environments. Powder-coated steel looks good initially but chips at mounting points, exposing bare metal to rust. Marine-grade stainless steel (316 alloy) costs more but withstands coastal salt air and acidic grill smoke indefinitely. Even if you don’t live beachside, stainless components resist the corrosive effects of grease-laden vapors that condense inside grill carts. For inland applications, 304 stainless offers adequate protection at a moderate price premium over coated steel.
Performance Factors That Separate Good from Great
Spark Consistency in Windy Conditions
A weak spark flickers and fails in breezy conditions, forcing you back to manual lighting. Quality systems produce a snapping, blue-white spark that jumps a 3/16" gap reliably even in 15 mph winds. This consistency stems from robust transformer design and proper shielding. Test before final assembly: hold the electrode near the burner and activate the igniter. You should hear a sharp crack and see a defined spark arc. If it’s a faint yellow spark that struggles to jump a smaller gap, return the kit—performance won’t improve after installation.
Response Time and Reliability
Top-tier igniters generate sparks within 50 milliseconds of button press, creating immediate ignition when paired with proper gas flow. Cheaper systems may have a noticeable lag or require multiple presses, indicating weak capacitors or poor switch contacts. Reliability also means consistent performance across temperature extremes. Read reviews focusing on winter performance—some kits fail when temperatures drop below 40°F due to battery chemistry limitations, while others include cold-weather battery recommendations.
Multi-Burner Synchronization
For grills with three or more burners, sequential ignition matters. The best kits spark all electrodes simultaneously, allowing you to light multiple burners quickly. Some budget systems use a single output that cycles between electrodes, creating a delay that lets gas accumulate. This not only wastes fuel but creates a small fireball effect when ignition finally occurs. Check whether the kit uses a single transformer with multiple leads or individual modules per burner—the former is standard and acceptable if properly designed, while the latter offers redundancy but complicates installation.
Power Source Options Decoded
AAA Battery Systems
AAA-powered kits dominate the entry-level market due to battery availability and compact size. A fresh alkaline AAA provides roughly 1,500 sparks, translating to a full grilling season for most users. However, voltage sag occurs as batteries deplete, causing weak sparks before complete failure. Lithium AAA batteries cost more but maintain consistent voltage until nearly depleted, making them ideal for seasonal grillers who want reliable performance without mid-season battery changes.
AA Battery Systems
AA configurations offer longer life—up to 3,000 sparks per battery set—and more stable voltage under load. The slightly larger module size is rarely problematic, and the improved performance margin justifies the minimal cost difference. For grills with more than three burners or those used multiple times weekly, AA systems provide better long-term value. Rechargeable NiMH AAs work but deliver slightly lower voltage (1.2V vs. 1.5V), which may affect performance in marginal installations.
Button Cell Alternatives
Rare but worth mentioning, button cell systems appear in ultra-compact modules designed for premium grills with limited space. These offer limited spark count—typically 500-800 cycles—and specialized battery replacement. Avoid them unless space constraints absolutely demand the smallest possible module. The cost-per-spark is higher, and finding replacement cells mid-season can be challenging compared to ubiquitous AA or AAA batteries.
Budget Considerations and Value Proposition
Entry-Level vs. Premium Price Points
Basic igniter kits start around $15-25, offering simple push-button operation with minimal weather sealing. Mid-range options ($30-50) add better materials, IP64 ratings, and more flexible mounting hardware. Premium kits ($60-100) feature stainless construction, IP67 ratings, and extended warranties. The sweet spot for most grill owners lies in the $35-45 range, where you get reliable performance without overpaying for features like remote battery boxes that few actually need.
Hidden Costs to Factor In
The sticker price rarely tells the full story. Factor in stainless steel mounting screws ($5), dielectric grease ($4), and possibly a step drill bit if you need to enlarge mounting holes ($12). If your grill lacks pre-wired access between the control panel and firebox, you may need to purchase additional high-temperature wire loom to protect the ignition leads. Some kits require separate ground wire installation if your grill’s firebox isn’t electrically continuous—a common issue with painted or powder-coated interiors that insulate components.
Maintenance and Longevity
Cleaning Electrodes Without Damaging Them
Ceramic electrode insulators accumulate carbon deposits from incomplete combustion, eventually shorting out the spark. Clean them quarterly using a soft brass brush—never steel wool, which scratches ceramic and creates new carbon adhesion points. Dip the brush in isopropyl alcohol for stubborn deposits. After cleaning, verify the spark gap hasn’t changed; thermal cycling can loosen electrode mounts. A quick blast of compressed air removes debris from the module’s vent holes, preventing moisture accumulation that leads to internal corrosion.
Battery Replacement Schedules
Proactive battery replacement prevents mid-cook failures. For seasonal grillers, replace batteries annually during spring cleaning. Year-round grillers should swap batteries every six months, or at the first sign of weak sparking. Mark installation dates on batteries with a permanent marker to track age. Always remove batteries if storing the grill for winter; leaking alkaline batteries destroy modules through corrosive damage that isn’t covered under warranty. Consider lithium batteries for seasonal use—they have a 10-year shelf life and won’t leak.
Winter Storage Best Practices
If you live where grills hibernate for winter, remove the entire igniter module and store it indoors. Cold temperatures crack solder joints, and moisture from freeze-thaw cycles infiltrates even well-sealed units. Disconnect the battery, clean the module with a dry cloth, and place it in a sealed bag with a silica gel packet. This five-minute ritual can double the system’s lifespan. For permanent outdoor installations, invest in a grill cover that specifically covers the control panel area, preventing water from pooling around button seals.
Troubleshooting Common Issues
When the Spark is Weak or Inconsistent
First, check battery voltage with a multimeter—it should read within 10% of nominal voltage. Clean the electrode tip and verify the spark gap hasn’t widened beyond 1/4". Inspect wire routing for chafing against sharp metal edges that can cause partial shorts. If sparking improves when you manually ground the module housing, your ground wire connection is poor. Remove the ground screw, sand the contact point to bare metal, and reconnect using dielectric grease to prevent future corrosion.
Dealing with Cross-Wiring Problems
Multi-burner kits sometimes suffer from spark “bleed,” where one electrode fires weakly or not at all. This indicates insufficient transformer output or excessive wire length causing voltage drop. Try swapping electrode leads at the module—if the problem follows the wire, it’s a wire issue; if it stays at the same burner, it’s the electrode or gap. Some modules have adjustable output potentiometers (usually hidden beneath a sticker) that can increase voltage marginally, but this shortens battery life and should be a last resort.
Addressing Moisture-Related Failures
If your igniter works fine on dry days but fails after rain, moisture is bridging the circuit somewhere. Remove the module and spray its interior with moisture-displacing electrical contact cleaner. Check that all wire connections use the included waterproof boots—sometimes installers skip these for convenience. For chronic moisture issues, mount the module vertically instead of horizontally to prevent water pooling, and apply a bead of silicone sealant around the button shaft where it passes through the control panel.
Safety Certifications and Standards
CSA and UL Listings: What They Mean
Certified ignition modules bear CSA (Canadian Standards Association) or UL (Underwriters Laboratories) marks, indicating they’ve passed rigorous testing for electrical safety, gas ignition reliability, and failure mode analysis. These certifications aren’t just bureaucratic stamps—they verify the module won’t create sparks during gas leaks or fail dangerously when wet. Uncertified knockoffs may work initially but lack the safety margins built into tested designs. Always look for the certification mark on the module itself, not just the packaging.
Why DIY Modifications Void Warranties
Most grill manufacturers explicitly state that unauthorized electrical modifications void the warranty. This isn’t just legal posturing—improperly installed igniters can damage gas valves, melt control panel components, or create fire hazards. If your grill is still under warranty, use only manufacturer-approved igniter kits, even if they cost more. For out-of-warranty grills, keep receipts and installation photos; some third-party igniter manufacturers offer their own warranties that require proof of proper installation to honor claims.
Environmental Factors and Performance
High-Humidity Challenges
In humid climates, condensation forms inside grill carts overnight, creating persistent moisture issues. Choose modules with conformal-coated circuit boards that resist humidity-induced corrosion. Some grill owners in coastal Florida or Louisiana report success mounting the module inside a small weatherproof project box with a desiccant pack, though this adds complexity. Electrode corrosion accelerates in humidity too—nickel-plated electrodes last significantly longer than bare steel in these environments.
Coastal Corrosion Concerns
Salt air doesn’t just rust burners; it destroys electrical connections. If you grill within five miles of the ocean, invest in a kit with marine-grade components. Apply dielectric grease not just to connections but also to the battery terminals. Rinse your grill with fresh water monthly to remove salt deposits, focusing on the control panel area. Some coastal grillers replace igniter modules every two years as preventative maintenance, considering it a small price compared to the cost of corrosion-related gas valve failures.
Altitude Adjustments
At elevations above 5,000 feet, lower air density affects spark characteristics—gaps that work perfectly at sea level may require slight reduction for reliable ignition. Some modules have altitude compensation circuits, but most don’t. If you live in Denver or similar high-altitude locations, start with a 1/8" spark gap rather than the standard 3/16", and increase gradually if you experience premature electrode fouling from overly rich ignition conditions.
The Upgrade Process: From Decision to First Ignite
Planning Your Installation Day
Reserve a dry afternoon with temperatures between 60-80°F—cold makes plastic brittle, while heat makes installations uncomfortable. Gather all tools and hardware before starting. Take photos of your grill’s current configuration from multiple angles; these prove invaluable if you need to reference original wire routing or burner positions. Lay out a clean work surface and organize small parts in containers. If you’re replacing an existing igniter, test the new module’s spark before disassembling anything—this confirms the kit works and prevents discovering defects after you’ve already cut wires.
Testing Protocols Before Final Assembly
Never fully reassemble your grill before testing. After mounting the module and electrodes, insert batteries and perform a spark test on each burner individually. You should see and hear a robust spark at each electrode. Then connect the gas (if safe to do so) and verify actual ignition. Only after confirming reliable operation should you button up the control panel and finalize wire routing. This step-by-step validation saves hours of troubleshooting buried beneath reassembled components.
Breaking In Your New System
New electrodes sometimes have manufacturing residues that affect initial performance. Run your grill on high for 10-15 minutes after installation, allowing the electrodes to “self-clean” through normal heating cycles. During the first month, check electrode gaps weekly—thermal expansion and contraction can loosen mounts. After this break-in period, the system should provide years of maintenance-free operation. Document the installation date and battery type in your grill’s manual for future reference.
Frequently Asked Questions
How long do electric igniter kits typically last before needing replacement?
Quality igniter modules last 3-5 years with proper maintenance, though electrodes may need replacement every 2-3 years depending on usage and climate. The transformer module itself often outlives the grill, but battery corrosion and moisture infiltration are the most common failure points.
Can I install an electric igniter on a grill that never had one originally?
Absolutely, provided your grill has accessible burner ports and space to mount the module. Most pre-1990 grills lack pre-drilled holes, requiring you to drill mounting points. Measure twice, drill once, and always deburr holes to prevent wire chafing.
Will upgrading my igniter void my grill’s warranty?
If your grill is still under manufacturer warranty, any unauthorized modification—including igniter installation—typically voids coverage. Use only factory-approved kits for warranty protection. Out-of-warranty grills have no such restrictions.
Why does my new igniter work intermittently or only on certain burners?
This usually indicates insufficient voltage, improper grounding, or electrode gap issues. Check battery voltage first, then verify all ground connections are clean and tight. Weak spark on one burner suggests that electrode’s gap is too wide or its wire is damaged.
Are battery-powered igniters safe near propane tanks?
Yes, when properly installed. Certified modules are designed to contain all sparks within the electrode assembly, away from the tank. The low voltage (1.5-3V) in the module itself poses no ignition risk. Always route wires away from the regulator and hose connections as a precaution.
What’s the difference between a single-output and multi-output igniter module?
Single-output modules spark all electrodes simultaneously using one transformer, while multi-output systems have separate circuits per burner. Single-output is standard and reliable for most grills. Multi-output offers redundancy but costs more and complicates installation with additional wiring.
How do I know if my grill is compatible with a universal igniter kit?
Measure your burner port accessibility, control panel space, and check for existing mounting holes. Most “universal” kits fit grills manufactured after 1995 with standard burner configurations. If your grill has unique burners or a cramped control panel, look for kits specifically designed for your brand or consider a remote-mount module.
Can I use rechargeable batteries in my grill igniter?
Yes, but with caveats. NiMH rechargeable batteries provide 1.2V versus 1.5V from alkalines, which may cause weak sparking in marginal installations. Lithium-ion rechargeables (1.5V regulated) work perfectly but cost significantly more. For most users, standard alkaline batteries offer the best cost-performance balance.
Why is my igniter clicking continuously even after the burner lights?
This indicates a failed flame sensor or incorrect installation. Some modules spark until they detect flame conductivity through the electrode. If the sensor wire is disconnected or the electrode is too far from the flame, it won’t detect ignition. Check the sensor wire connection and adjust electrode position closer to the burner flame.
Is it worth upgrading a cheap big-box store grill with a premium igniter?
Generally, no. If your grill cost under $200 new, invest that $50-75 toward a better grill. Premium igniters shine when installed on quality cast-aluminum or stainless steel grills with solid construction. On thin, rust-prone budget grills, the igniter often outlasts the firebox itself, making the upgrade economically questionable.